

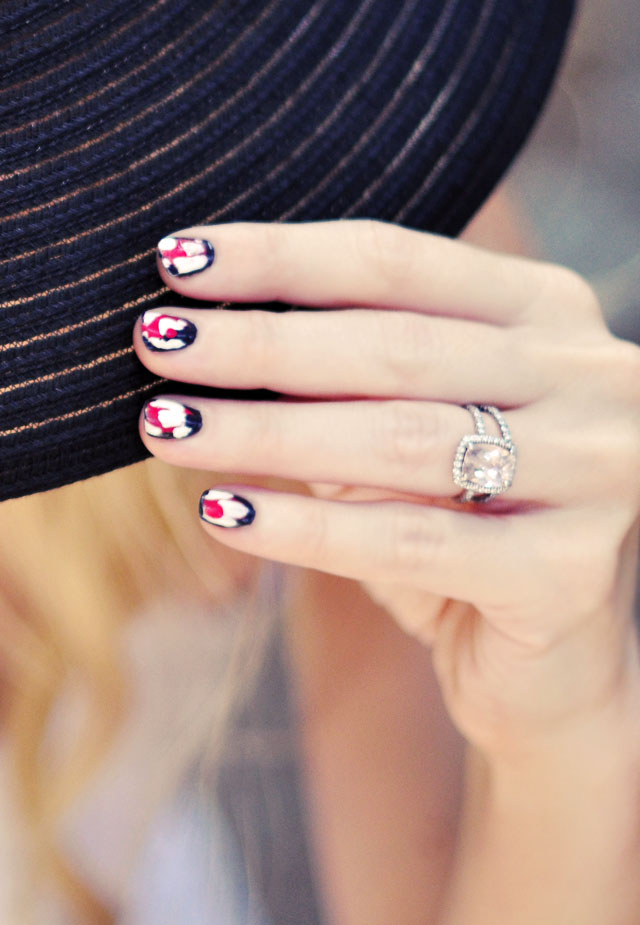
When I first finished my nails, I was a little meh about them because they kind of reminded me of a red, white, and blue, Fourth of July mani, but the longer I’ve looked down at them, the more I’ve come to love them. It just so happens that the gray, coral, and white are a version of a patriotic nail art look, but this mani would really be nice in a multitude of other colors. You know I love manis and nail art that isn’t precise and doesn’t have to be perfect… It must be my love for contemporary art {or the fact that I have very little patience for perfection ;}
* Final photos taken during yesterday’s outfit shoot for my post/collab with Glance: The Little White Dress and a sneak peek at tomorrow’s outfit as well.
What I Used…

* OPI “Cajun Shrimp” {I love this color for summer. See also my Bright Coral & Gold Nails}
* Sinful Colors “Ardoise {Night Magic} 1037” {Get a better look: Chanel Lacquer vs Sinful Colors}
* White nail art polish from the Emori 50 piece Magical Nail Polish Collection {these polishes are super cheap and strongly scented, but they have long skinny brushes that are great for nail art if you don’t want to also buy a nail art brush and tool set… And every time I search for them online, the bottles and logos are different, just fyi.}
* Seche Vite top coat {not shown}
Steps…

* Apply one coat of your base color and let dry.
* Do each nail one at a time and begin by applying another coat of your base color.
* While it’s STILL WET, and your hand in an upward position, add a large drop of your second color and let it sort of slide down on it’s own, picking up a little of the base color paint around the edges. Move your finger around to let it settle into an interesting shape.
* While it’s STILL WET, follow the previous step with your third and lightest color, but in smaller and more drops, continually moving your fingers around to create fun shapes. The Ikat look is created when the edges of the white get a little blurred and jagged. Some look better than others, and some just look like modern art. Either way is good.
* Your polish will be a bit thick and take a while to dry, but add a nice thick top coat like Seche Vite to speed up the process.
* I did this manicure last Friday and it’s still going strong with ZERO chips {that’s 6 days now}. However, my base coat is the Sinful Colors charcoal gray which beat the Chanel polish by a landslide in my test last week.
Voila… Voila!


Have Fun!
* Find all {or most} of my nail art manicure tutorials here


