
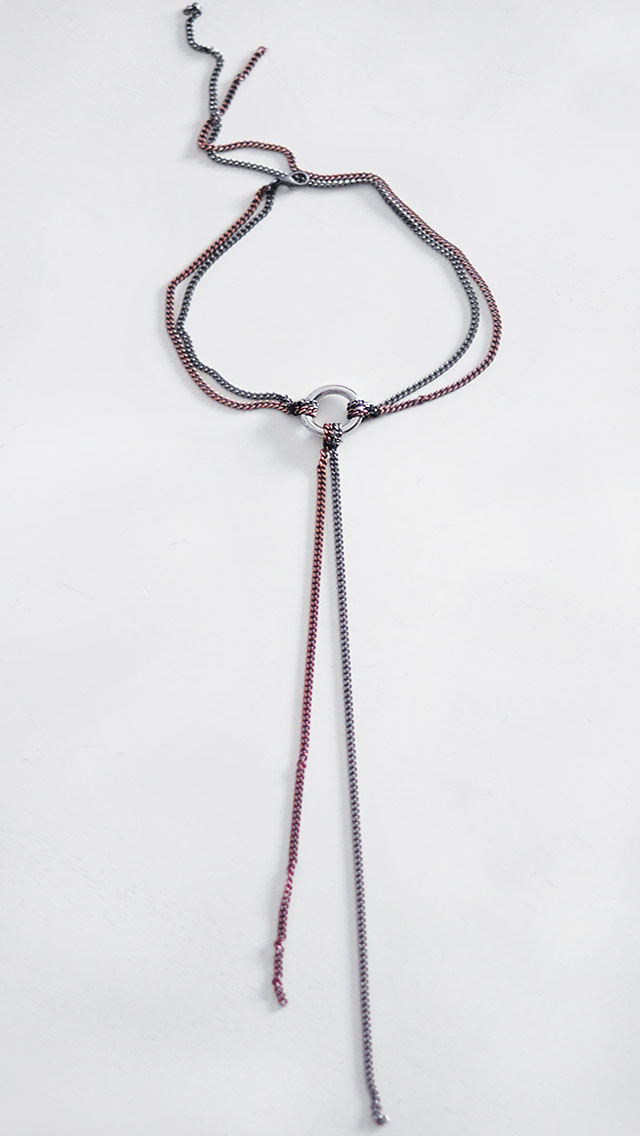
We normally see “O-Ring” necklaces attached to leather or faux leather and in the form of a choker with rivets holding the ring and the leather together. You can see me wearing a vintage version in this outfit post and this one as well. And while I love a great O-ring choker, an O-ring chain necklace has a bit more appeal and I wonder why you can’t find them more readily available… I’m not sure I’ve ever seen one quite like this, but I’ve definitely seen versions… In fact, I think Tiffany had a version with one chain, that sort of slipped through the ring and dangled on its own, do you remember that look? It was pretty. Well I suppose this is a take on the two combined, and with two different color chains for added emphasis and I have to admit, I love the look. It’s hard and soft all in one.
Here’s What You’ll Need…
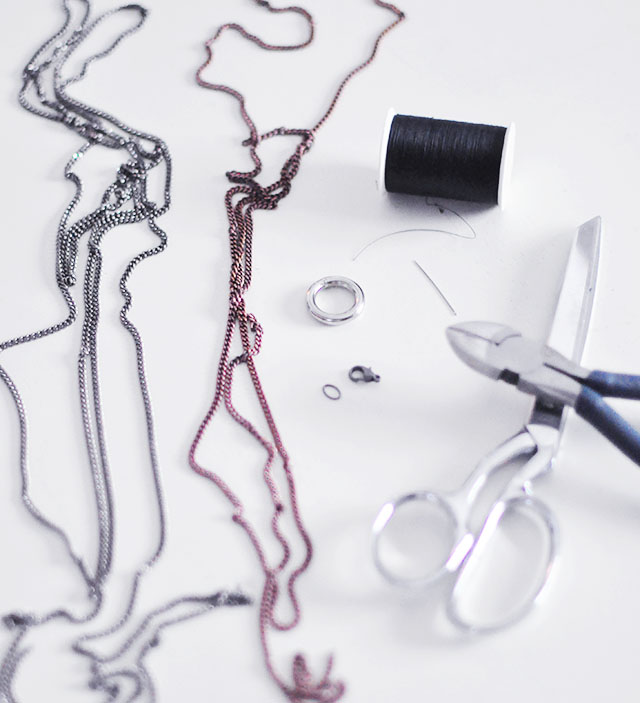
- 1″ heavy Metal O-ring mine is nickel plated
- Fine chain in desired color and link: I used Antiqued Copper Plated 3.6mm Flattened Curb Chain AND Gun Metal 3.6mm Flattened Curb Chain
- Needle/Thread… in a color easily disguised by the chain OR small jump rings in matching metal
- Closure hook
- Beading pliers and/or wire cutters
Steps…
FIRST!!! If your chain is large enough that small jump rings will go through your links easily, swap out all of the threaded steps for jump rings. My chain was too tight for anything to fit in between the links so I chose to use thread, though I do like the way it turned out.

Before cutting or clipping any of your chain, simply begin with two open ends.

Slide them each under your O-ring, then up and around, attaching them to THEMSELVES and then SECURING THEM TOGETHER while keeping the chain flat.
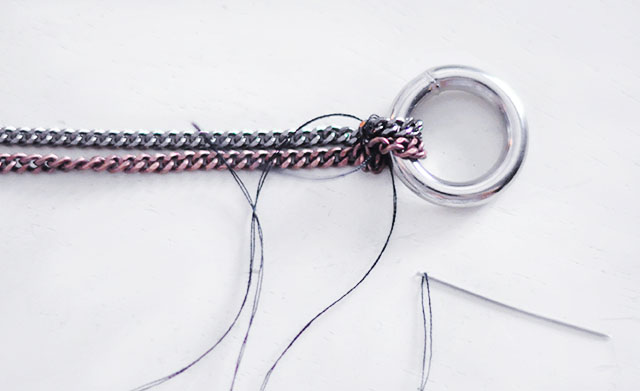
Again, if your chain links are open wide enough, you can use pliers and jump rings… I basically “sewed” mined together with a needle and thread.

Hold the O-ring up to the base of your neck to measure how much chain you need to secure it in the back, add a few inches for mistakes, then using your wire cutters or beading pliers, rid the excess chain.
With your excess chain, repeat the steps above on the opposite side, leaving a bit MORE chain in the back so that one side will dangle down a little bit {the other side will have the hook}.
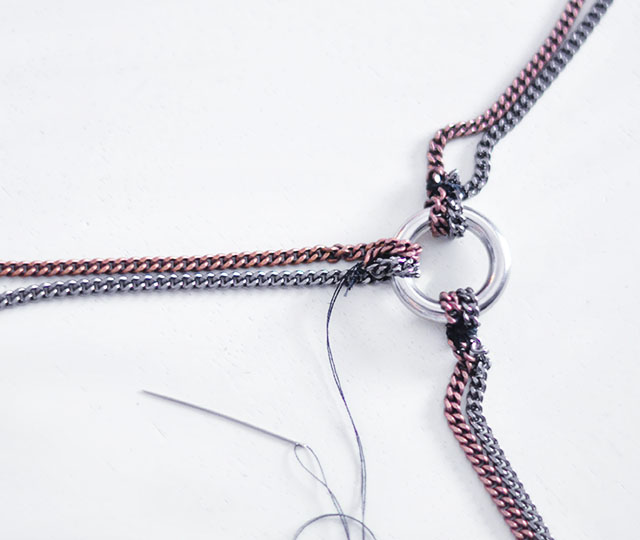
Using the longest of your chain, repeat the steps above at the bottom of your ring and let your chain hang long. I snipped one chain shorter than the other by a few inches so they would have more movement. You can choose to leave these as long or as short as you like.
I loved the idea of hiding the chain beneath my top OR being able to wear it out, making it more versatile.
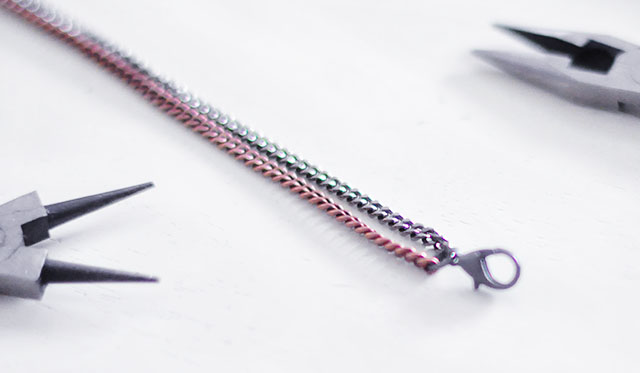
Measure around your neck, clipping one side shorter than the other, attach your closure hook to the end of both chains evenly. I was able to use a jump ring here because my open ended chain links were now freed up a bit.
IF your chain links are large enough, you can simple use the closure that came with your hook, attaching it to any point along the opposite chain in the back where you want to be able to wear your necklace. IF your chain is large enough, you may just be able to “hook” anywhere along it so you won’t NEED an actual “closure”.
I created a “loop” with my needle and thread in the exact place I wanted it so I could “hook” it closed there, then left longer chain hang down in the back.
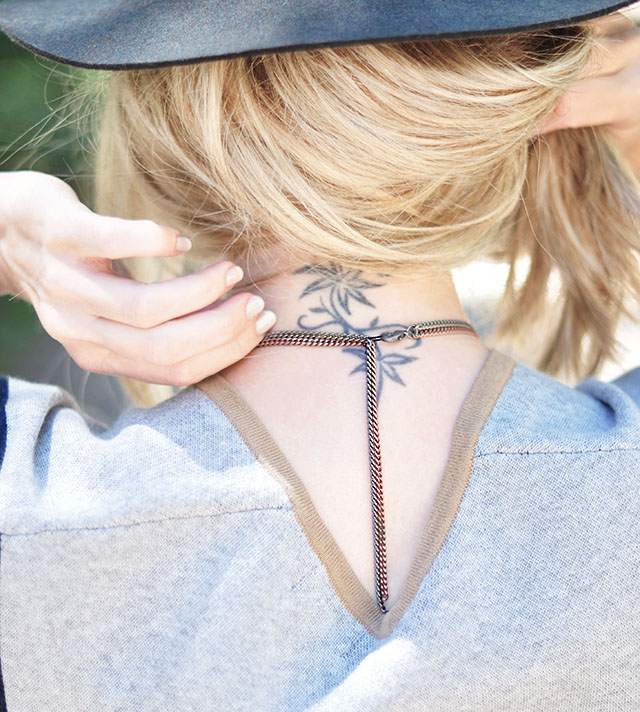
And… Voila!


What I’m Wearing…
* Custom hat from Etsy ~ Similar hat here
* Vintage cut-offs {mine from the ’90s}
* Poncho sweater from Jigsaw London
* Aviators by Jimmy Choo
* Over the Knee suede boots by Free People – shoes… see them here with my leopard coat



Have Fun!
* Find all my DIYs here

