A few months ago… way back in summer, I had the urge to paint my drippy watercolor flowers that I had previously only done on paper, on a much larger scale and on a canvas. My first thought was to buy a pre-stretched canvas, but they are always so expensive and never in the larger sizes I want and honestly always feel very amateur to me. However, I don’t know how to stretch my own canvas nor do I have access to anyone who does, which also makes me feel very amateur.
My next thought was to buy a vintage painting at a thrift store and just paint over it… genius! So I went on the hunt and found nothing in the size or price I wanted… until I took a drive with my stepdad to the local mountain dump WHICH just so happens to have a thrift store that I had never been to but had heard pretty great things about.
Upon walking in, I headed straight for a wall that had art and frames and mirrors stacked up against it and found a blank white canvas that had been stretched by an artist and gesso’d already in the exact size I was looking for and I bought it for $5! It felt like magic. I somehow manifested the perfect canvas at the mountain dump thrift store and I literally was jumping for joy… which then had me immediately wondering what else I could manifest but on a much larger scale.
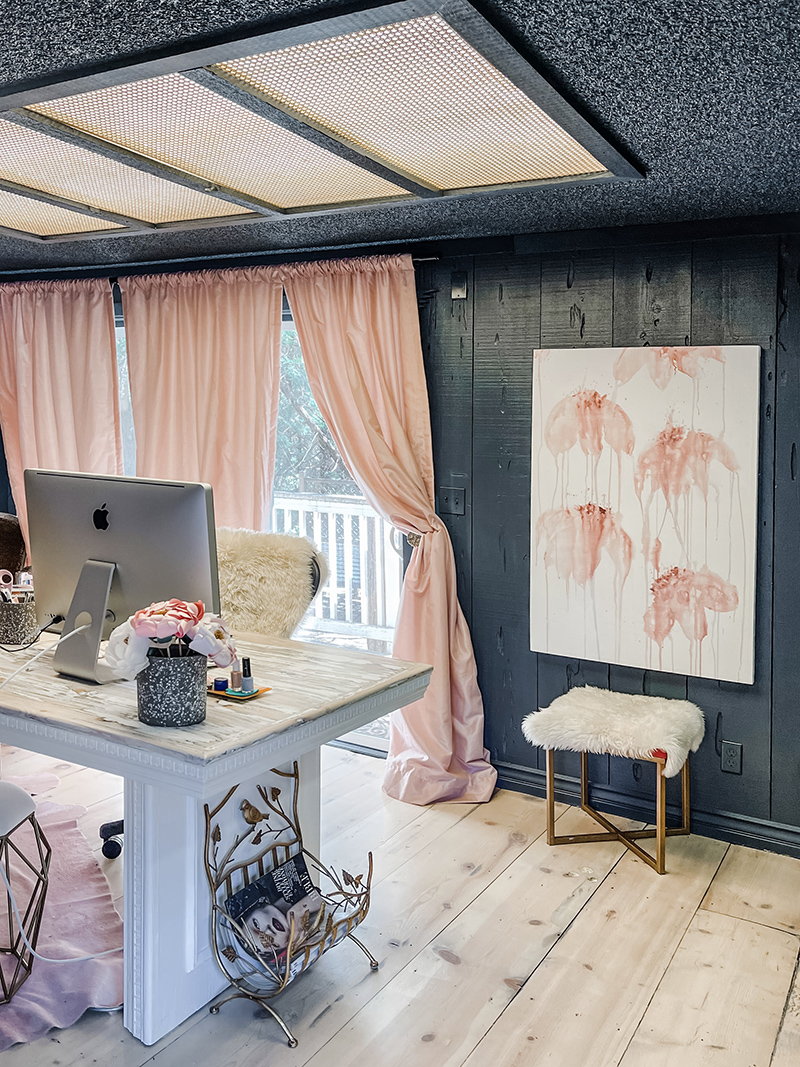
Since it was a little dirty, I bought some acrylic gesso on amazon, watched a few YouTubes to make sure I was doing it correctly and then got to work. After my gesso dried, I started on my drippy flowers and though it was my first try on a large scale, I was pretty happy with how it turned out and I hung it in my office…
* See my Instagram reel here – showing the small paper version compared to the large version …. and a few old pencil drawings and works in progress from a few yeas ago.
After that painting I REALLY had the urge to paint MORE and decided to go to Ross because I had heard their art section was very affordable. And it was! I found 4 large horizontal paintings (that I intend on painting over) for $24 and under. One was $11 and THEN I FOUND THIS MASSIVE ONE seen here (4’x4′ for $59.99), which I bought way before I even had the thought of moving. I had planned on painting my dripping flowers on it but since I’ve moved out of my office and hung my pink dripping flowers at the stairwell landing in my place, I wanted to do something different with this one.
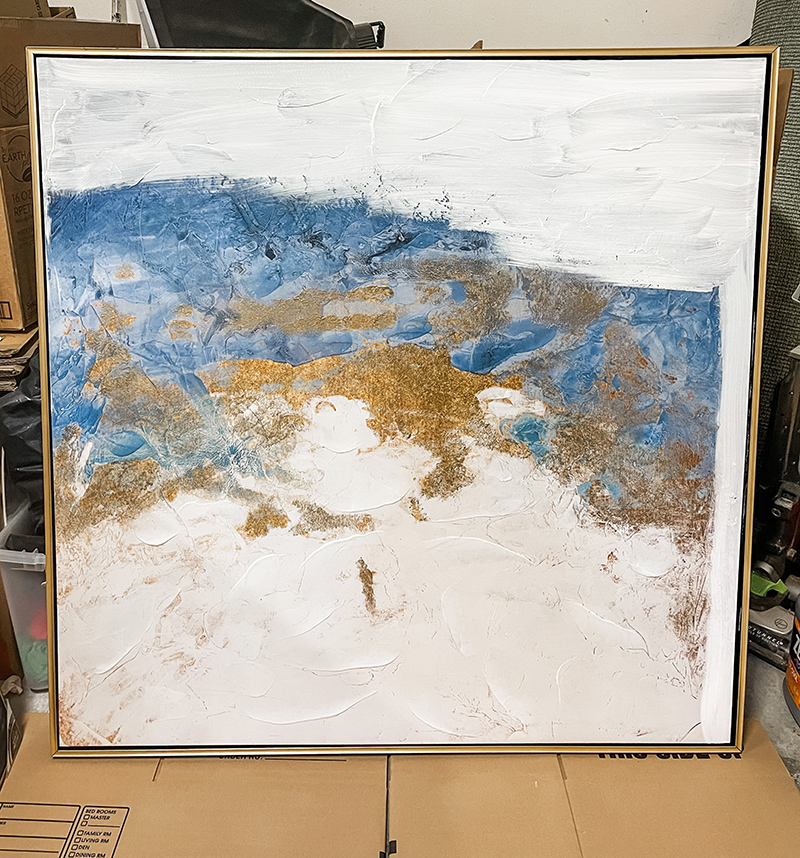
I opted for a very abstract and simple painting in only two colors, midnight blue and light grey, which were leftover acrylic paints from my Dogwood Paintillio painting, which I don’t think I ever shared here and now I want to just because paint by numbers is super fun and it was a very affordable way to have a logo sign painted… because I did it myself. Actually, this color may have been left over from my own Paintillio of Me as Marilyn with my dogs.
Anyway, I didn’t think about filming or photographing a step-by-step while I was actually painting (Saturday night) until after I was finished, so there is no real tutorial for the painting itself… (I’m sorry) and I’m not entirely sure it’s finished anyway, but I like it as it is now. This post is basically to get you inspired to paint your own canvases if you can’t find art you like in the sizes you like in the prices you like, like me 😉
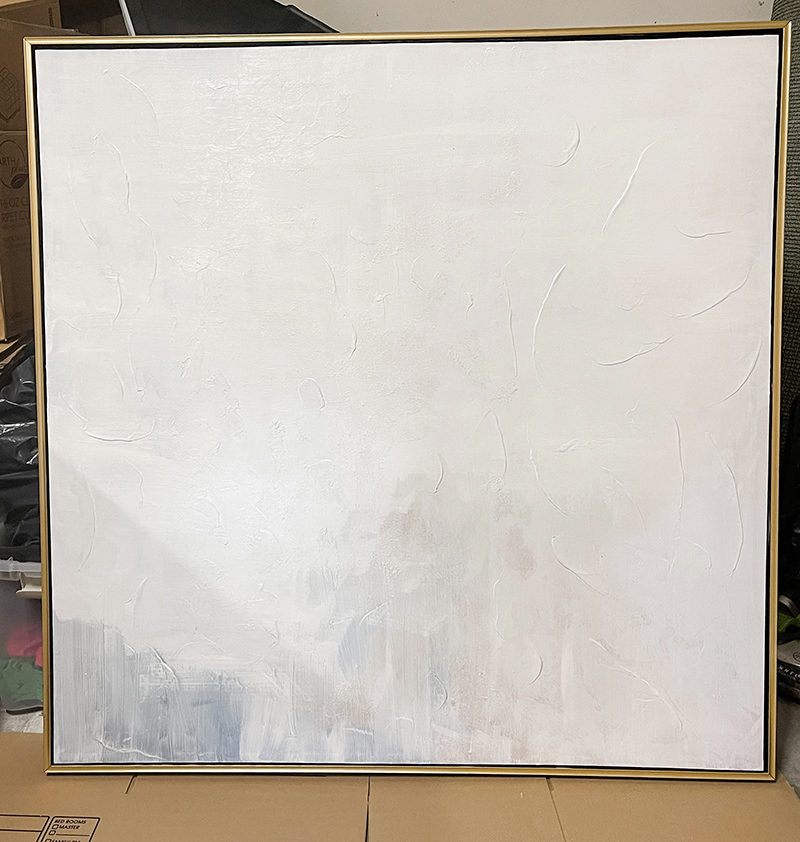
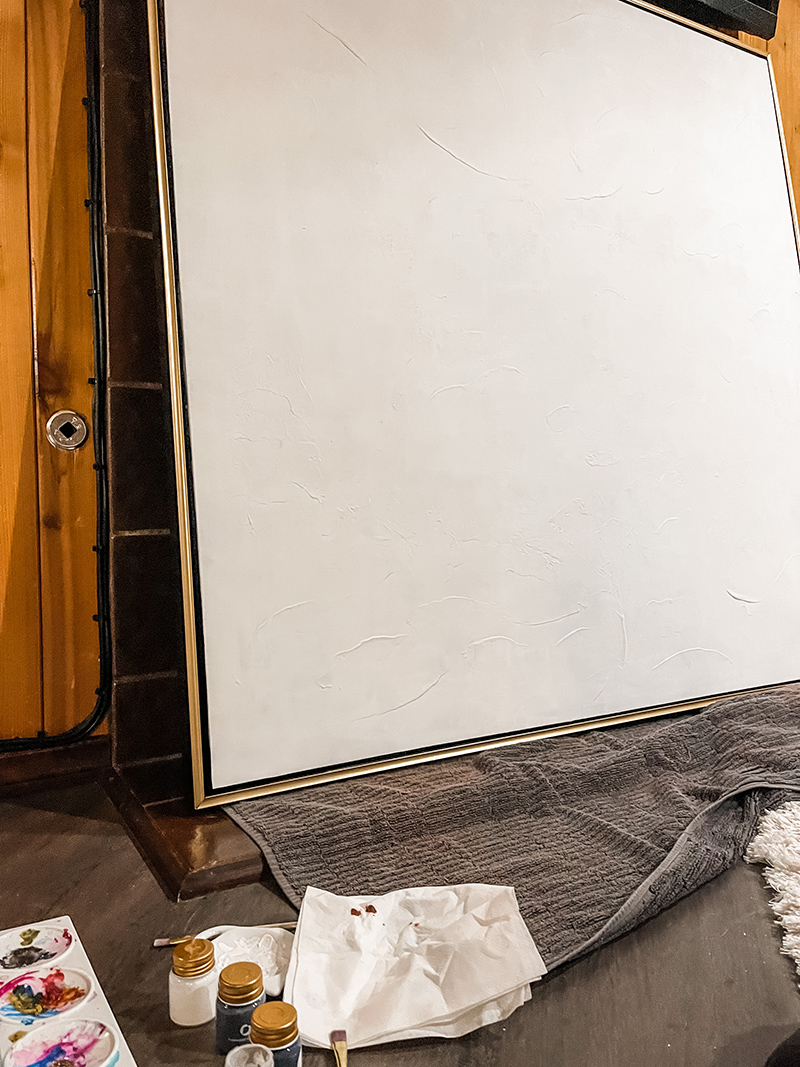
Here’s What It Looked Like when I Bought It… (Before)

It was $59.99 which I think is an amazing price for a piece this large!
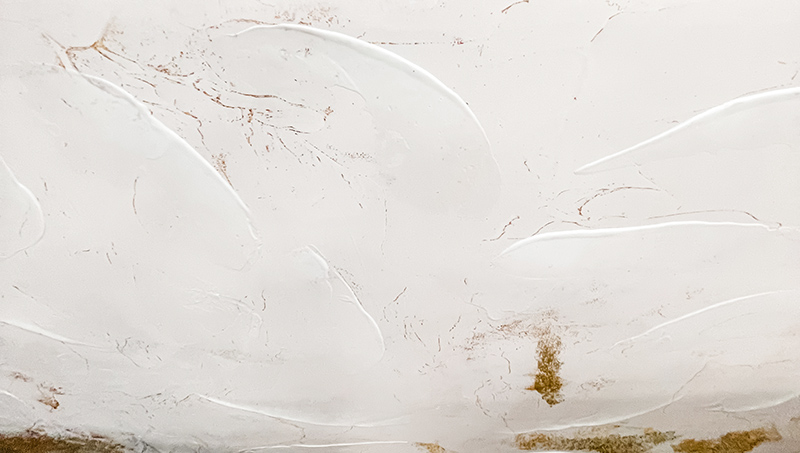
It’s funny that as much as I didnt’ like it when I bought it, it would have almost worked in my new place. I just didn’t want the gold… AND if I had known I was going to hang it here, I might have only painted over certain areas… What I loved most about it, besides the size, is that it’s textured and I knew that would create a really cool canvas backdrop for anything I’d paint.
Below: Closeup of the texture – before
Here’s What You’ll Need to Repaint it…
- Gesso… I used Liquitex BASICS Gesso Surface Prep Medium, but there are tons of different options depending on the paint you use.
- Large paint brush for gesso + small paint brush for acrylic (or brush of your choice)
- Sandpaper (optional)
- Acrylic paint
- Water jar, paper towels, towels, etc.
Covering the Original Painting with Gesso for a White Background
My canvas needed 3 coats of gesso to cover the painting behind it… at the very least, you’ll need 2 coats. You can see the beginning of the first gesso layer on the top above.
NOTE: I did not remove the frame to paint it because I’m lazy 🙂
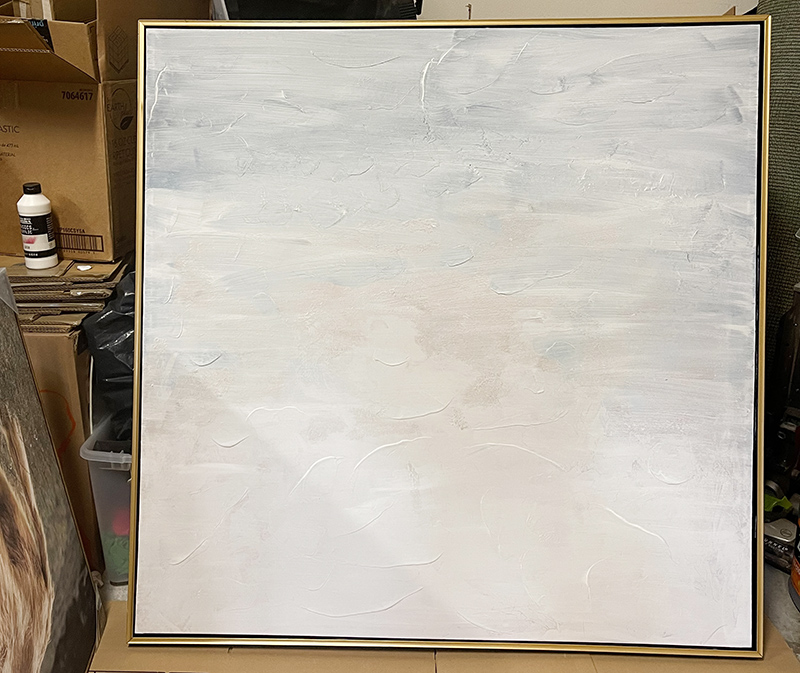
Paint your first coat all in the same direction and let dry…
Paint your second coat in the opposite direction and let dry.
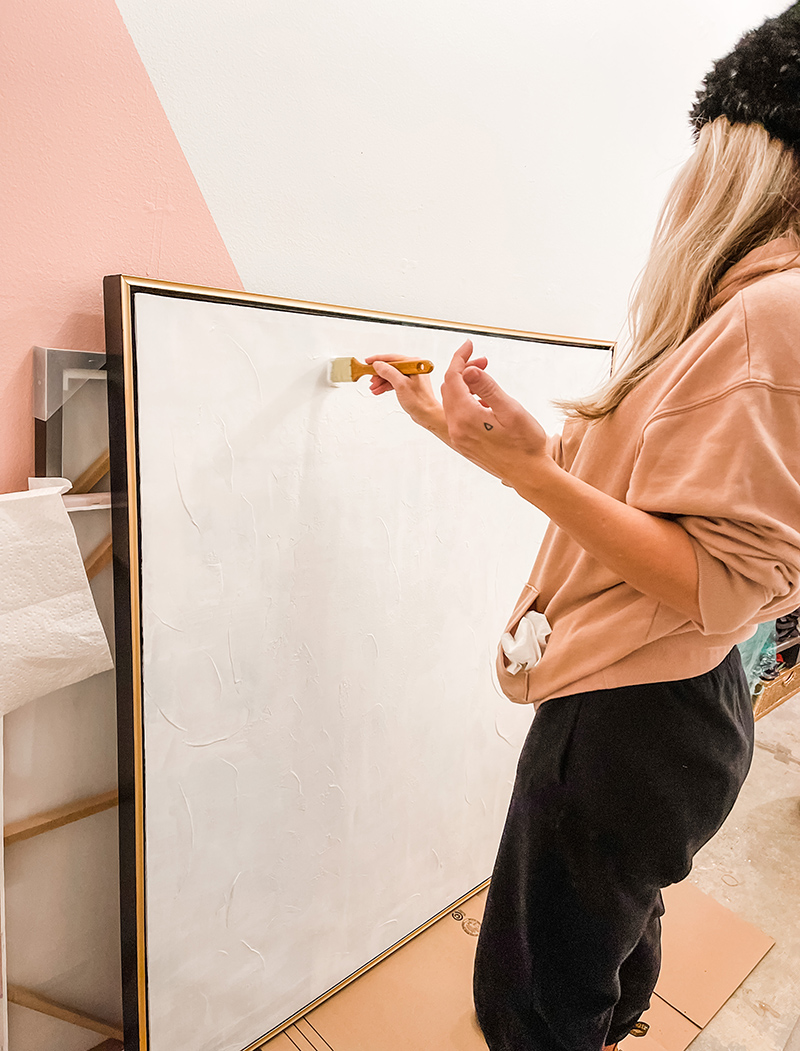
Repeat steps above in alternate directions for each additional coat.
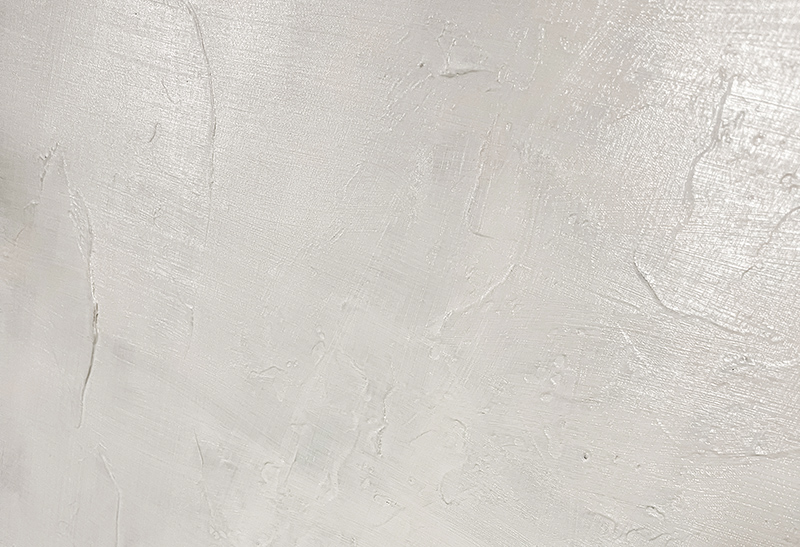
TIP: If you don’t like the brush strokes, use sandpaper to sand it down in between gesso coats. If you want a smooth SMOOTH background, sand MORE.
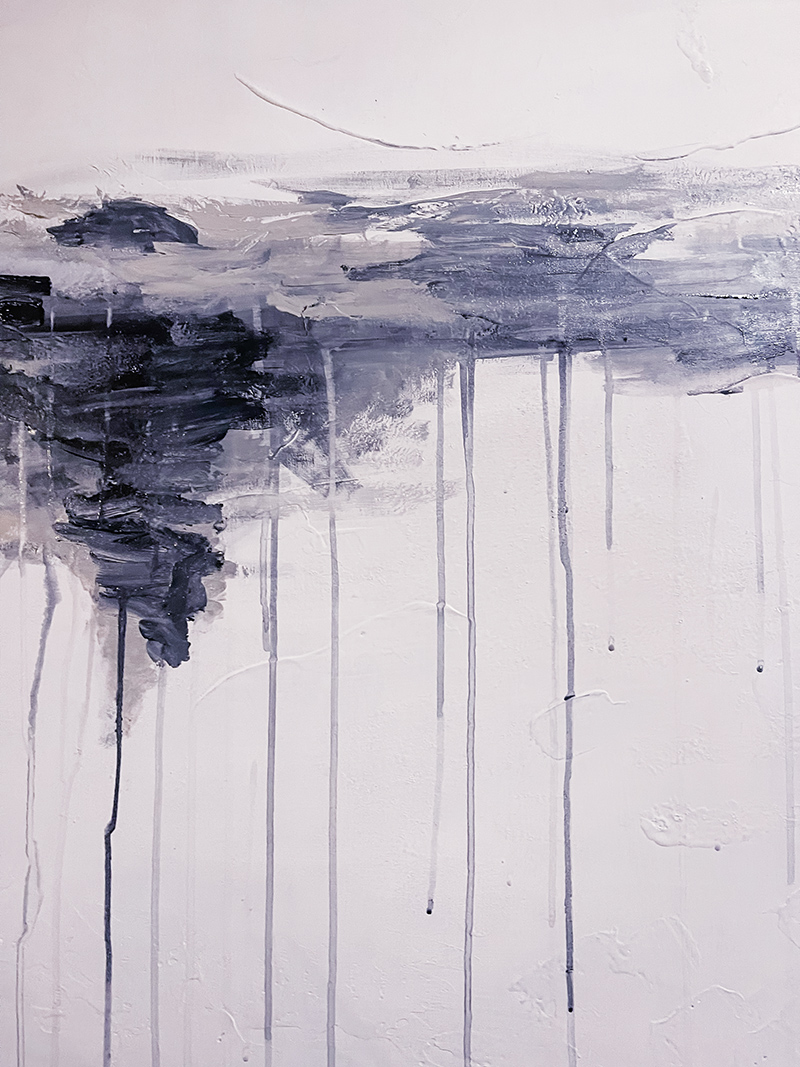
I didn’t sand at all because I wanted the texture to show through my painting… see the brushstrokes on top of the original texture of the painting below.
Once it’s dry, which happens pretty quickly, you can begin your new painting over it.
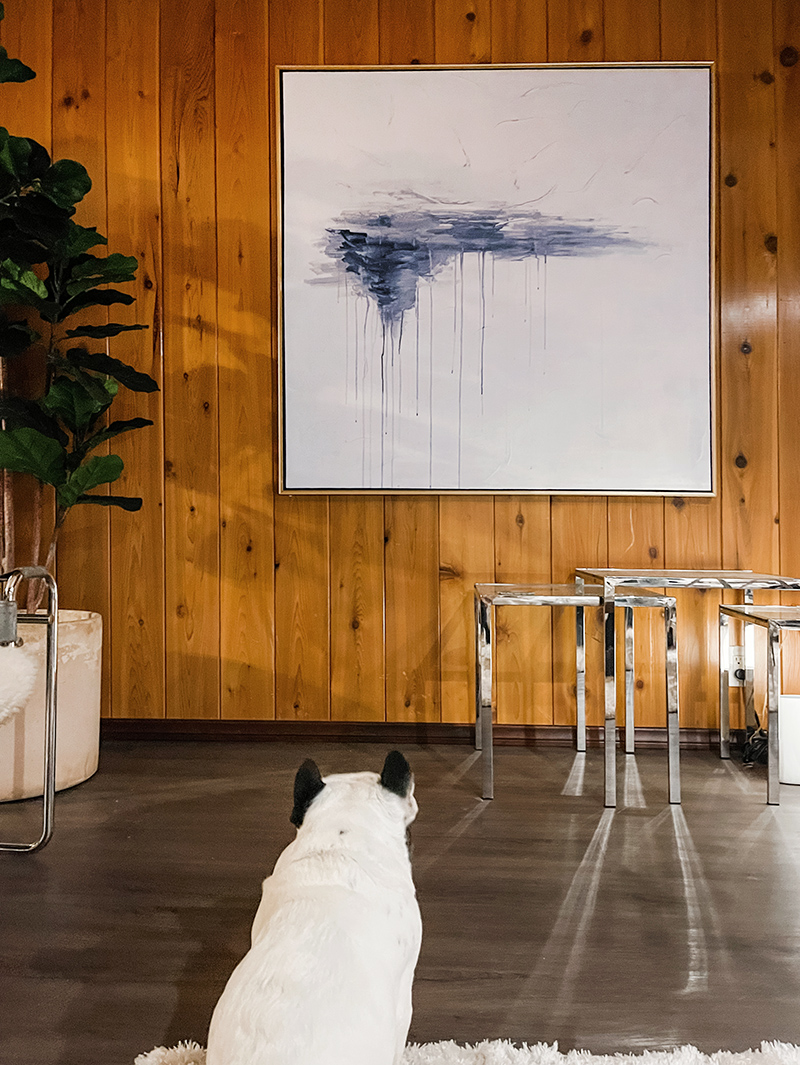
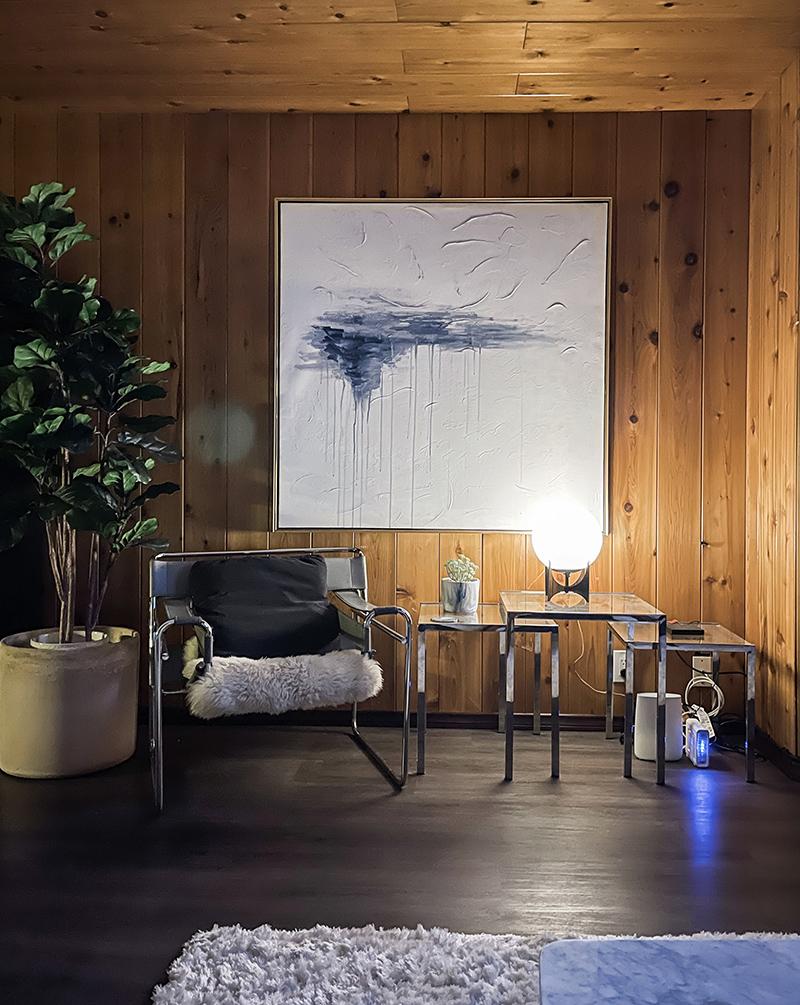
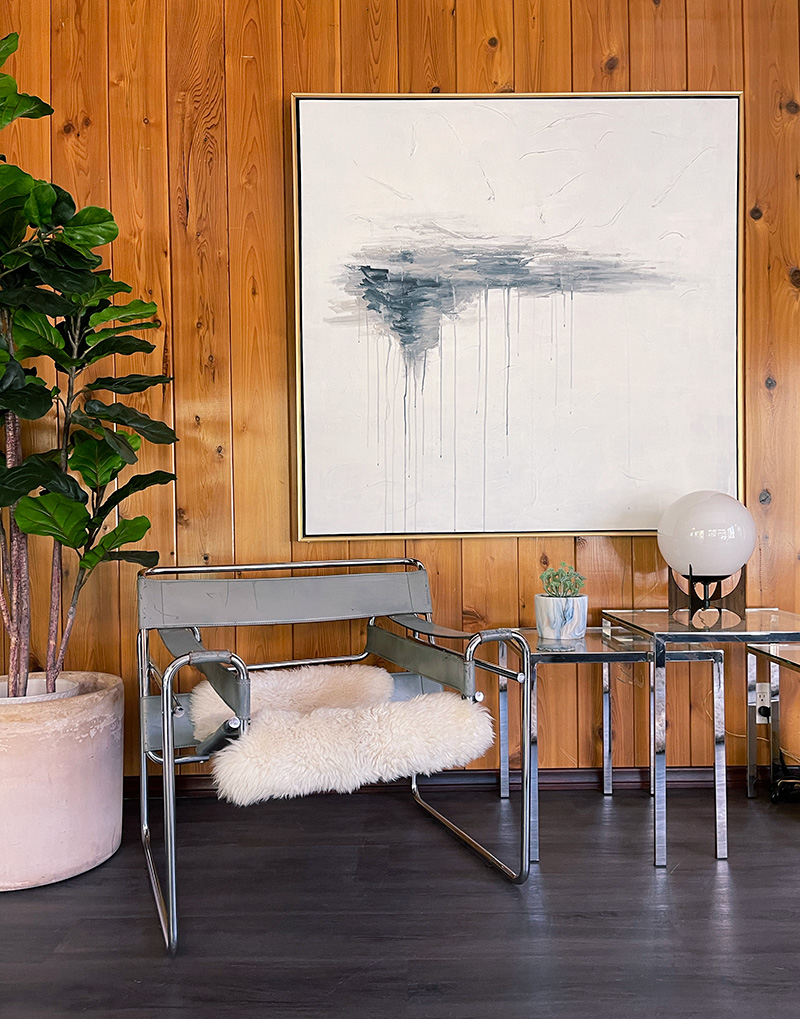
I wanted something simple but abstract and in complementary or even matching colors to my living room with a lot of white space in the background since I have a wood paneled wall, I really wanted to brighten up the space and this was my solution.
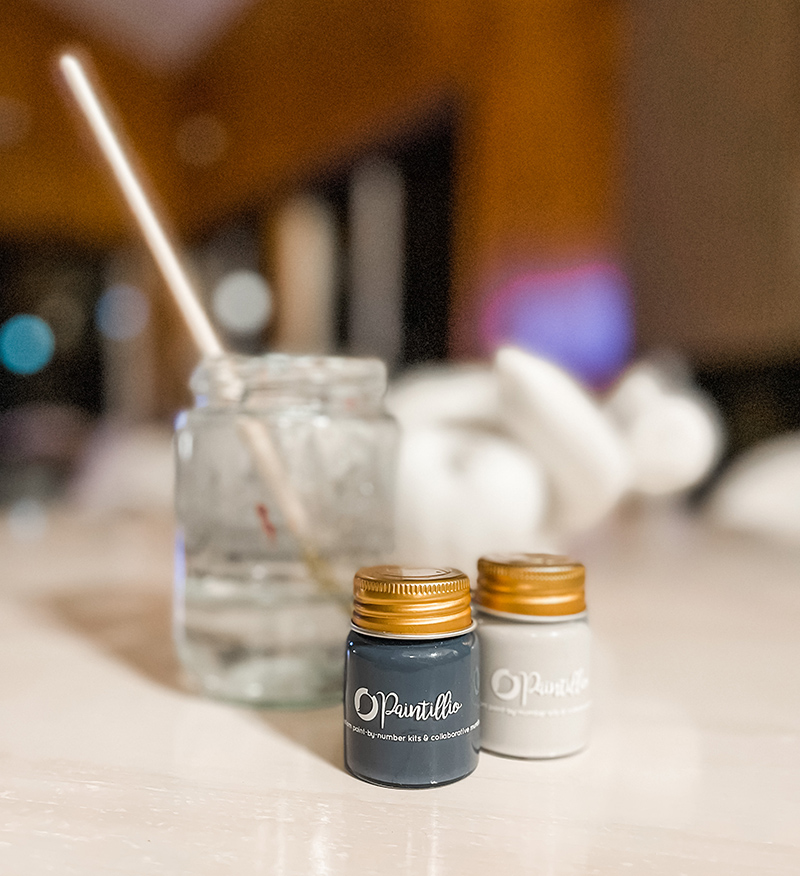
These are the two paint colors I used, along with water to create the abstract/dripping piece that in the end revealed a face… and since I was actually quite sad while painting it, it ended up feeling like a self portrait with tears.
I don’t hate it… I quite like it (and I think it looks better in person than in these photos, it’s larger IRL too), but I’m not so sure it’s done yet. It almost feels like it’s missing something on top, but I don’t want to add to it just because it’s so bare and then not like it at all and have to start over.
The fun part about this though is that you can’t really make a mistake. If you don’t like it, you can gesso over it and start over again.
Below is the only shot I have of part of the process. I really wish I had some forethought to shoot it or record it, but again, this is not about recreating MY PAINTING, it’s about getting to paint YOUR OWN!
These were taken at night… since I was painting at night in my living room, so the colors are not quite right.
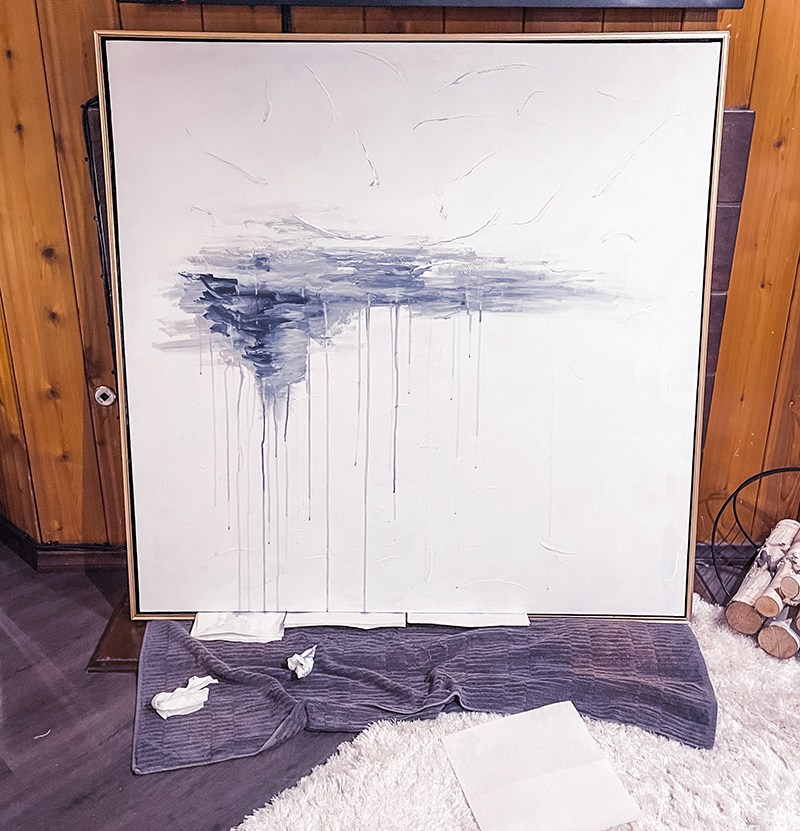
And… Voila!
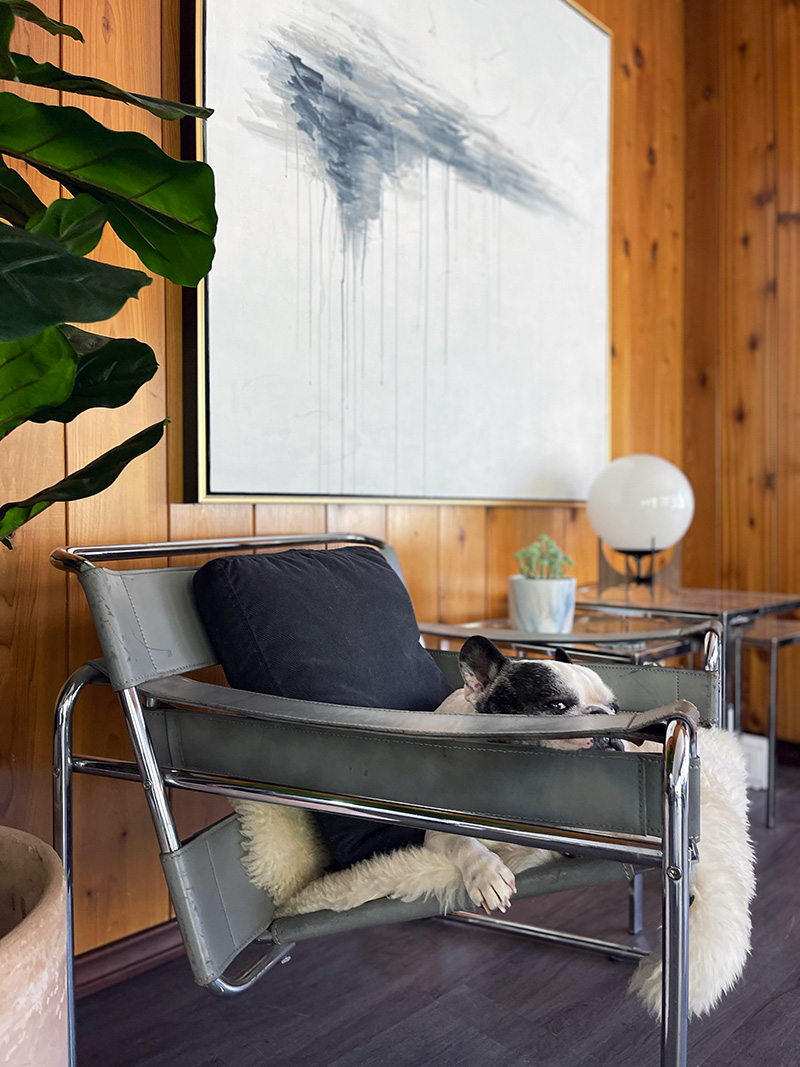
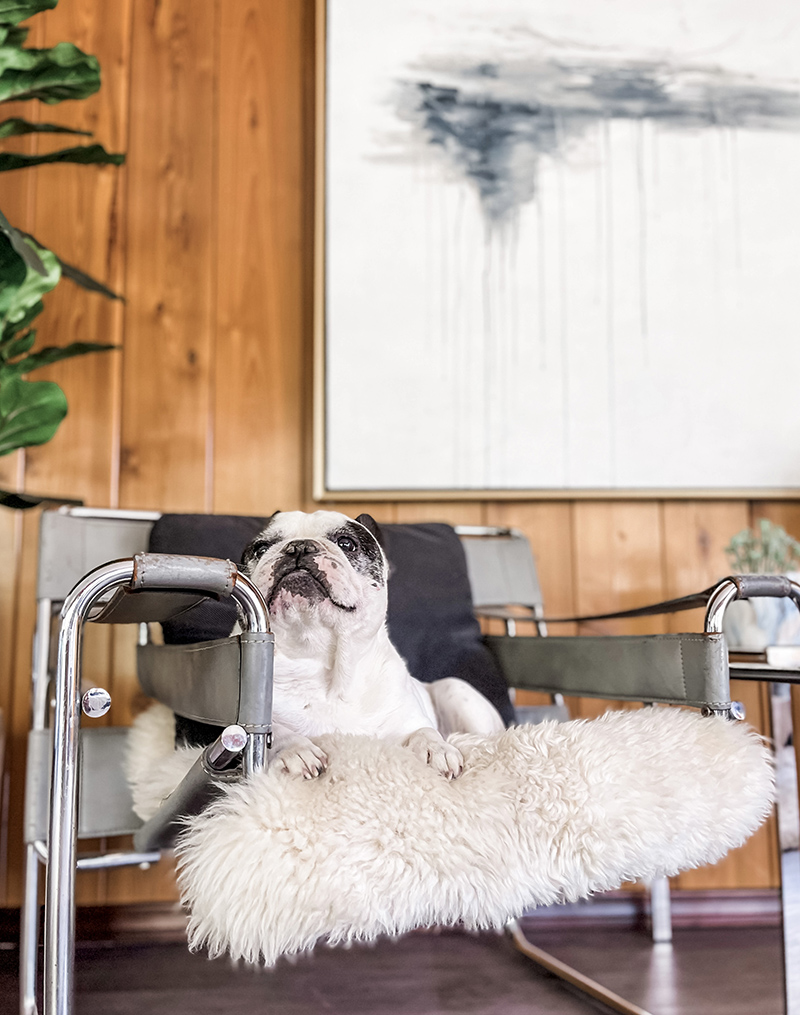
Trevor barks at me every day after his morning meal until I put him in this chair. It’s his favorite.
I found it recently at a local vintage shop called Bella’s Antiques. I am 99% sure it’s an authentic Wassily chair, though the leather is pretty beat up in some areas.
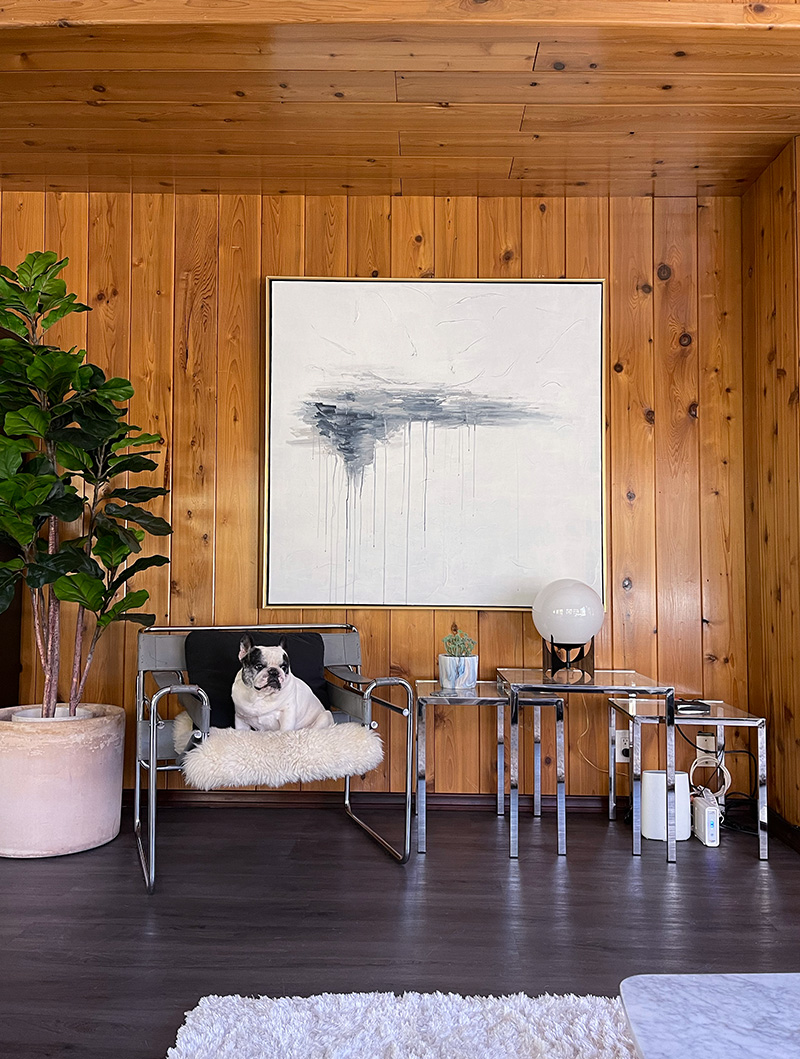
I still have to find a way to disguise the modem and router and TV wires… I found the chrome nesting tables at another antique store recently as well.
At night…
Have Fun!
* Find all my Art Posts here
* Find all my DIY Home Decor here
* Find all my DIY Art posts here
I think that I am kinda done, Can we just get to 2021? PLEASE