Moving into the townhouse meant a lot of downsizing, which I am not so good at. I still have so much stuff from my first house in storage and well, you get the point. I have a lot of stuff and this is the year it’s either staying or it’s going.
First to go was my dining room table, not because I didn’t love it, because I still do, but it’s just WAY too large for this little space I call home now. But alas, it’s not gone for good; my mom and stepdad took it and it works in their house perfectly!
Anyway, this meant I needed a new table and my first and always favorite place to start is at the local thrift shops. And in my search for the perfect table, I found the perfect chairs, but no table. So I took to the internet and was originally leaning toward something simple and trendy like this white marble top round table and was comfortable spending somewhere in the $300 range… but as I continued my search, (and once I moved my couch into my place) I started falling in love with a little more detailed look.
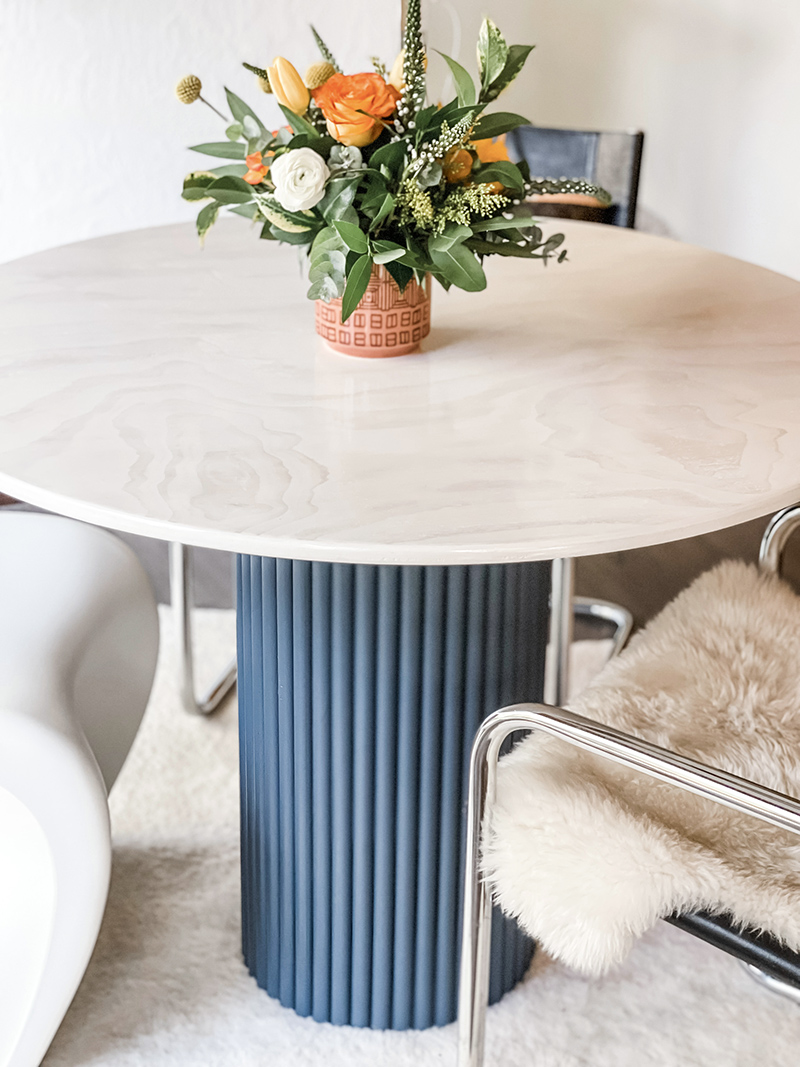
I swooned over the simplicity and modern design of this round table with a rippled base and marble top, but I didn’t want to spend over a thousand on a table. Then I found a dark blue version with three more narrow legs (as seen in my inspo below) and since my couch is a dark blue (yes I have my old couch back! but only half of it fits) so I brought the design idea to Chad and asked if he thought he could make a similar table and together we came up with the perfect design (which is basically inspired by the first table linked above).
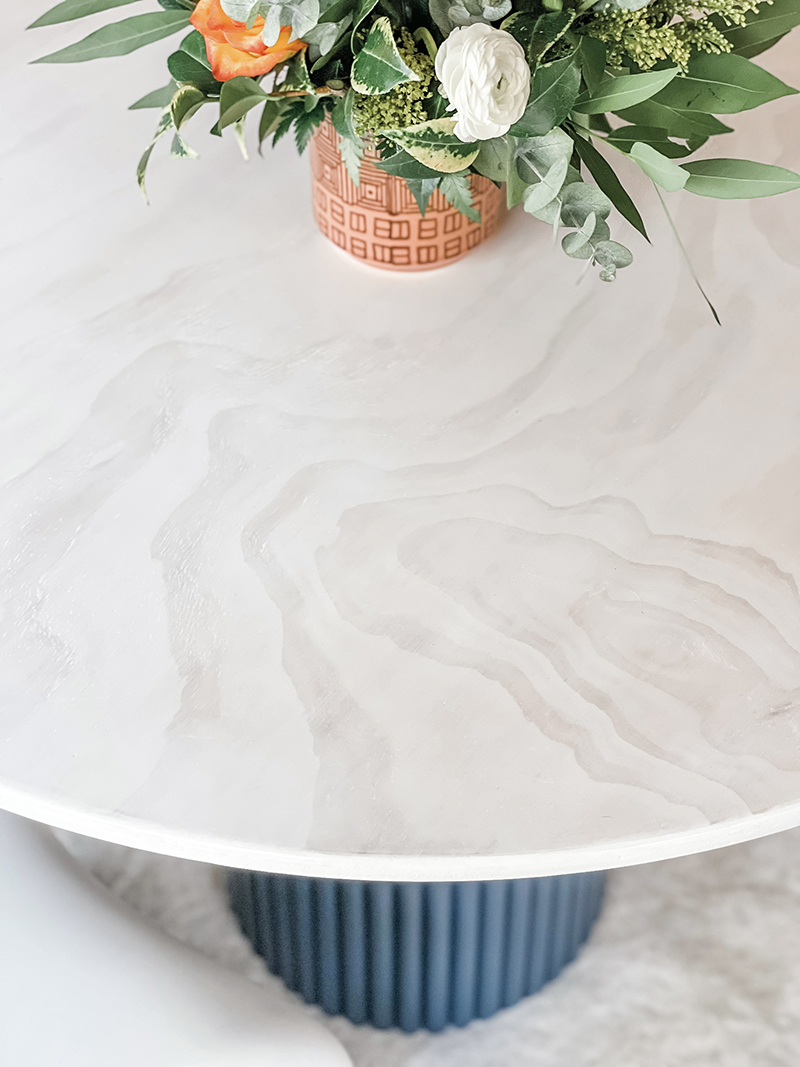
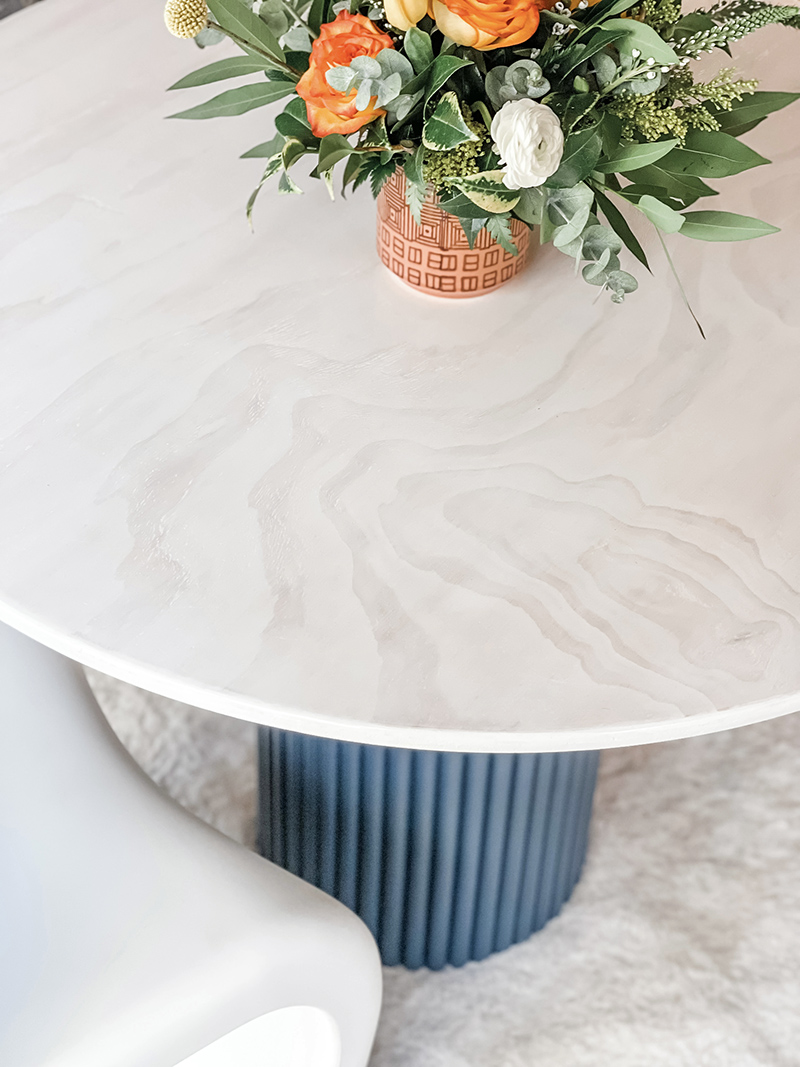
We had decided on the base with three narrow tubes but Home Depot only had the large tubes, so that ultimately determined the fate of my table. I also originally thought we’d paint the entire thing blue since I had leftover blue paint from my office that literally matched my couch to the T. But once the base was painted and Chad set the wood top on, I really liked the contrast and the light top. Once we found a light white wash stain, the wood grain almost took on a marble look and the clear coat finish added the shine that really gave it a luxe feel!
MY Inspiration…

Shop Similar Tables and Chairs…

So… here’s how we did it (well, technically, Chad did it – the entire thing because this is beyond my DIY skills) I can take no credit for the construction, only the design, which also technically was a rip off of the more expensive versions I didn’t want to fork over the cash for. Also I think ours turned out even better than the inspiration. Sure, I’m biased, but it’s perfect, if I do say so myself!
* DISCLAIMER: There are probably other similar DIY table tutorials floating around but I didn’t actually search them out.
Here’s What He Used…

Supply List…
- TABLE TOP
- 2 sheets – 3/4″ x 4′ x 4′ PureBond Birch Plywood Project Panel
- Varathane Antique White wood stain + sandpaper
- BASE…
- 1 – QUIK-TUBE 12″x 48″ Building Form Tube
- 45 – 7/8″x 7/8″ x 48″ Hardwood Round Dowels – you can opt for smaller or larger – we opted for whatever size they had the most of. I think we used about 45 for the base
- Razor blade or X-Acto knife
- Sandpaper 150-220 for the base/cylinder and then 1000 & 1500 for the TABLE TOP
- Gorilla super glue gel
- Bob Smith Industries BSI-151H Insta-Set Super Glue Accelerator,Clear
- 1/4″ x 1/2″ x 18-Gauge Crown Staples
- 33 fl. oz. Sika PostFix Fence Post Mix, Mix-In-The-Bag Expanding Foam
- Five big rocks (30-50lbs)
- Behr Marquee paint in Midnight Blue
- Silicon
- Nail gun
- Compound saw
- Lazer level or any level
- Drill
- Router (flush trim for the edge of the tabletop plus a round-over bit 1/4″ to round the edges)


Here’s How He Did It…
Starting with the base…
(I wish we had more photos of the early stages, but hopefully we managed to explain it well)
Begin by figuring out the height of the table that you want. Most small dining/kitchen tables are about 29-31” from floor to top. Measure the height of the seat of your chairs to decide the perfect height of your table.
Once you have your height, measure the thickness of the TABLE TOP that you’re going to use and deduct that from the overall measurement of the table height.
Measure your cardboard cylinder form and mark a line at your measurement – MINUS the tabletop. It’s helpful to measure and mark every 4-6inches all the way around to get a perfect line to cut.
Using your razor blade or X-Acto knife, carefully trace (slightly cut) the measurement line you drew, spinning the cylinder as you go until you cut all the way through it. This will take a little time to get a perfect line cut. Once it’s cut, use sandpaper 150 to 220 grit and lightly sand the edges top and bottom, inside and out to remove any jagged edges.
Creating the WOOD top and bottom hidden within the cylinder tube…
1. Grab one of your 4×4 sheets of wood and set it on a level surface.
2. Place your cylinder tube on top/of the wood and using the INNER edge of the cylinder, trace a line all the way around the inside to get a perfect circle.
3. Do this twice – one for the top (to help secure the TABLETOP to the base) and one for the bottom (of the tube) for stability and strength.
4. Cut out your wood circles (they will fit INSIDE the tube)
5. Using 80 grit sandpaper, sand the sides of your circles so there are no jagged edges
6. Test fit both circles into the tube to make sure the fit is right. TIP: IF they’re too tight, repeat the sanding process.
7. Swipe a (little) bit of SUPER glue around the edge of the WOOD circle and slip it into the bottom of the tube, making sure it is flush with the edges of the tube – and level.
8. Immediately stable the cylinder to the circle every 2-3inches all the way around to secure it.
NOTE: The second WOOD circle you cut out will go on at the end.
As you build your base/tube, you’ll need something perfectly level to build upon. We used a pre-cut 2×2 tabletop we found at Home Depot, which you can see in the photos below. It looks like a larger round raw wood base, note that it’s ONLY for level building purposes.

9. Cut your dowels to the measurement of your cylinder tube, making sure they are flat/level on each end.

10. Using a level, steady your first dowel against the cylinder tube and the base and using a STAPLE GUN, staple from the INSIDE of the tube out into the wooden dowel AS CLOSE TO THE BOTTOM/BASE OF THE TUBE as possible.
11. Level the TOP of your dowel and STAPLE IT IN PLACE (from the inside)… once the top and bottom are secure, continue stapling the middle of your dowel (from the inside) until it is securely in place.
THIS IS CRUCIAL because if you don’t get that first dowel level and perfectly square, the rest of them will not fit properly.

12. Line up your next dowel and repeat the process above.
As you get each dowel secured onto the tube, run a thin line of SUPER GLUE against one side of the dowel to where it’s touching the cardboard cylinder.
OPTIONAL: once glued, IMMEDIATELY spray the Accelerator on the glue so it dries FAST and hardens perfectly.

Repeat the steps above, adding each dowel after the next… you won’t need a level each time if the first was fit in perfectly level and square with the base cylinder.
It will look something like this…


If you want to paint or stain your base, now is the time.
We used Behr Marquee paint in Midnight Blue in a paint sprayer gun to ensure and even coat without brushmarks.
Ultimately we painted 3 to 4 coats, the photo above is the first coat.

Stabilize your base…
To give your base a little more weight, you’ll have to weight it down! 🙂 You can do this any way that seems logical to you.
We used about 5 large rocks (30-50lbs of collected mountain rocks) and Sika PostFix Fence Post Mix, Mix-In-The-Bag Expanding Foam to secure them.
1. Set all the rocks at the bottom of the tube/base tightly so they don’t jiggle.
2. Leave some gaps in between
3. Pour the foam into the tube/base to set it the rocks in place.
The photo above shows the foam dried, hiding the rocks beneath it.
Screws to secure the inner base top and the table top…
Drill holes for screws equally distanced apart from each other in an X pattern, 4 and then 4. We used 8 total. See photo above for reference… do not screw them all the way in until your tube top and table top are set in place. More on that later…
Tabletop…
If you find a pre-cut tabletop in the size you want, BUY IT and use that… if not, here’s how Chad created this beautiful tabletop.

1. Grab the 4 x 4 sheet of wood and place it on a completely level table, find center BY measuring from the edges in 24″ (if this is confusing, here is a video that might help)
2. Set a screw in the center of the back/underside and measure out to 23″
3. Lasso loop a string around the screw and tie it to a pencil at the 23″ mark
4. Holding your pencil and keeping your string tight, draw counterclockwise in a continuous motion to create a circle.
5. Cut your circle out and boom. Table Top.
6. Sand the jagged edges away from any area on the wood table top
7. Flip your table over, USING THE SECOND SMALLER INNER TUBE WOOD CIRCLE WE CUT OUT EARLIER, find center and attach it to the under/bottom side of the table using the super glue and staple gun (1-3/8″ staples) so it doesn’t show through the top. WE WILL SET THIS INTO THE TOP OF THE TUBE BASE.
8. Using your router, with a 1/4″ round over bit, go around your edges on the top and the bottom of the table to remove sharp edges and give it a gentle curve on the top and bottom of the edge.
9. Sanded (220 grit) top and bottom and sides and then clean and dry it off to make sure it’s dust free
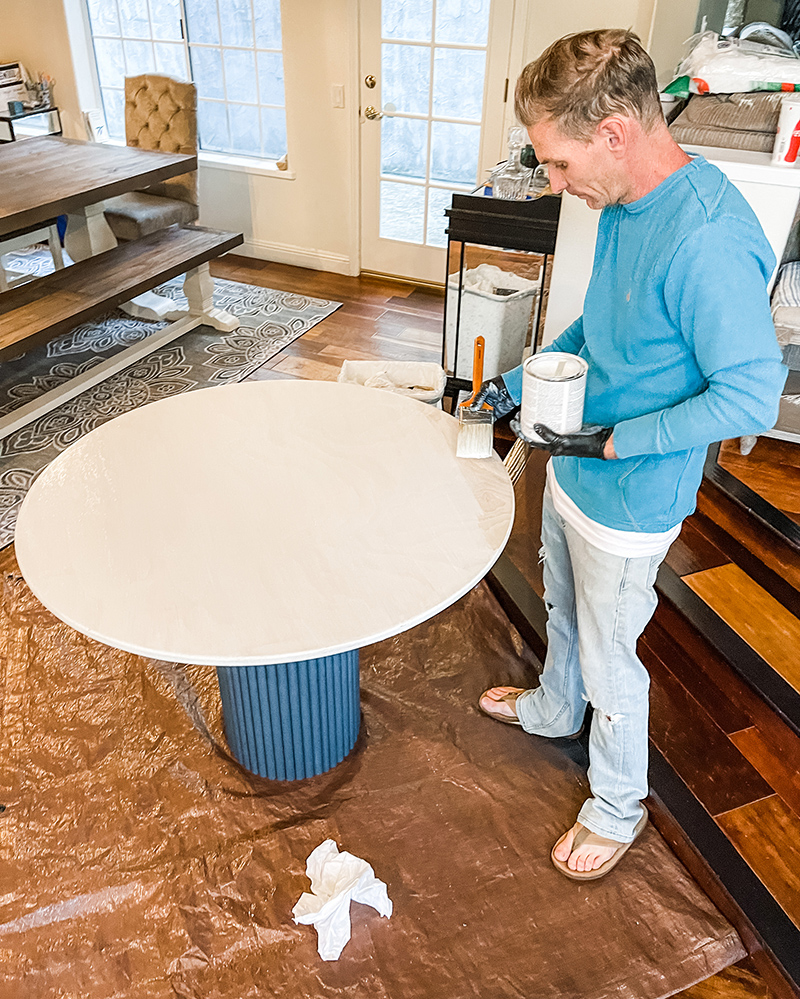
10. Apply 3 coats of stain allowing each coat to dry in between
11. Sanded (400-660 grit)
12. Applied 3-4 more coats, allowing each coat to dry in between
13. Repeated process and steps until you get the desired look/color you want.
14. Allow it to dry for a day or two and do one last final sanding all over with a 1000 grit
15. Wipe down with damp rag to remove any dust
16. Spray on a quick dry clear coat – let dry. Resend with 1500 grit and then wipe down and clear again.
Adding Tabletop to base…
1. Carefully set the bottom side of your table WITH THE SMALLER WOOD CIRCLE BASE into the dowel base and make sure it fits snugly.
2. Push the top down firmly and since you’ve already leveled the entire base and top, it should be level. Screw your screws all the way into the wood base, securing your top to the base of your table.

Above is a great closeup of the screws and underside of the table where the base meets the top, completely hiding the inner smaller circle within the tube… also note the wood underneath (the table top) is darker because it only received two coats of stain and a clear coat vs all the coats that went on top.
And… Voila!
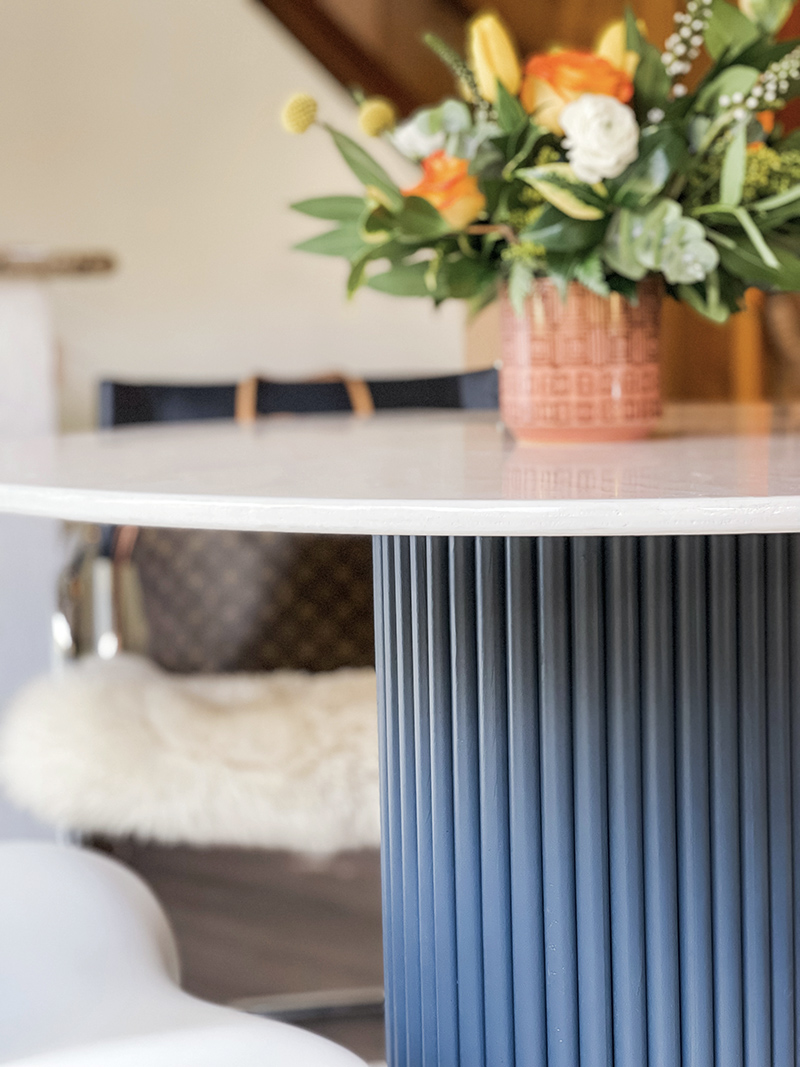
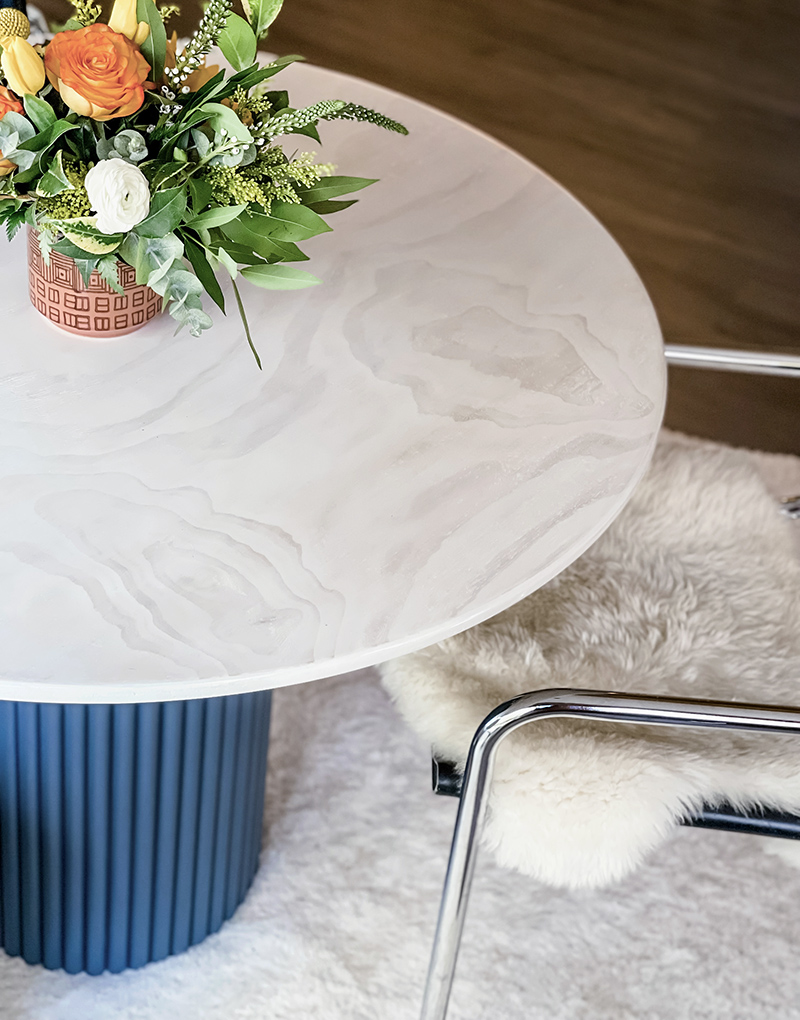
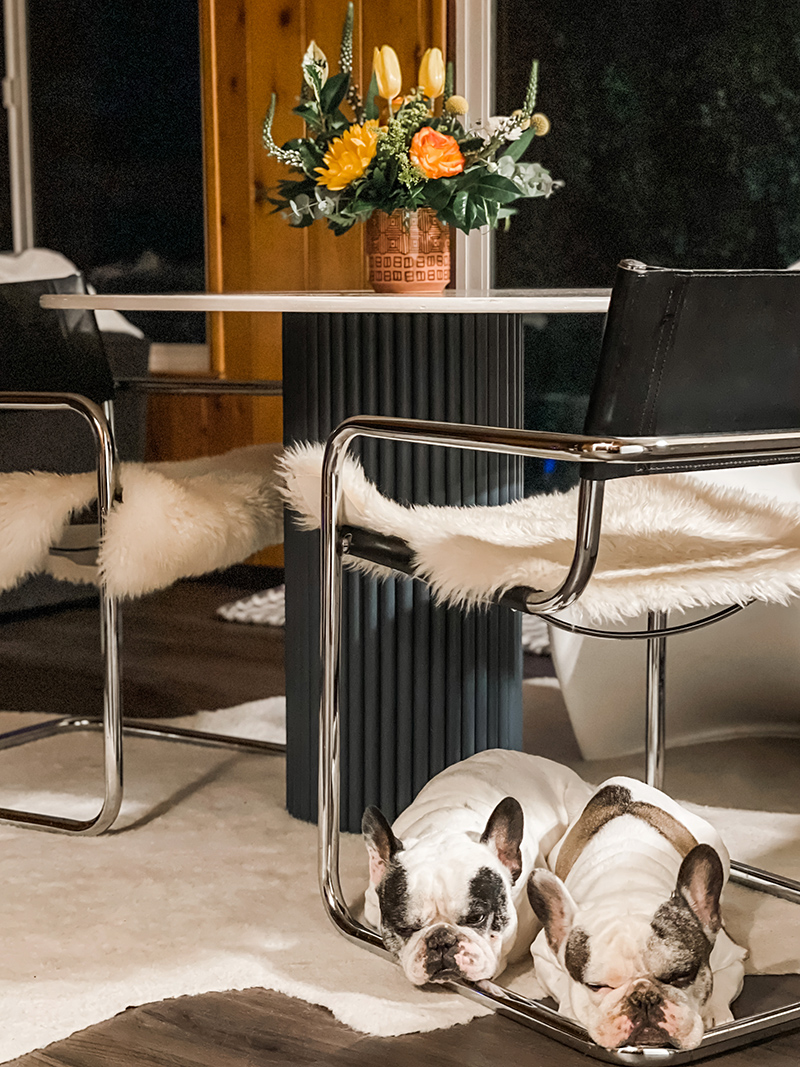
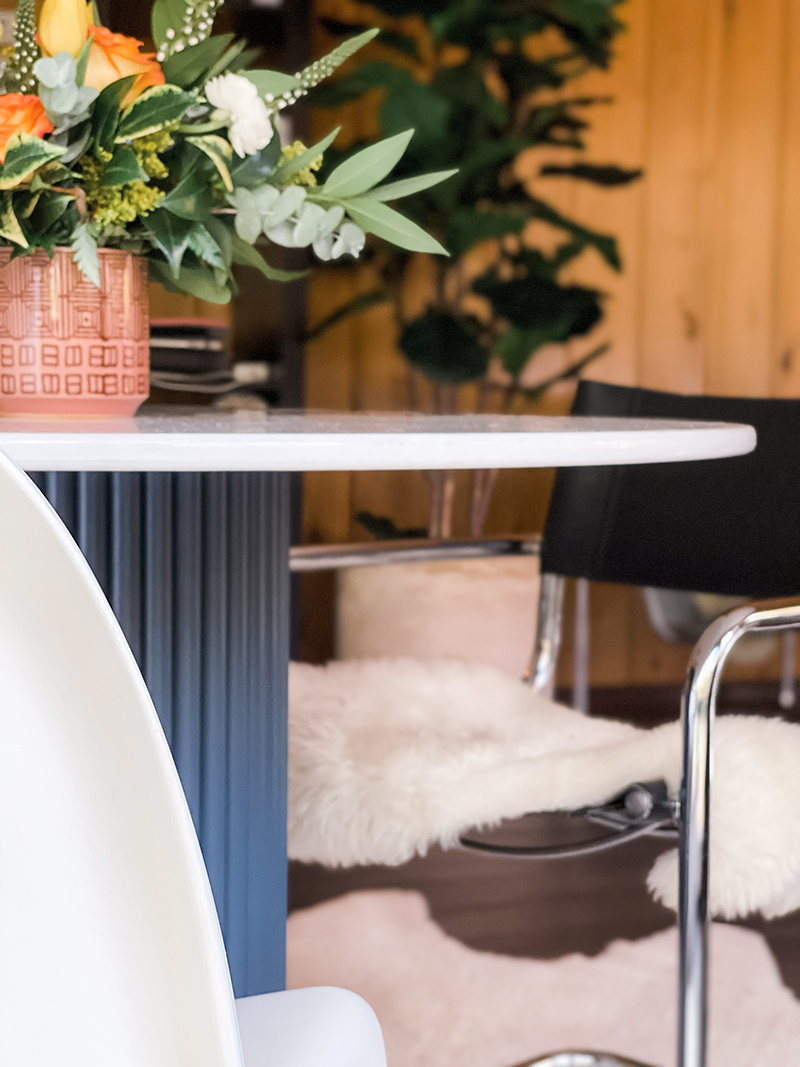
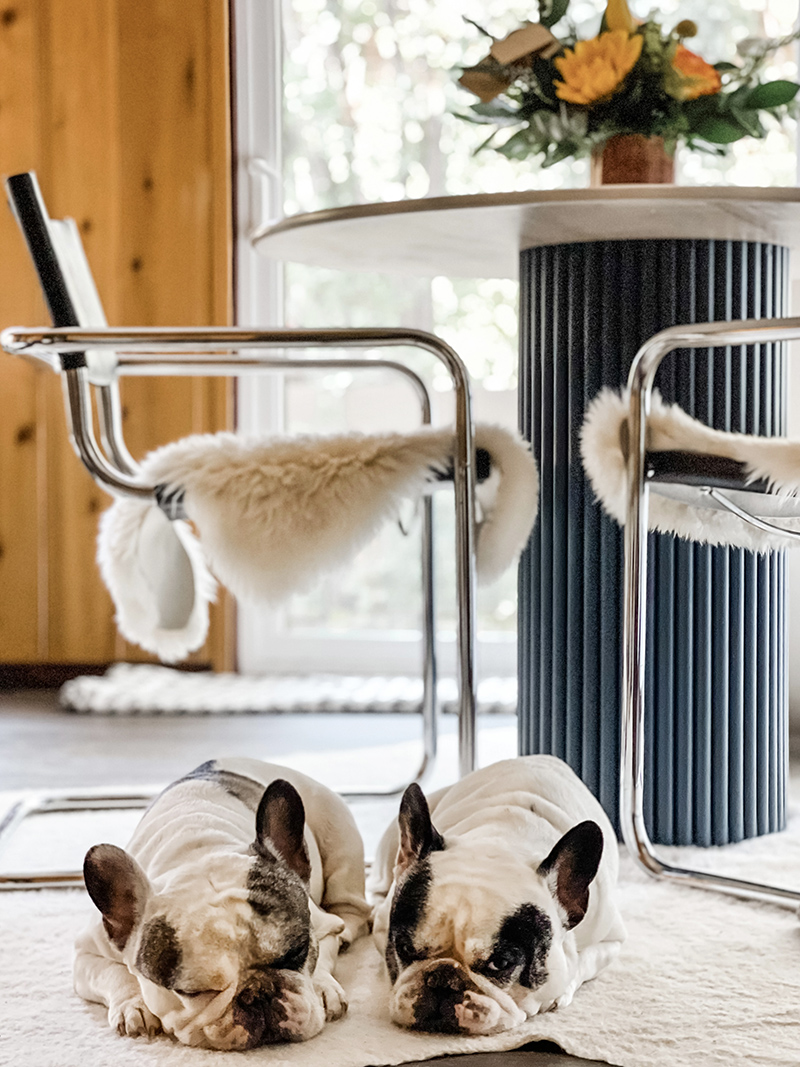
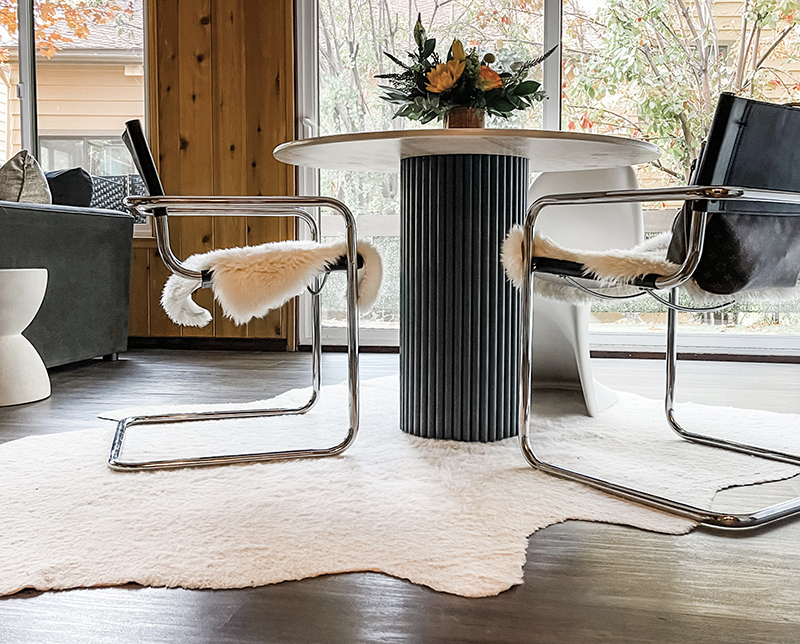
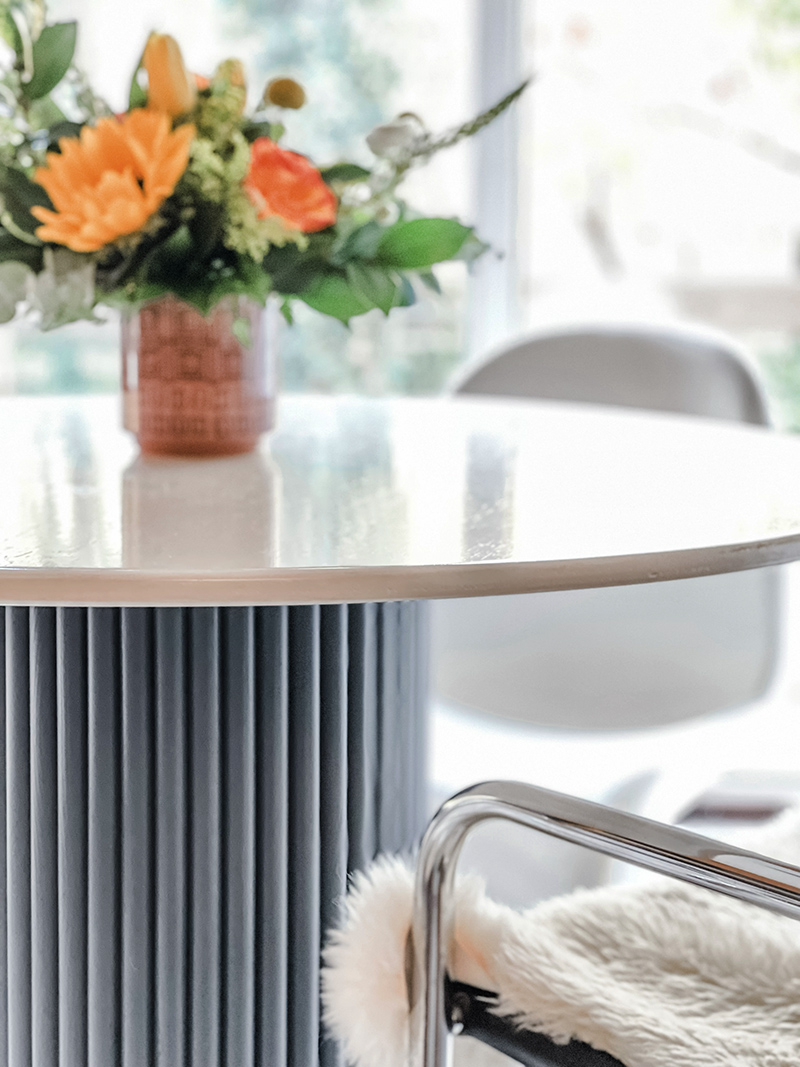
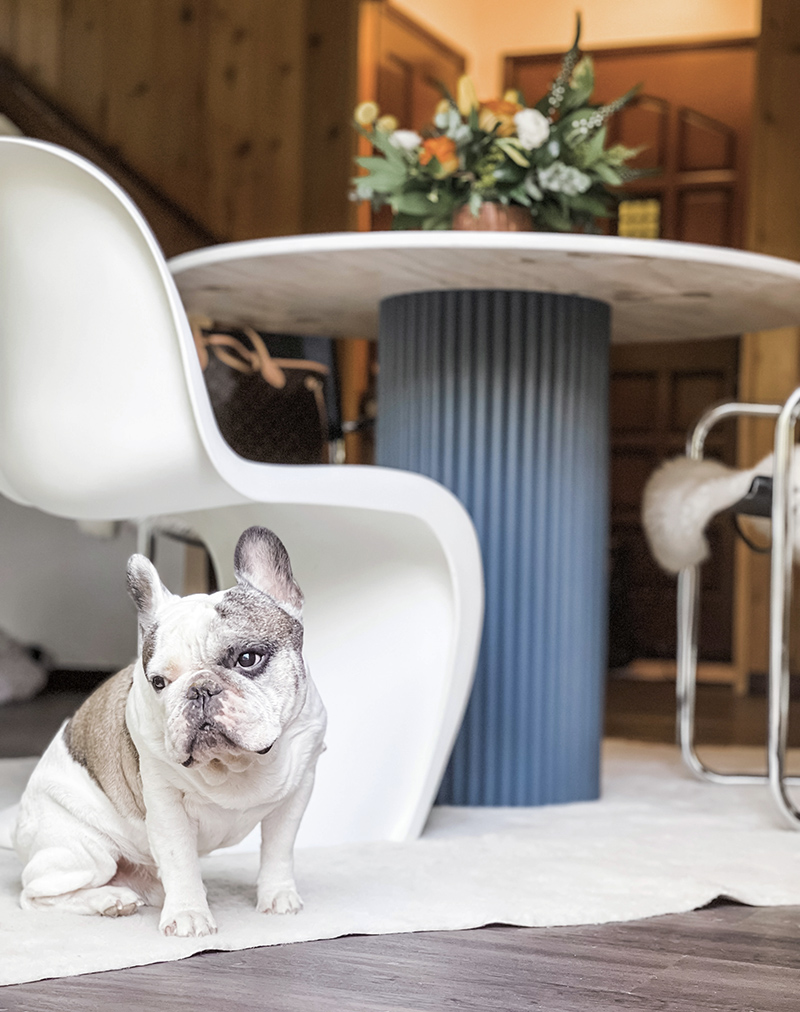
I am not by any means finished decorating the space, but luckily this old rug and the flowers my friend Michelle sent me helped make my small dining room area look somewhat finished… enough to shoot photos to share this post. As for the chairs, they’re all vintage. The white Panton chair was a gift from my boss at the art gallery years ago and I’ve loved it in all my houses since. I wasn’t going to use it here, but I liked it as the mismatched third wheel. The two chrome chairs were local thrift finds… I was originally looking at knockoff Marcel Breuer chairs) and I was MORE excited to see such modern/contemporary furnishings up here when it’s normally absent, but I got super lucky. I don’t think they’re original Mart Stam Cantilever chairs, but they’re pretty good replicas and other than a little worn leather spots, they look great and were worth every penny.
Happy DIYing Lovecats!
* Find all my Home and Decor posts here
* Find all my DIY posts here
* Find all my DIY Home and Decor posts here
DIY // How to Make Faux Stone Accent Tables with Spray Paint