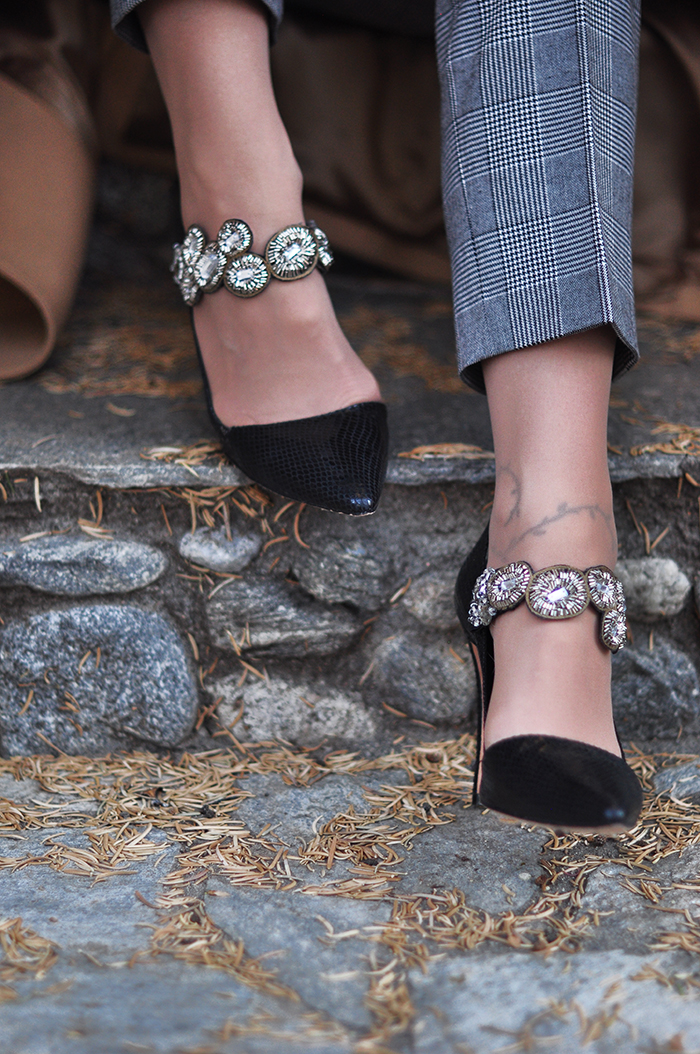
A few weeks ago I spied THIS AMAZING SHOE by Dolce & Gabbana and fell in love. I know there are a few other similar designs and on flats as well (I’ve linked them below) but the Dolce & Gabbana pumps are what truly inspired me to create something similar.
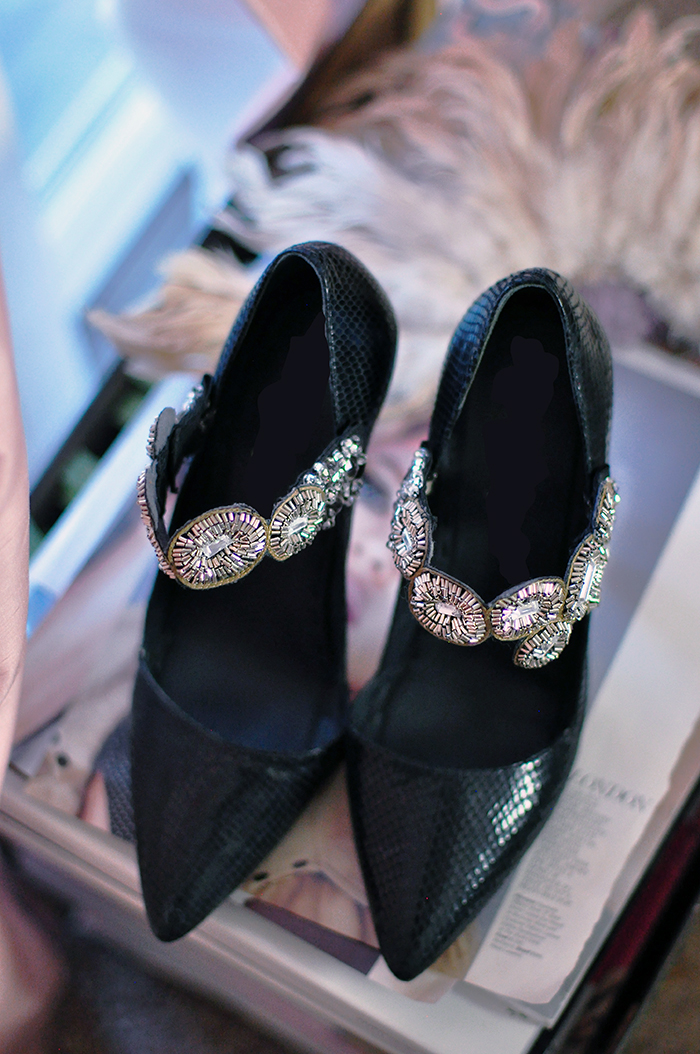
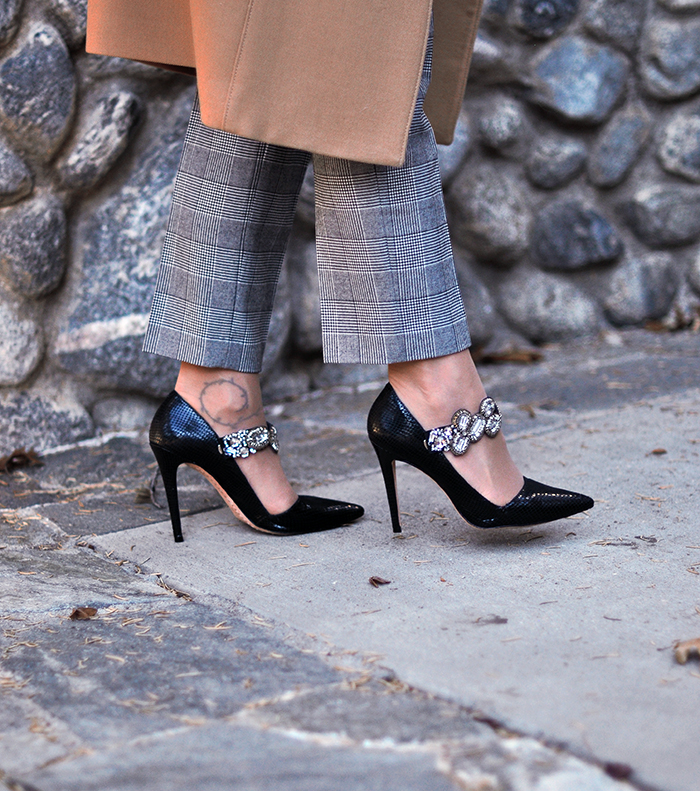
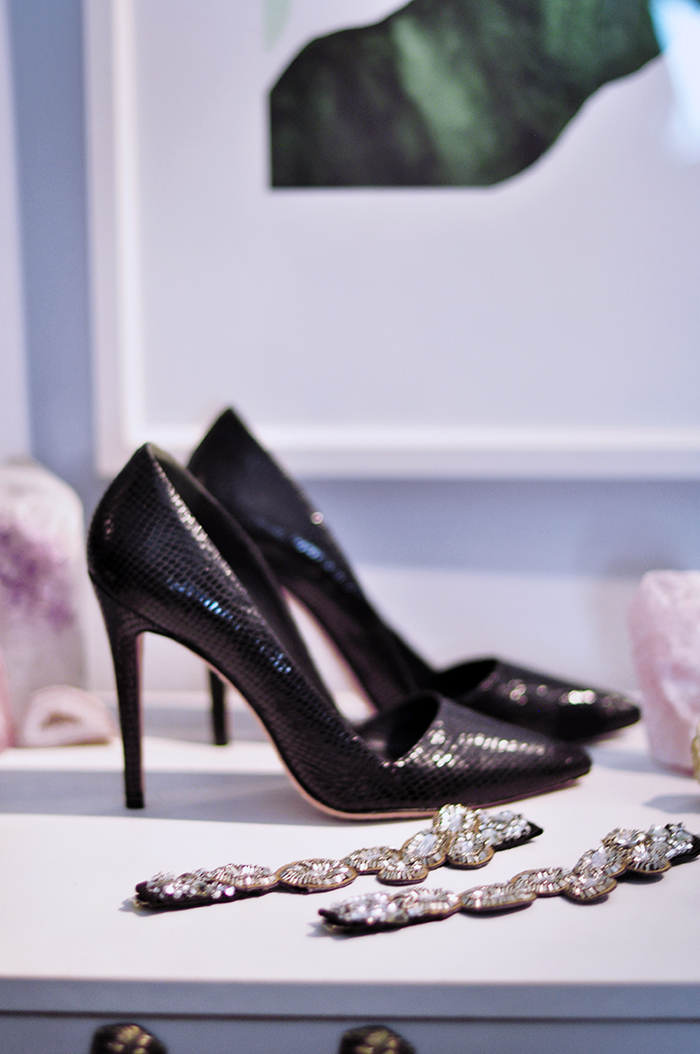
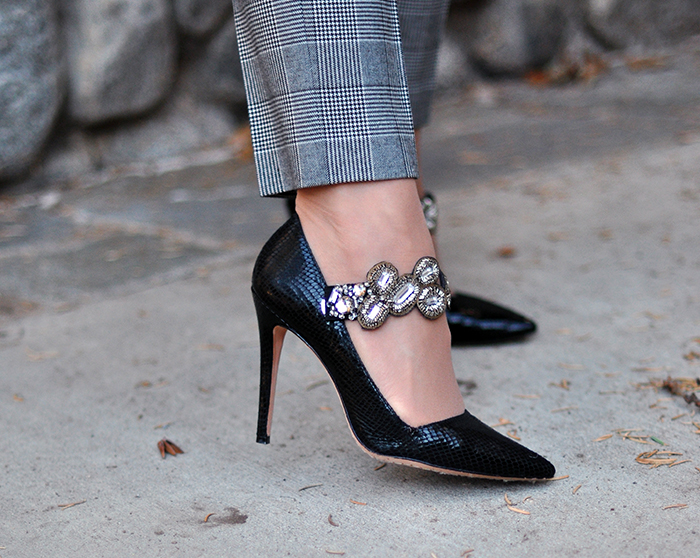
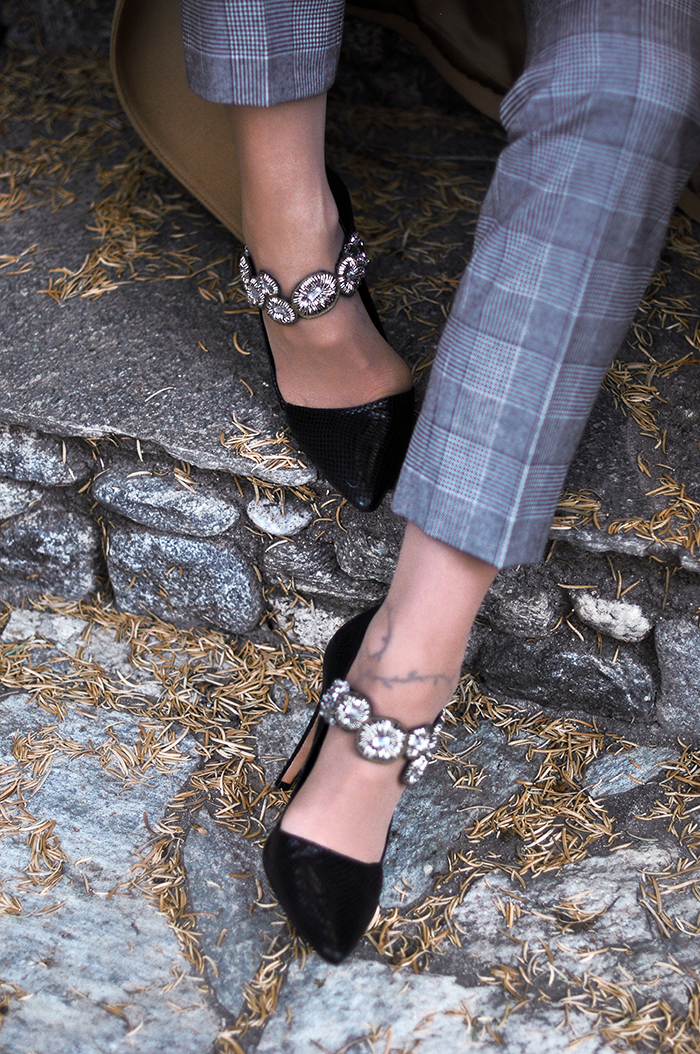
However, the DIY has got a one-up on the real deal (besides the cost) and that is that it’s completely REMOVABLE! And that means that you can use them WITH ANY SHOES… flats or heels and place them wherever you like! I also love that these can be worn with fancier holiday looks (like dresses or cocktail attire), work looks, as well as jeans and a blazer to add an edge or dress up a casual look.
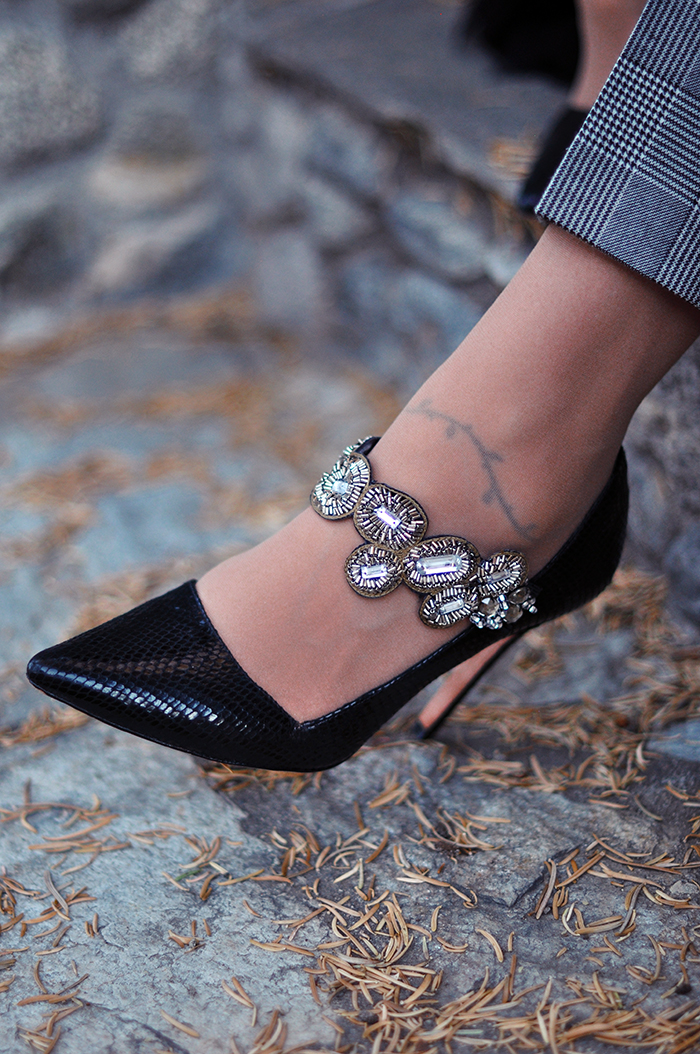
I love a Mary Jane strap placed anywhere along the top of the foot, but just under the anklebone is SUPER flattering on the leg (it lengthens it!) especially compared to an ankle strap that hits just above the ankle bone and sometimes cuts off the leg and gives the illusion of larger calves.
I know this: They will make any shoe look like a million bucks AND give your legs and feet a pretty little boost as well. I can’t wait to wear them with ALL THE OUTFITS!
Inspiration…
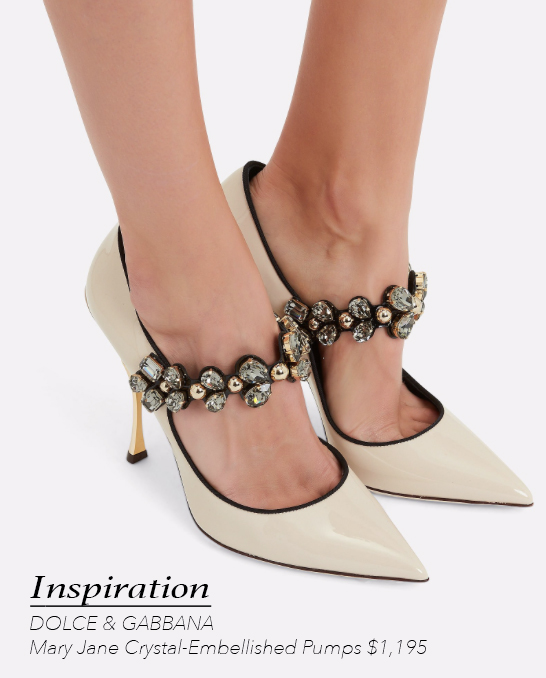
DOLCE & GABBANA ~ Cardinale Mary Jane pumps $1,195 ~ $1,291 and available in deep burgundy, black and ivory and on sale now at Net-A-Porter
SIMILAR OPTIONS…
* PRADA ~ Embellished strap Mary Jane pumps $1,125
* Karl Lagerfeld embellished flats $50
* Miu Miu ~ Crystal Embellished Mary Janes $790
Anyway, here’s how I did it… it’s perfect for the holidays and even as gifts! Just remember, if you’re making them as gifts and don’t have exact measurements, use a material with a little stretch and give -like elastic- so they are adjustable and fit correctly and will stay put as well.
Here’s What You’ll Need…
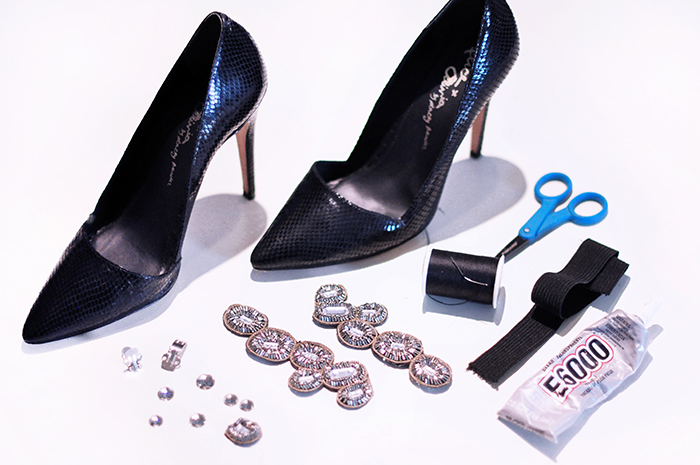
This DIY is easiest with a pre-made crystal embellished trim (usually in the wedding section of your local fabric or craft store OR Amazon has tons of options as well). I cut up an old belt to create my sections and then added elastic and beaded the ends since I didn’t have enough trim HOWEVER, if you have the trim, this DIY will be super easy!
If you’d prefer a less sparkly look, you can use lace or ribbon or a pretty and simple trim instead.
You may also choose to glue stones onto a felt-like surface (as I did with my bejeweled hair combs) and then carefully cut around your shapes, creating a strap to measure, then adhering it with glue or by stitching if you have holes in your clips like I do, to your clips and allowing it to dry.
* Crystal embellished trim, appliqués, patches or ribbon, vintage rhinestone bracelets, really anything could work!
* Blank Shoe clips
* Needle/Thread
* E6000 adhesive
Steps…
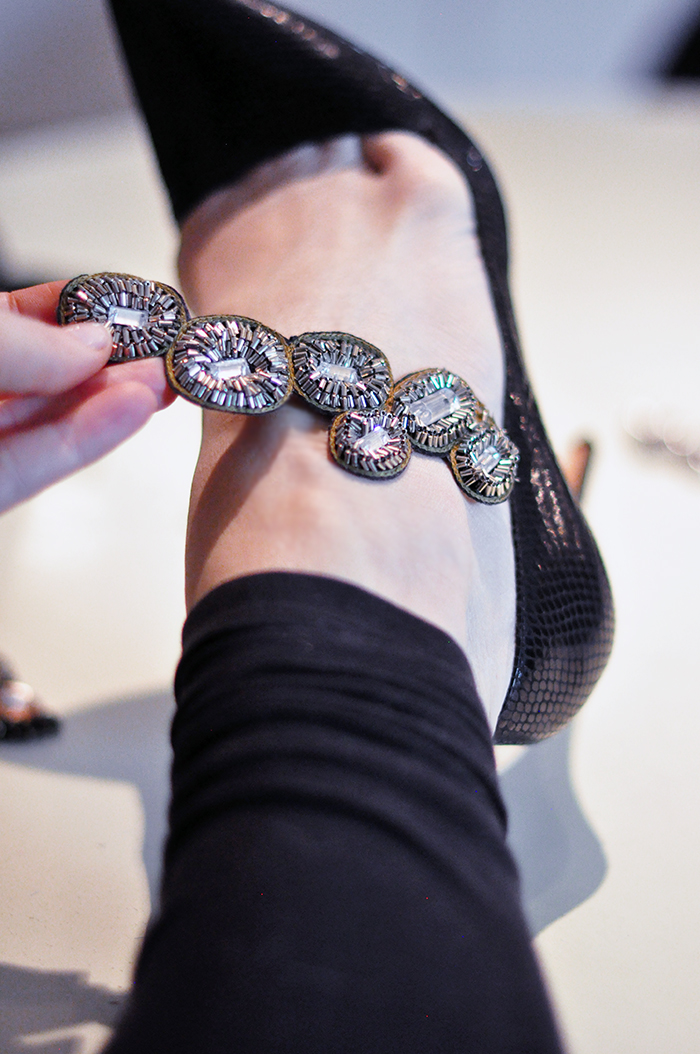
Once you determine what material you’re going to use, measure along the top of your foot (I used the actual beadwork appliqué to measure -it’s just easier) and decide where you want your strap to go.
I prefer it right under the ankle bone, but it’s also cute lower down on the foot too. If you use an elastic or material that stretches, you can wear it in both places and be fine.
If using lace or a pre-made trim, simply cut to desired length (unless it’s already the perfect length) and stitch onto your shoe clasps and voila! You’re done!
But here’s how I created mine…
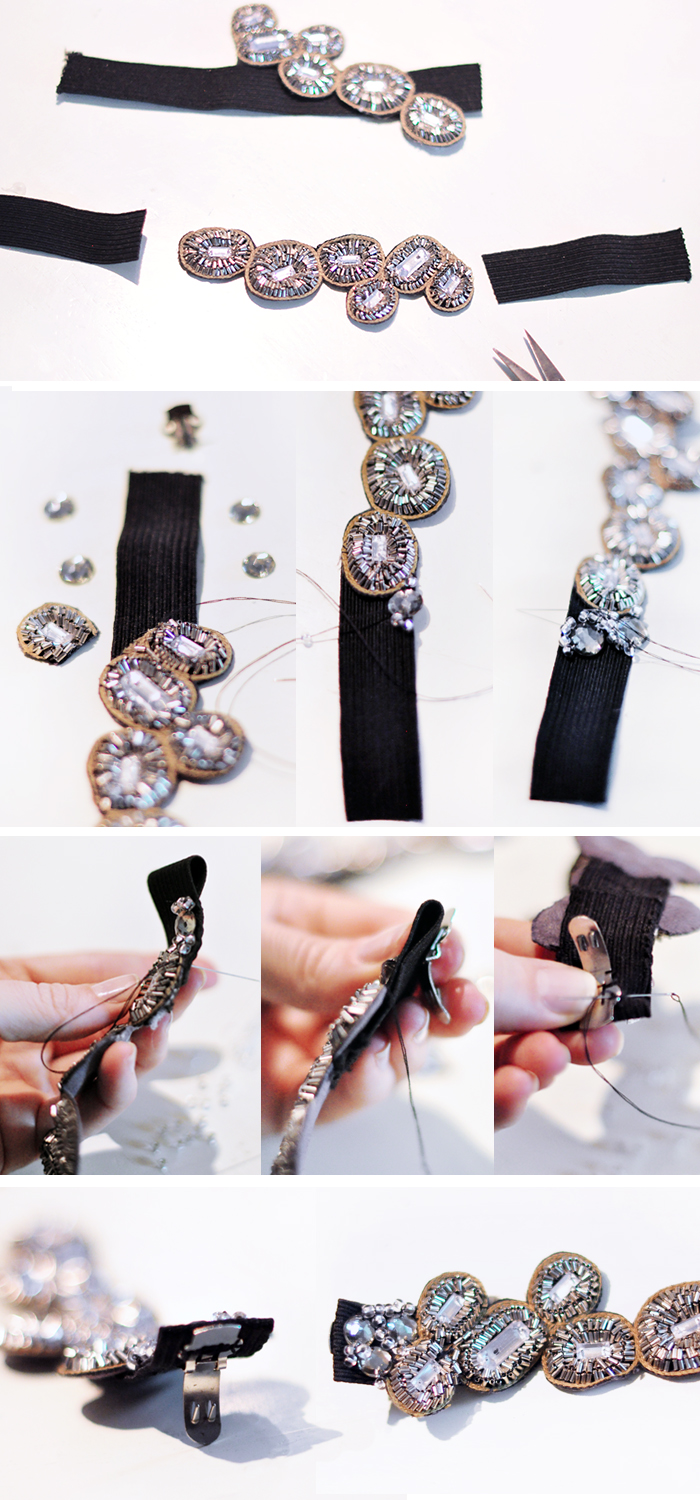
1. Since my embellishments weren’t long enough, I cut 2 pieces of 1-1/2″ wide elastic about 4″ long and stitched them to the ends of each side.
2. Using matching sew-on crystals and beads, I beaded about 1/2″ of the elastic areas beginning at the ends of the appliqués.
3. When I was about halfway done, I folded the elastic in half (in back) and stitched the edges down and to the end of the appliqué as well. This not only strengthens the strap and gives it more resistance but also looks a lot cleaner by hiding the stiching on the back.
4. I then hand stitched my clasp on (upside down/backwards) so the spikes would clamp inside the shoe and not on the outside just in case— I wanted to prevent ruining the outer edge of my pumps. Make sure only the tip of it is visible from the front. You want your strap to look seamless with the shoe itself. (see the bottom photo above)
5. Once the clasp was in place, I finished the beading and crystals up to the edges.
NOTE: They don’t look AMAZING on the underside because I have a mix of black and grey because it’s all I had to work with. I COULD HAVE cut out a backing and glued or stitched it in place, but it wasn’t necessary since I’m the only one who will ever see it. IF you’re giving them as a gift though, you may want to consider lining the back with a soft but thin fabric to make them look finished and professional and be comfortable as well.
And… Voila!
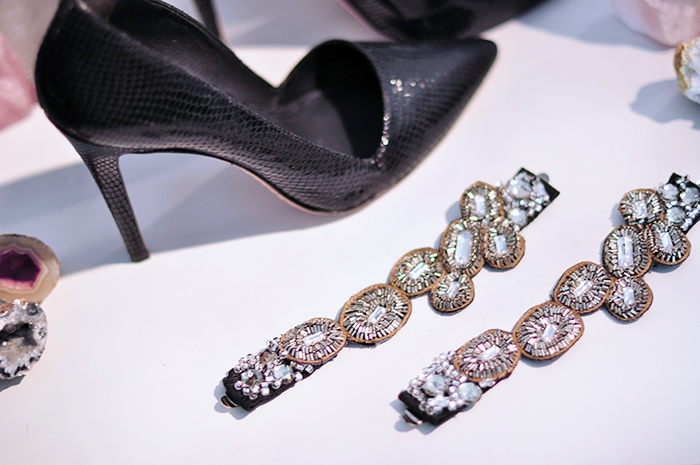
Have Fun!
* Happy Holiday DIYing!
* Find all my DIYs here
* Find all my Shoe DIYs here


