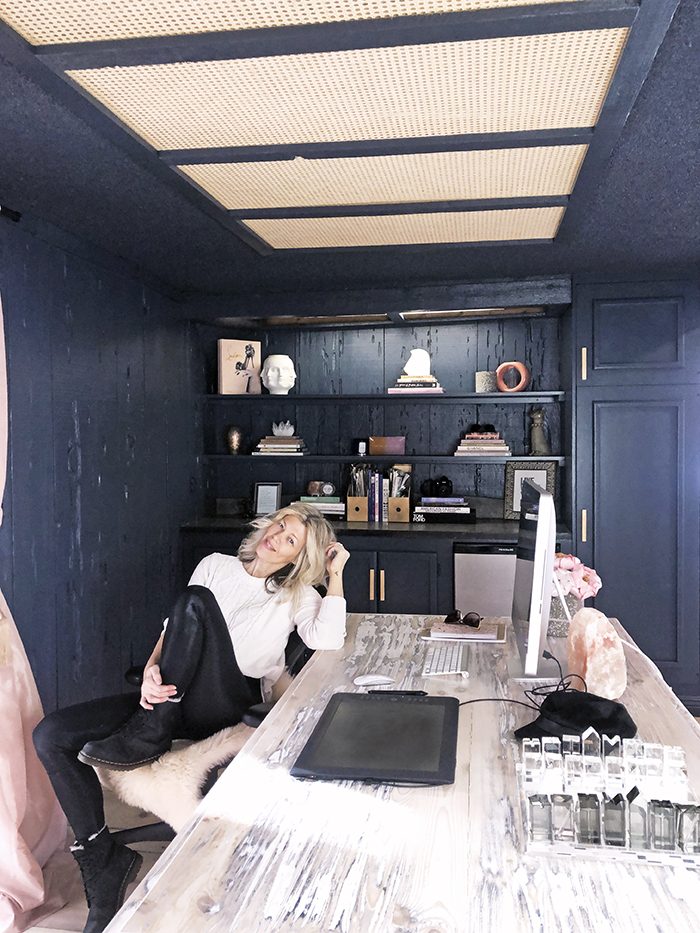
Lovecats, I can finally share at least part of my new office and my level of excitement is off the charts!
I’ve been working in my new office every day this week and though I’m still trying to get used to a new schedule, I am loving every minute of it! I smile when I drive up and am giddy when I unlock the door and walk in. I even say HELLO as I set my bags down and turn on the lights and push open the curtains. Then I turn on the music and sit at my desk and just look around smiling for a few minutes before getting to work. You’d think a camera crew was following me along with a catchy theme song the way I’m acting, but it’s REAL 🙂
I’ve been excited about getting to work here since October (2020) when I rented the space, and yes it took longer than I expected it would to renovate (and we’re still not quite done), but I had no idea just how much of a love affair I’d be having with the whole thing. It’s silly, really!
I haven’t finished fully decorating… I don’t have any art on the walls yet and I will probably end up changing how I style the shelves numerous times. In fact I’ve already bought a little potted plant that ended up there after I took these photos, so it will be fun to share the evolving styling of the shelves. Also, the lighting panels above the shelves aren’t done yet, and I have to hem my curtain panels and hang tie backs on the sides and if I ever find my hardware, pull the panels out of the rods and attach them with hooks, but otherwise, this area is done and I’m so happy with it.
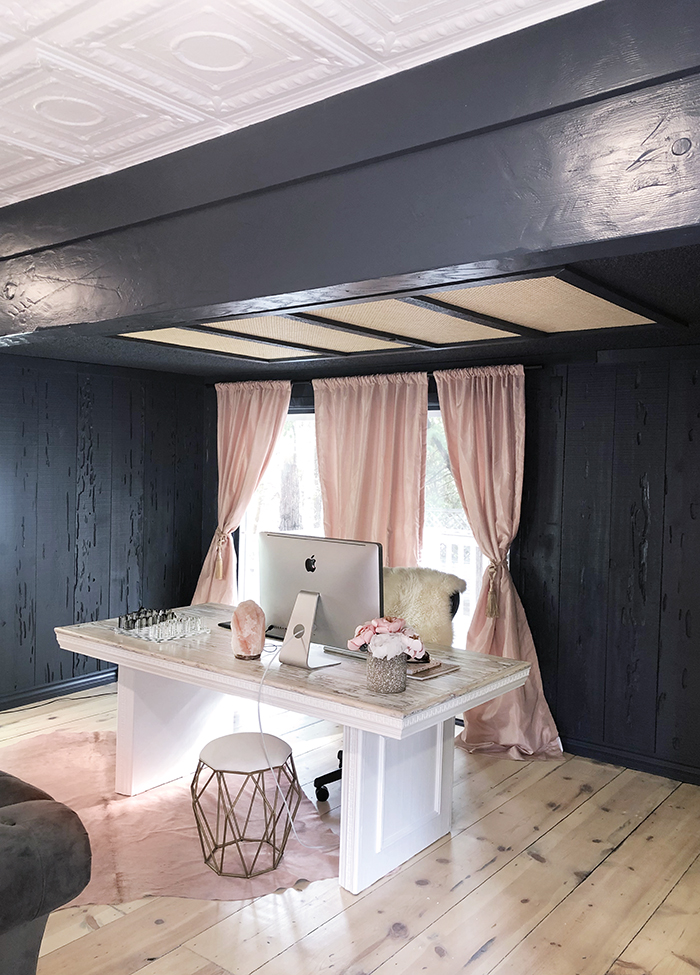
So here is a first look at my new office – my desk and work area.
I shared the basic renovation in the post below, but I thought it would be fun to share the before and after photos here for a full comparison.
My Desk and Work Area, The Overall Space…
I knew when I walked into this space that this area would be where I’d want to sit at my desk and work. I didn’t actually have a desk at the time, but before we really even started renovating I found one that I loved.
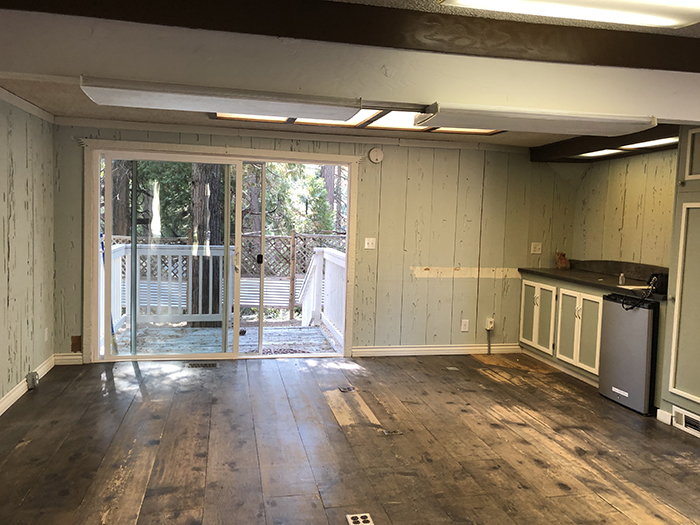
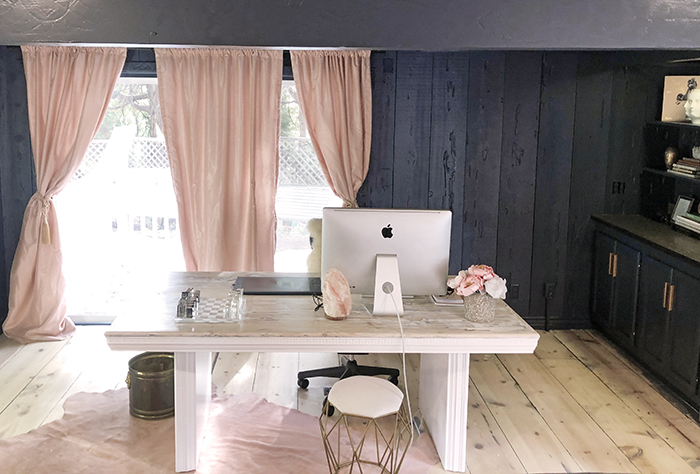
The angle of the photo above makes it look a bit smaller than it is… but my desk is MASSIVE. I found it at a local furniture shop called Jeannine’s Home Furnishings, who just has the most exquisite collection of pieces, but are generally a little out of my price range (I posted about her store in June 2013 soon after moving up here). My mom and I went on a little thrifing shopping adventure one day and decided to stop by Jeannine’s just to take a peek. Right before walking out the door I spotted this huge table sitting outside on her patio along with the blush pink cowhide rug folded up on a shelf beside it. The desk was old and in pretty bad shape but she quoted me a price for both and then we left because it was still more than I wanted to spend on a desk I’d have to refinish. I spoke with Chad on the phone a little while later and told him about the pieces I found, mentioning that they weren’t in the best condition and I was going to think about it for a while before committing to buy anything.
Later that evening, I was at my office in the beginning stages of renovation and Chad showed up with our friend Pablo who was backing his truck into my driveway and when I walked out I noticed THE TABLE WAS IN THE BACK OF HIS TRUCK. Chad went to Jeannine’s and bought me the desk and rug and I was so surprised I squealed!
We then spent the next few months moving it around the office as we renovated and then another few weeks refinishing it, but he did a fabulous job and I love how he left the top with a distressed look – yet it’s the softest thing you’ll ever touch! I’ll do an entire post on the desk soon as I mentioned before, it was a labor of love and I LOVE IT.
The Counter/Shelving Area…
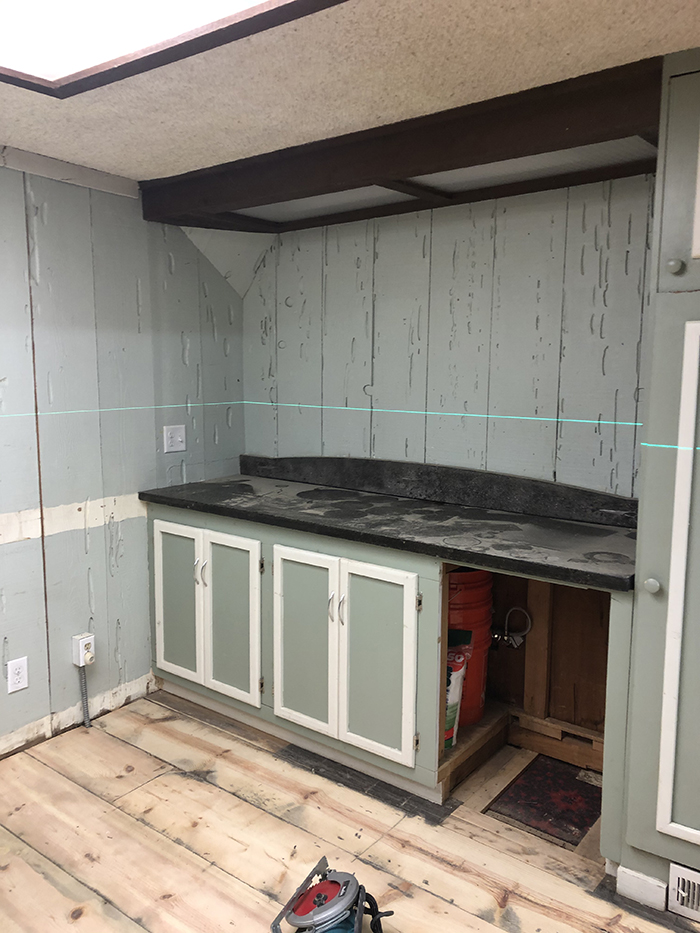
This was basically just a counter top with cabinets and a mini fridge below. The upper space was pretty much useless, though I first thought it would be a great place to hang my HUGE cork (mood) board, it still needed more…
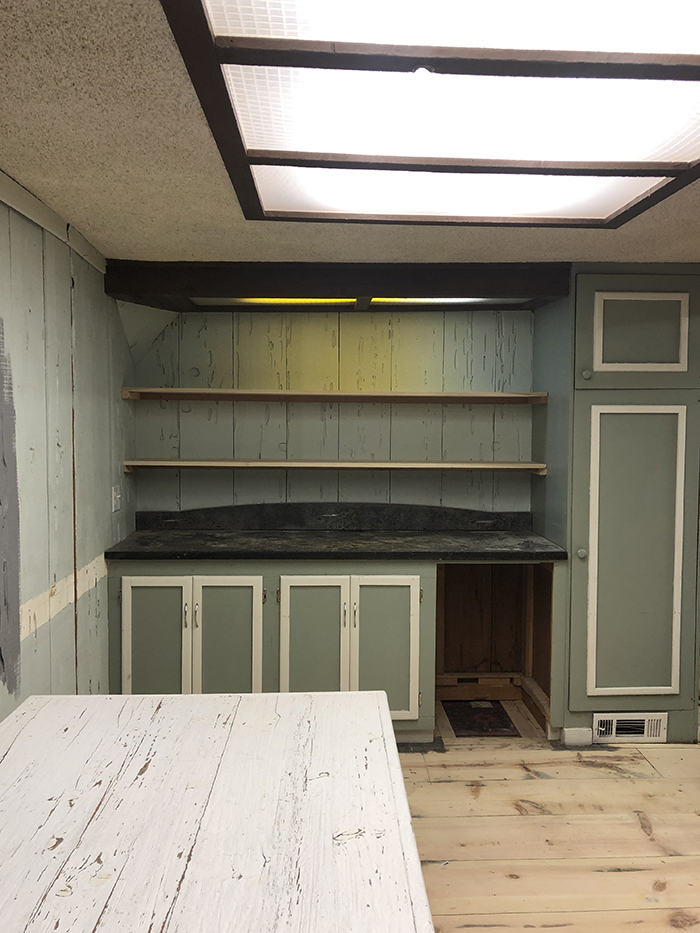
So I asked Chad to add two shelves to the wall and once we painted everything in the same Midnight Blue from Behr Marquee, it felt more like a built in that was always there.
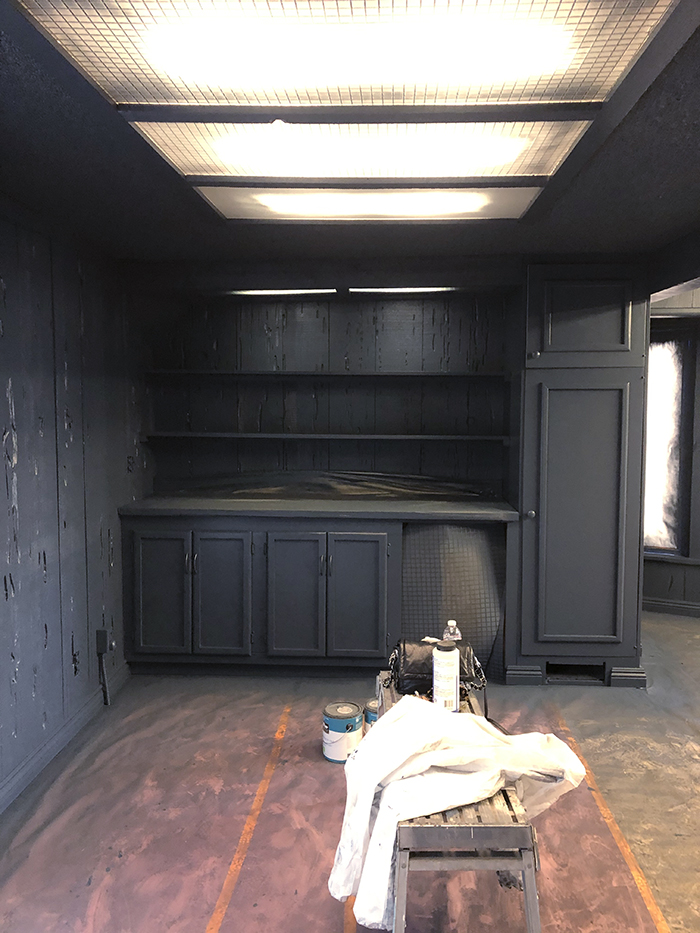
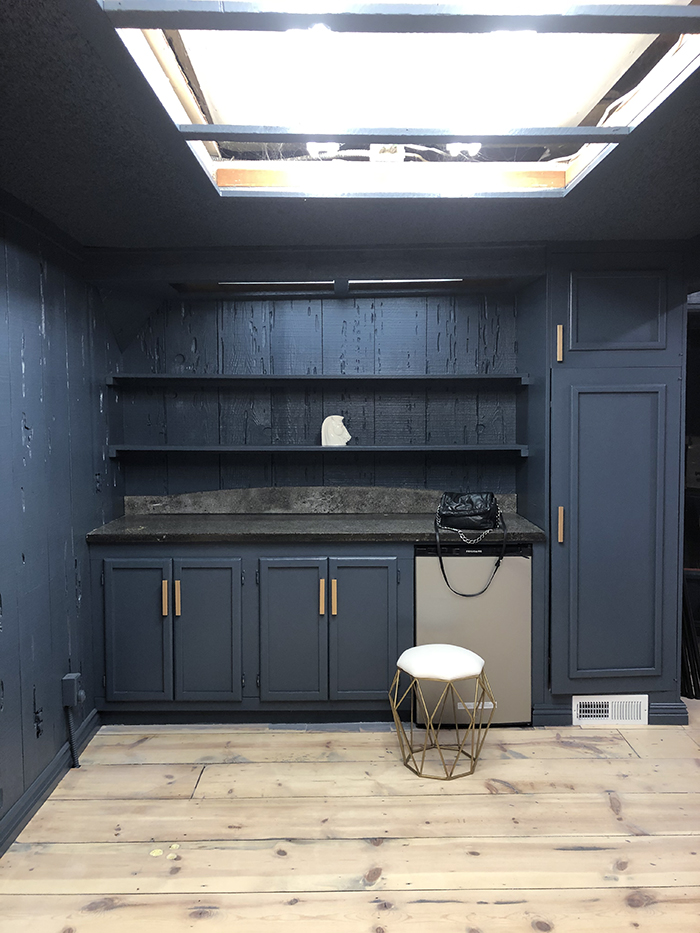
I was going to buy new brass hardware for the cabinets but found these wooden pulls I saved from an old Ikea dresser hack and painted gold, which were the exact size I needed and worked out perfectly. I made an Insta-Reel to show a quick before and after, but you get the picture.
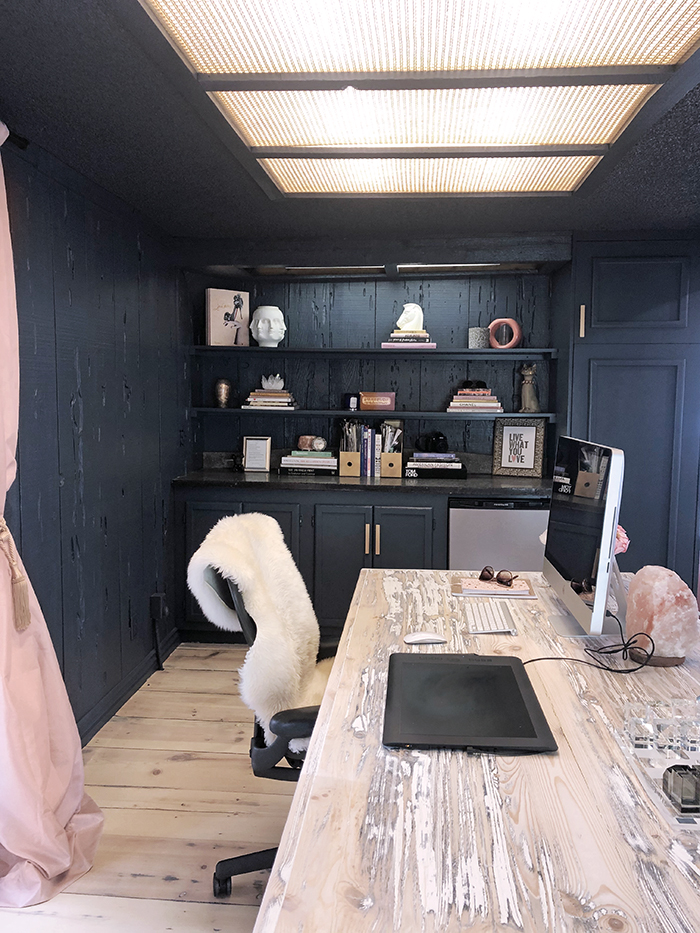
So far I’ve styled the shelves with all my pretty fashion and decor coffee table books with a few of my favorite vases and animal figurines as well. I honestly don’t know why I’m obsessed with animal figurines, but I am. The horse is my newest acquisition, stolen from my mom’s house, which I mentioned in my DIY stone tables post.
Like I said above though, I’ve already moved things around since shooting these photos and want to bring in some new smaller art pieces as well. I have a feeling this will be ever-changing and fun to rearrange.
From Another Angle…
This is the angle you see as soon as you walk in the door. My desk area (seen here) is to the right and the sitting area (not shown) is on the opposite side, or right in front of you when you walk in the door.
Since there is a fireplace on the opposite wall, it made sense to put a sitting area there and my desk back here and this way I can see the front door and out the front windows while I’m working.
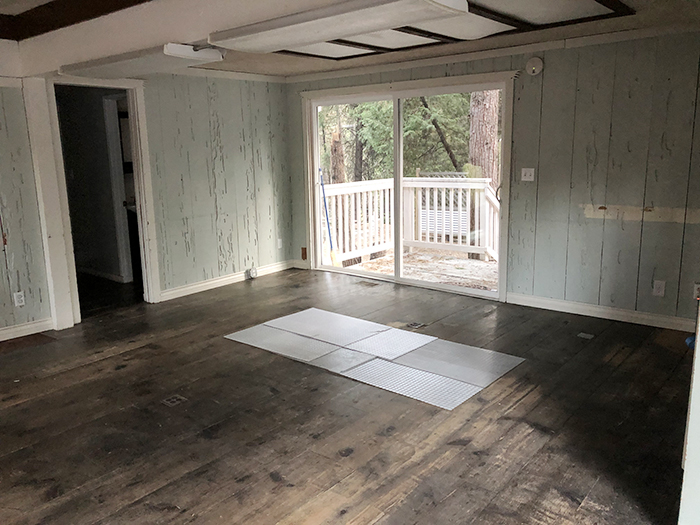
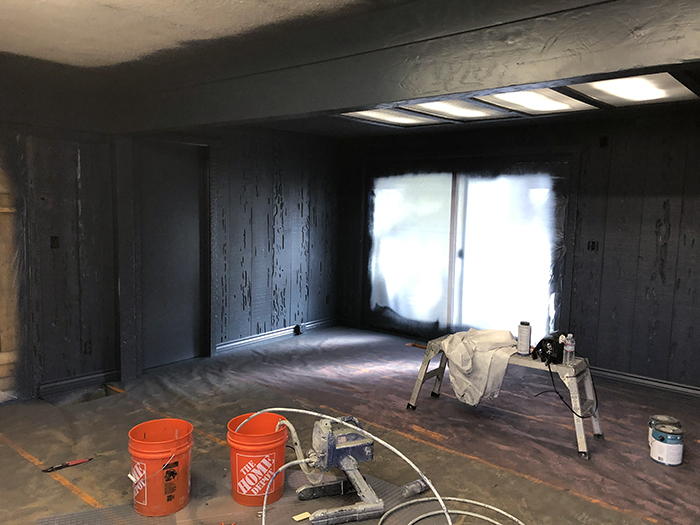
I’ve already added a few new things, like a little stool against the wall next to the slider to set my bags on when I walk in. I still need curtain tie back hooks and art, like I said above but the far wall (to the left of the slider) has become a fantastic place to line up my studio lighting, so that might just stay there since it’s so convenient.
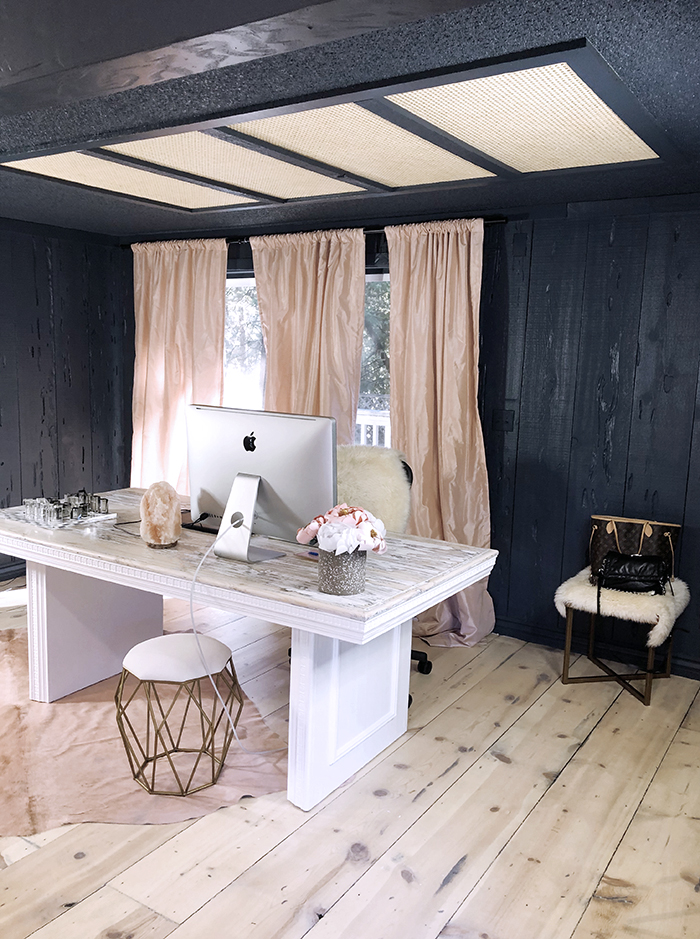
I think things will change as I work there more (and I say there because I’m home now, writing this on my laptop because I felt bad leaving the dogs for so long today – eventually I will bring them will me)… and the more I get a feel for how I will be using the space on a day to day basis, the more I’ll be able to add and rearrange things to suit. I’ve already shot a campaign there this week and had a blast and the studio lighting came in very handy right along that wall. Also, there are tons of plug outlets in this place which makes it so easy to work.
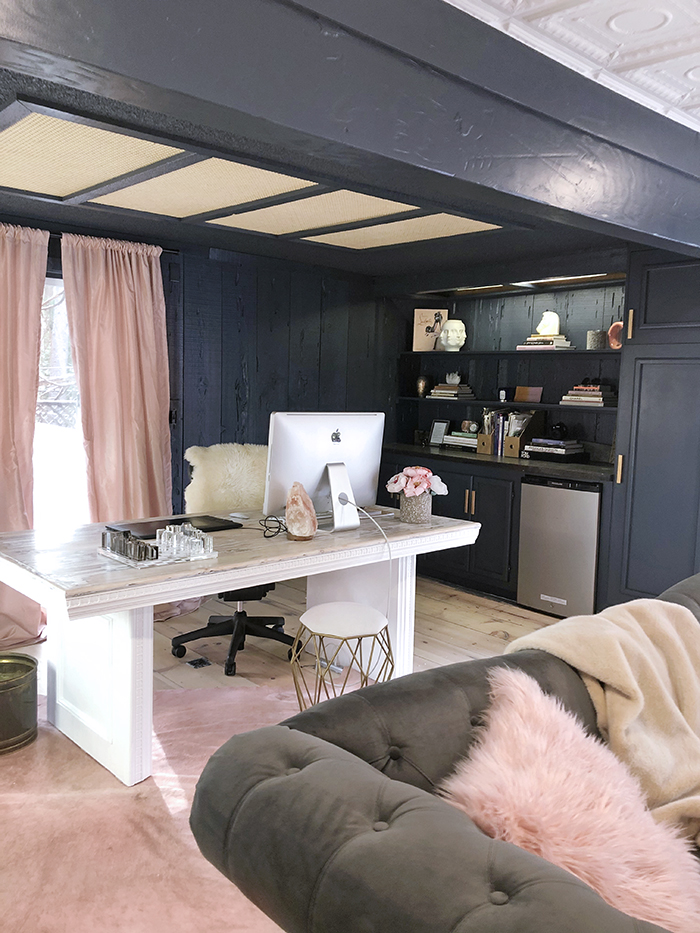
Oh it’s so dreamy…
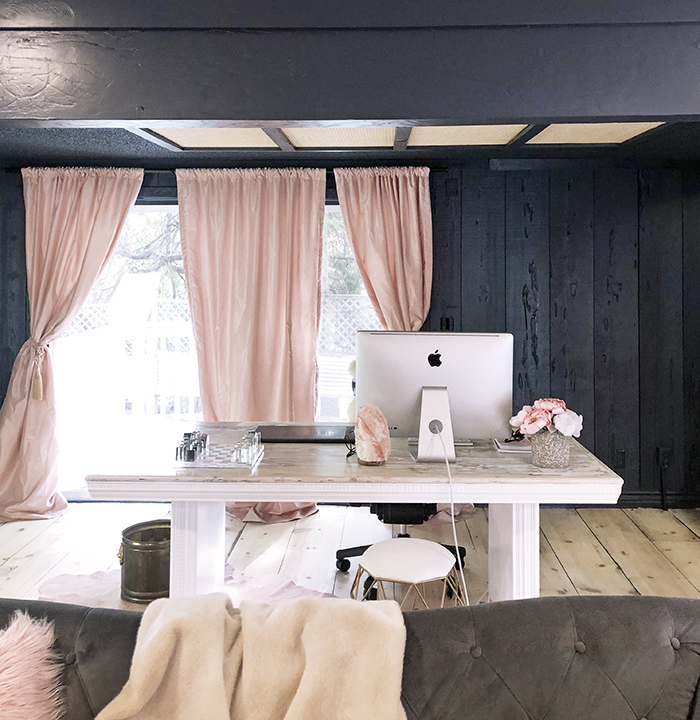
In the coming days I’ll share the DIY light panels we created to cover the hideous flourescent light and plastic soffit troffers alternative which I think are pretty fantastic, If I do say so myself. I mean, if I had to live with the ugly plastic light panels that reminded me of an old corporate office, I don’t think I would have been able to stand it. Dramatic, I know 😉 but still.
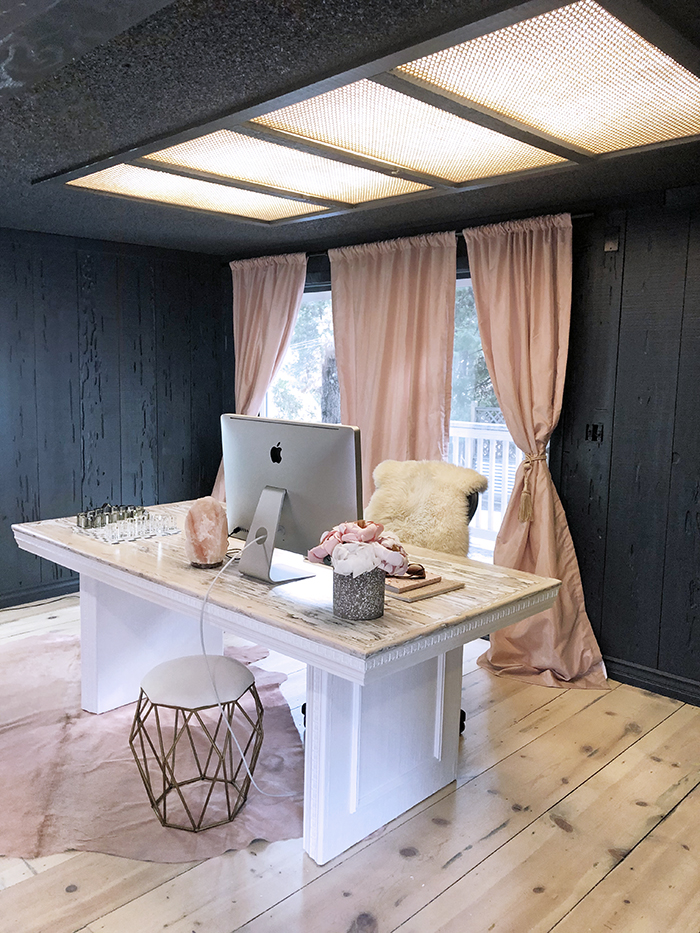
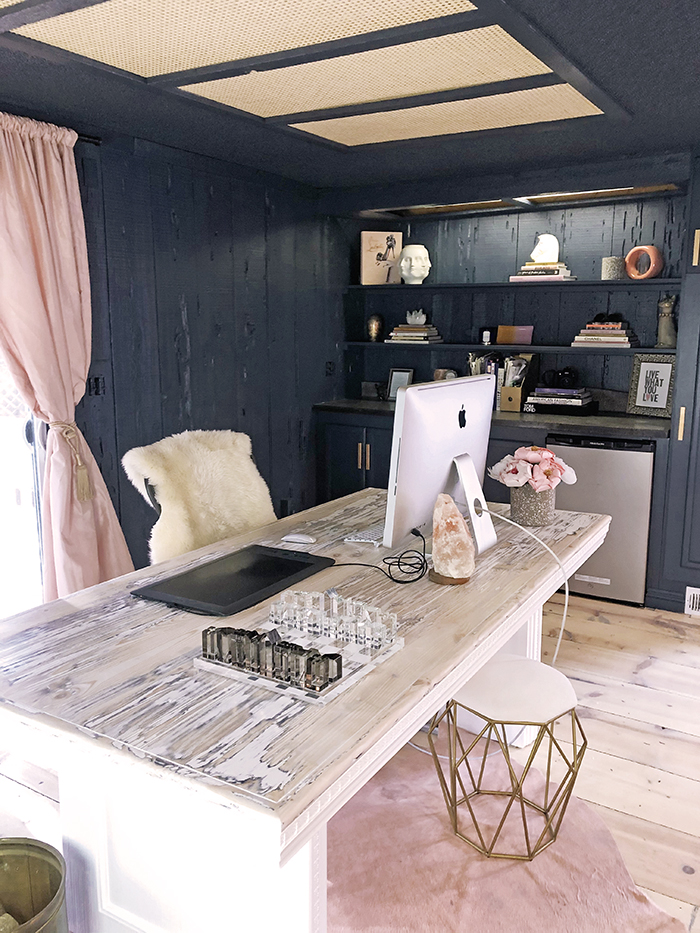
The dark blue walls photograph differently in every light, which is a little tricky because sometimes they’re blown out and completely the wrong color or they’re too dark to see at all, but I’ll get the hang of it eventually. I think I achieved and almost-consistent look with these. With the light floors and blush curtains, I love how dramatic the walls are and all the trim painted the same hue too.
As soon as my chandelier arrives for my sitting area, I’ll finish that room and photograph it and share it as well, but I’ll have a few more DIYs to post in the coming days, so that’s fun. I hope you’re enjoying seeing this process and my new office as much as I am enjoying creating it. Thanks for following along 🙂
Happy Friday Lovecats!
* Find all my Mountain A-Frame Office posts here

