Happy Monday Lovecats! I hope you are well 🙂
It’s been two months since we started renovating my new office and that means it’s two months longer than I wanted it to take to finish it. But you know what they say about renovation… it always takes twice as long as you think it will to complete and costs twice as much. And that has been true with literally every renovation project I’ve taken on, from small (the patio roof addition on my old house) to large (Dogwood Tavern).
Luckily I have a skilled electrician, contractor and builder (Chad – as seen in photos) who can literally build and fix anything and he was willing to work for free… well, almost free 😉
When I first signed the lease I planned on just a few upgrades. I was going to paint and swap out the lighting/electrical… and that was pretty much it. And of course those little upgrades turned into a full blown renovation that I’m not mad about now and guess what? IT IS 99% COMPLETE and I am JUMPING FOR JOY.
We still have some small things to finish and a full reno on the bathroom to complete, but that won’t stop me from putting the finishing touches on the rest of the space and moving in and decorating… which I THINK is truly the most exciting part.
So where do I begin?
ps. this is a long post
Let’s start with the floors.
Floors…
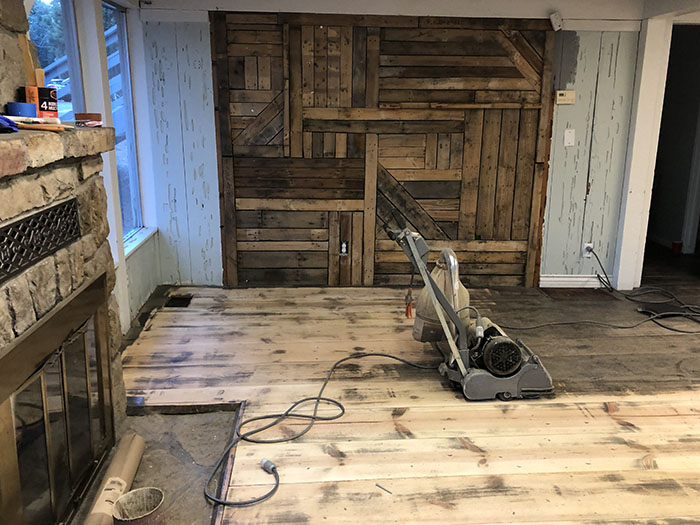
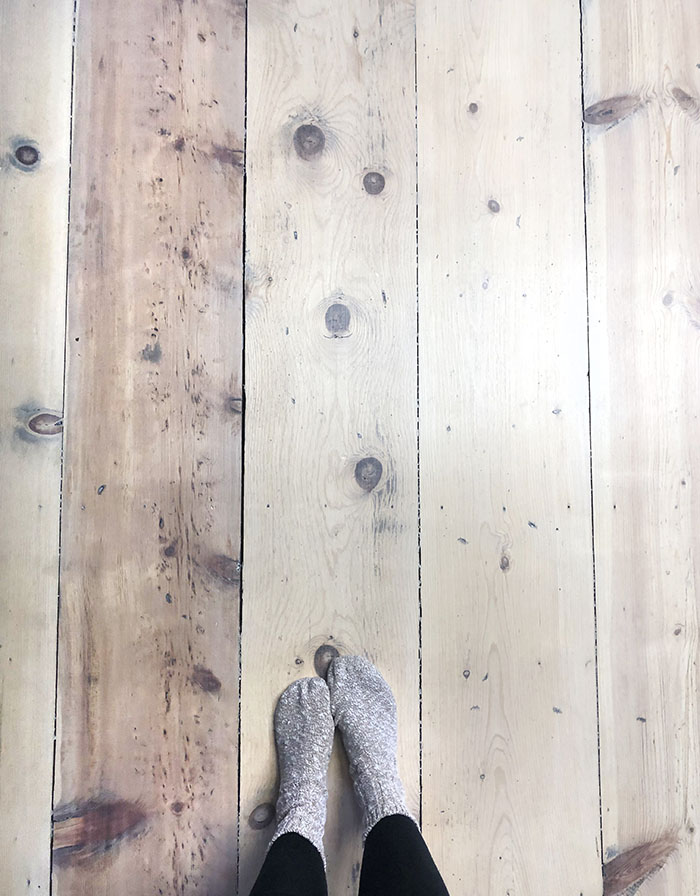
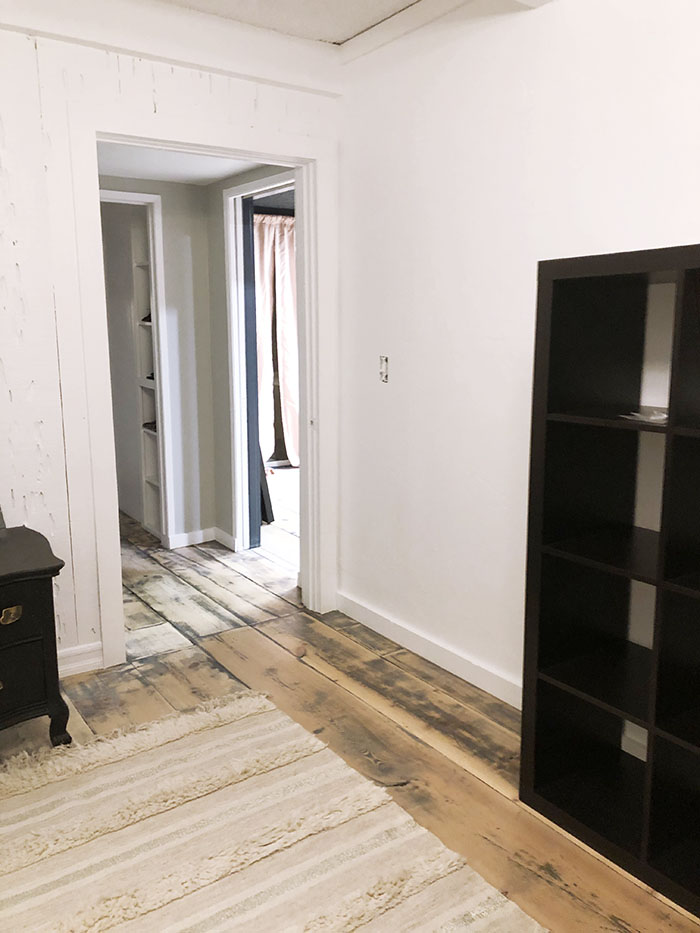
NOW, I didn’t actually mind the floors – at first, because I liked the old world look about them but Chad convinced me to refinish them and I’m happy we did because ultimately they were in way worse condition than I thought and I’m happy with the light finish we created.
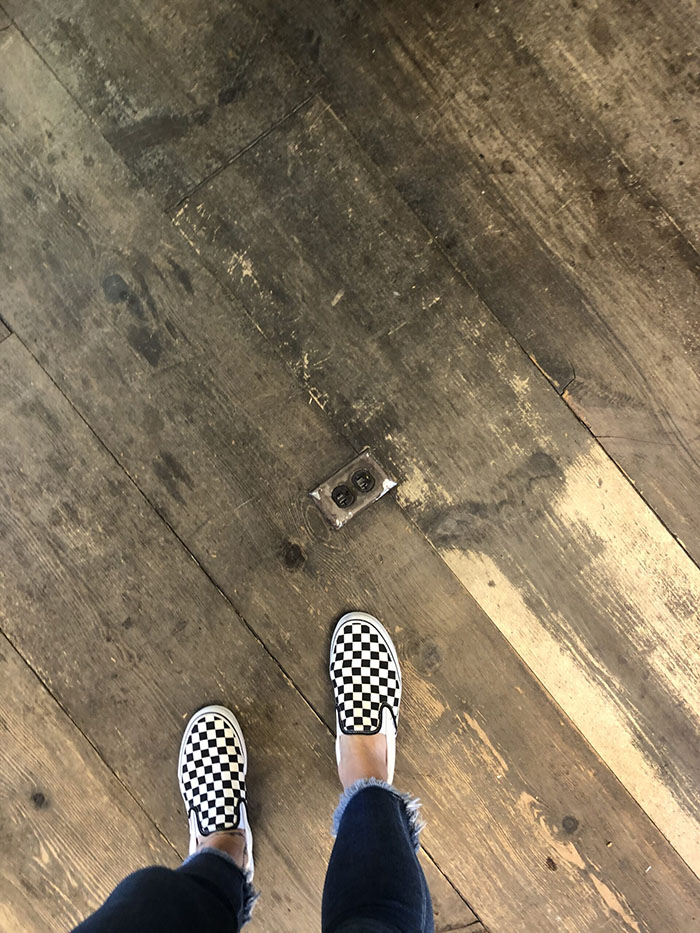
Looking back, they did look pretty dirty.

We sanded all the wood flooring throughout, but took the front areas in the main room down to almost raw and left the back areas with a bit more of a distressed look. We then applied what felt like one hundred million coats of Varathane Poly+Stain Antique White, but it was probably closer to about 3 coats. I wanted them to feel light but not white washed and hoped the antique white would cancel out the yellow tones, which it did well enough. We used water based stain so it went on pretty transparent vs the oil based white stain, which would have created a much lighter “whiter” feel and cover up much of the wood grain. We’re left with a natural light semi-white washed look that I really like… especially since I painted all the walls in a really deep dark blue/gray hue.
Which brings me to the walls… and paint colors…

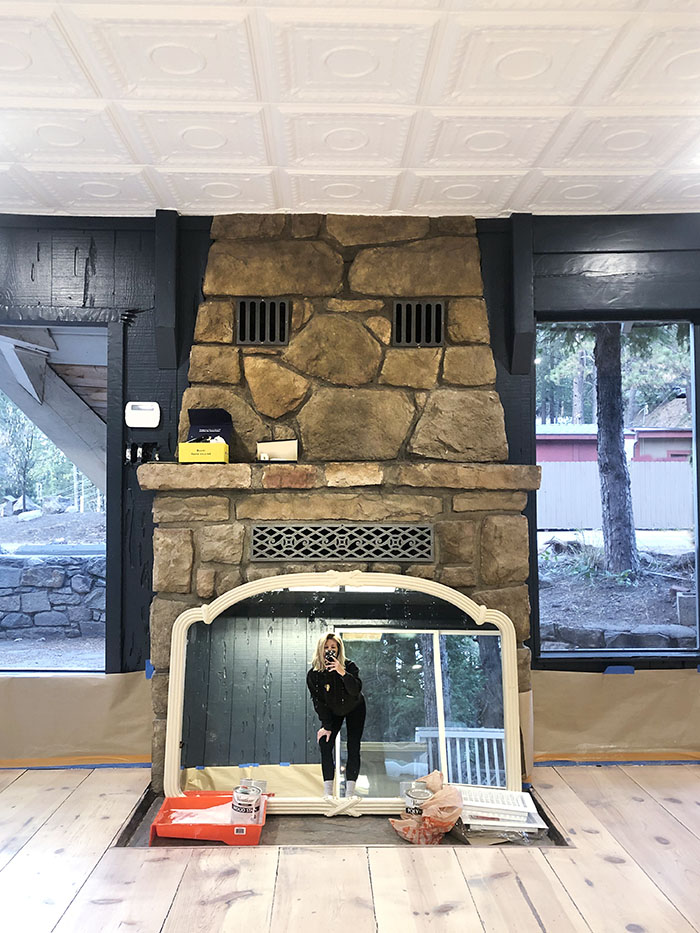
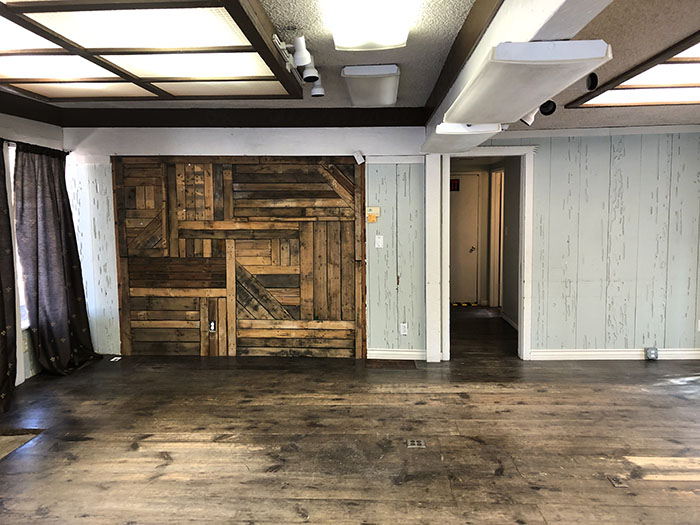
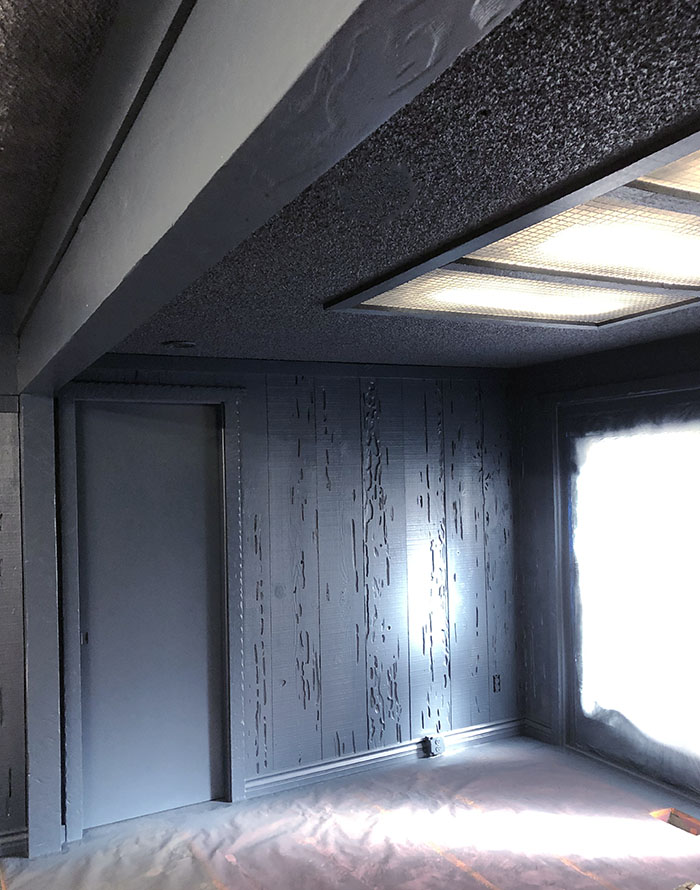
Aside from this random wood plank section of the wall (which we left as-is and I’m sort of regretting now) the walls in the main room are paneled with textured wormwood planks which had already been painted a sage green and beyond color choice, they just needed to be freshened up from wear and tear over the years. I originally thought I’d go with a soft light grey like my last home office, which was soothing and nice to work in. However, I wanted my new office to look nothing like my old office even though I’d be using the same curtains and some of the same furniture, I wanted an entirely new look. So I decided to go DARK… and then sought out to find the perfect shade of dark charcoal grey/navy blue.
Check out my early inspiration and mood board here:
Main Room (office/desk area and sitting area)…
Before…
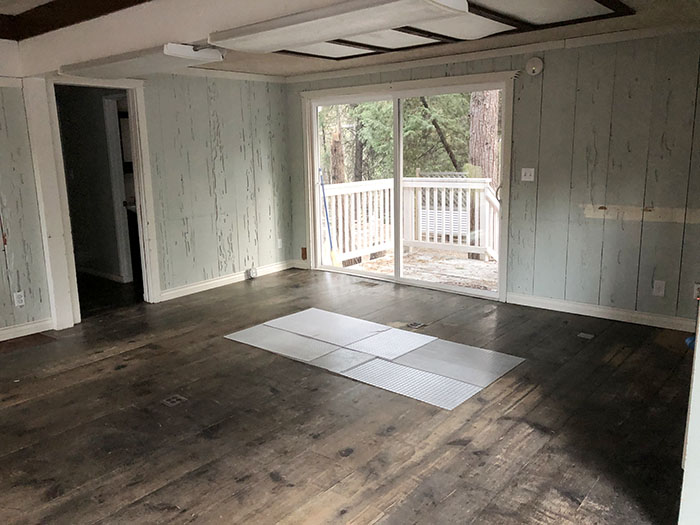
NOTE: the panels on the floor were to give me an idea of where my desk would sit and how much space it was going to take up.
After…ish
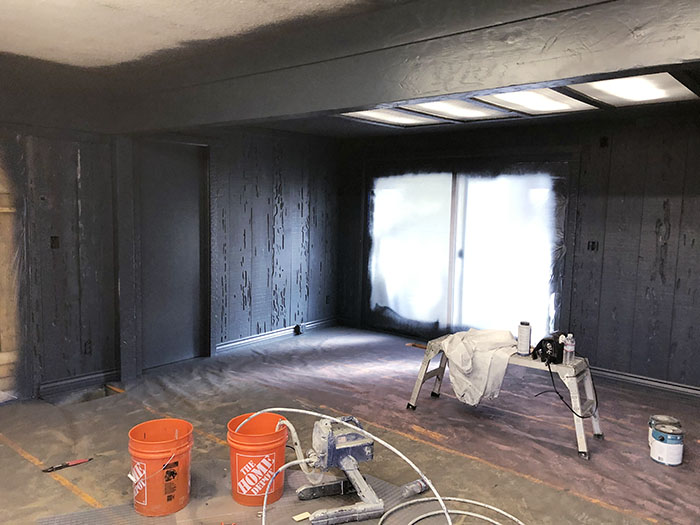
Ultimately I went with Behr paint color ‘Midnight Blue’ which turned out exactly how I wanted it to and looks nothing like the color they show on their site (fyi) but it does look pretty similar to the swatch for it below.
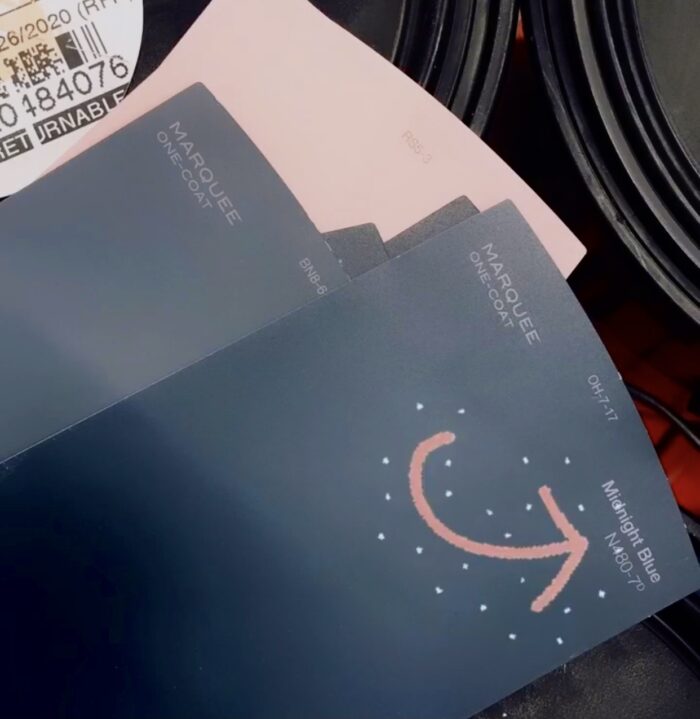
I was looking for an almost navy blue washed silk, does that make sense? This Helmut Lang silk romper I wore over ten years ago right here on my blog 🙂 kept popping into my mind for the perfect color!
In certain light it reads dark grey and in others it reads navy blue, but not TOO BLUE and it’s DARK and in every photo it basically looks different, so there’s that. Anyway, this was the perfect color for the exact look I was going for and why I wanted to keep the floors light as well. I was really a bit scared to go dark everywhere but am so glad I took the risk. I also knew that I’d be hanging my peachy pink curtains so that would brighten up certain areas as well.
In the back area (my project room, closet, hallway and bathroom) I wanted a much brighter wall so Chad gave everything a crisp white coat of paint, including the ceilings, and then I painted the hallway in light dove grey so the contrast from the front dark walls into this area wasn’t so severe.
Project Room…
Before…ish
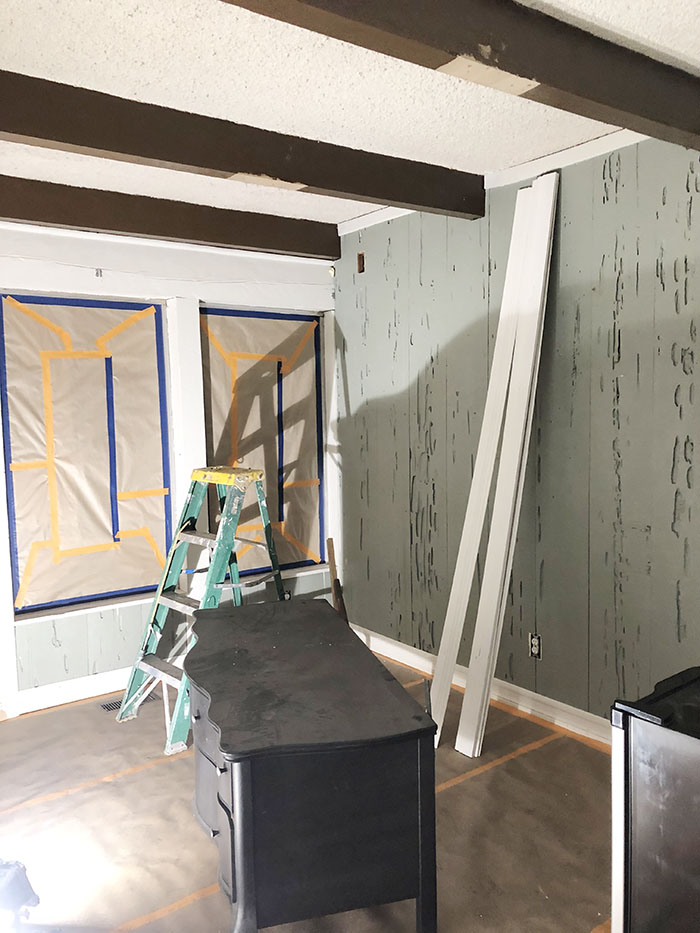
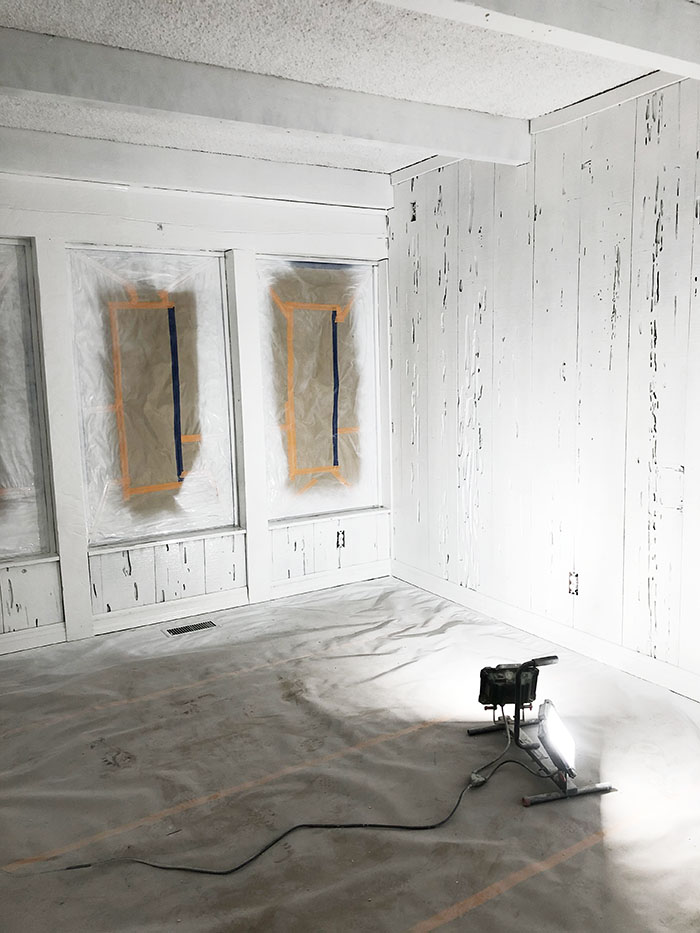
Obviously when you paint with a sprayer instead of brushes and rollers, you have a TON of prep work to do, which is very time consuming (and annoying) but worth it because the spray gets every nook and cranny and is necessary for textured walls and ceilings like these.
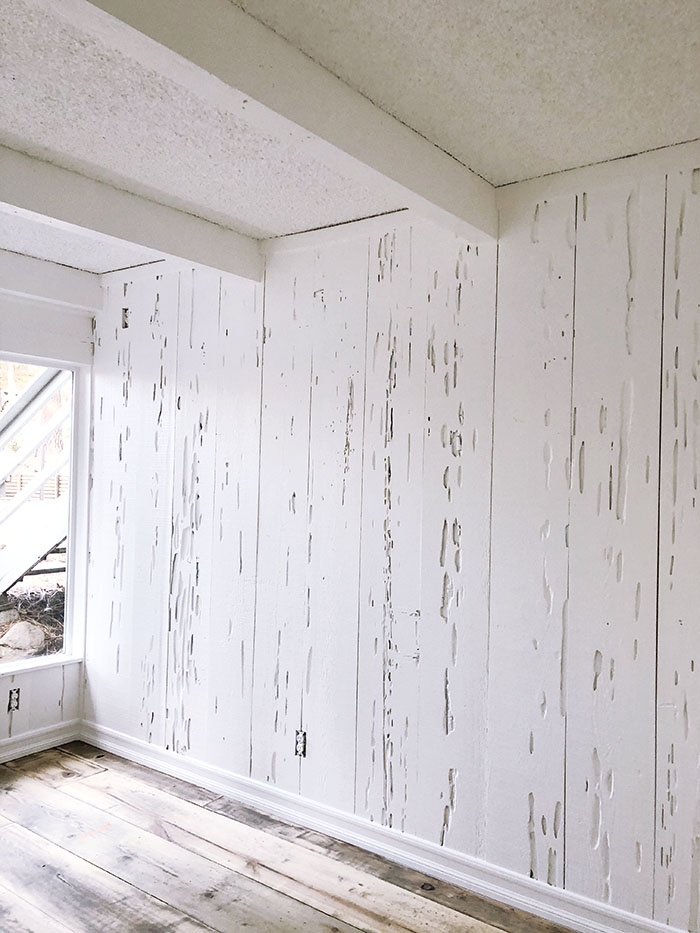
My project room will have all dark furniture so I wanted the walls white to get a nice contrast and also to create nice lighting for working.
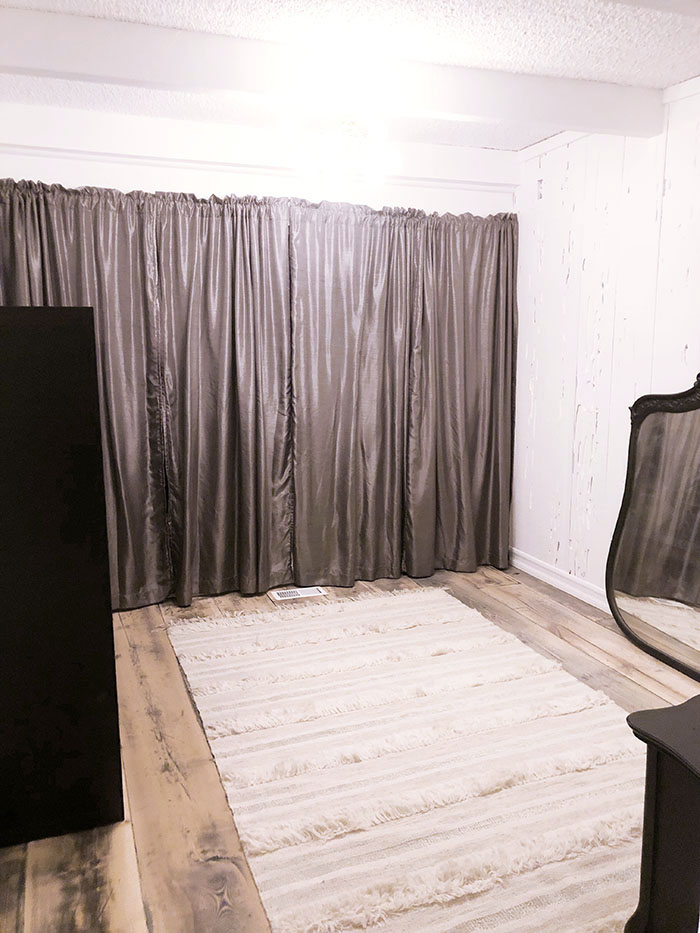
These silky grey curtains came with the space, though they read a little purple sometimes, but I don’t mind them so I’m keeping them for now.
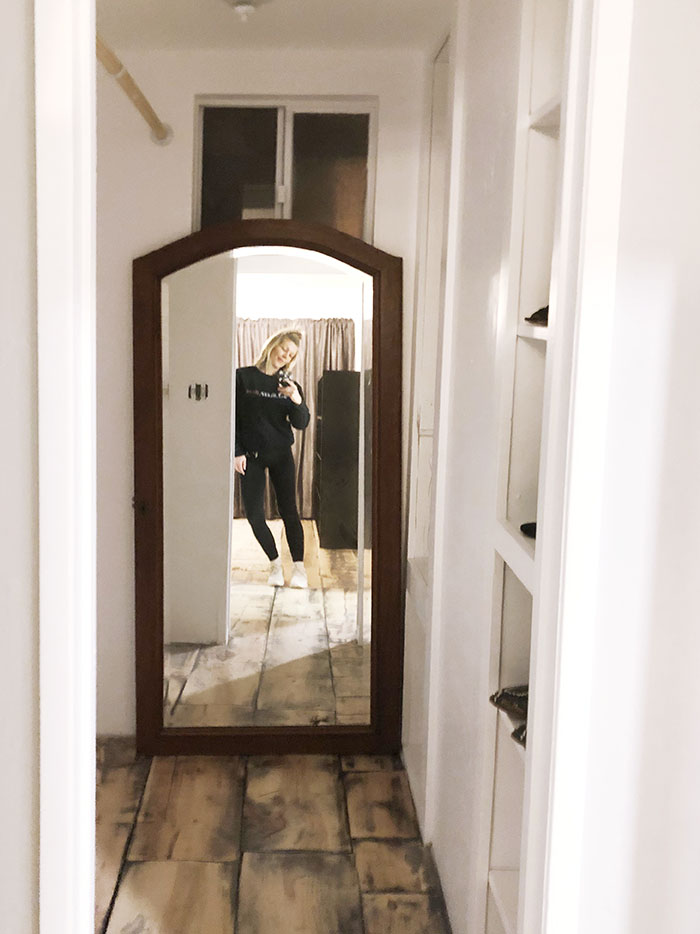
Since I have a storage unit full of stuff, I won’t be buying too many new items, which makes me happy actually. I don’t like keeping a storage unit so this will clear much of it out. My mom and stepdad spotted this gorgeous mirror and chest at a yard sale and scored it for free for me. I just replaced the old knobs with agate pulls (which you can see on my Insta-Reeels) and Chad is going to fix the mirror to sit atop of it and it will store extra fabrics and DIY supplies. I also have an old Expedit for the rest of my DIY storage needs, I just need to figure out a work table and then move everything in and organize my supplies.
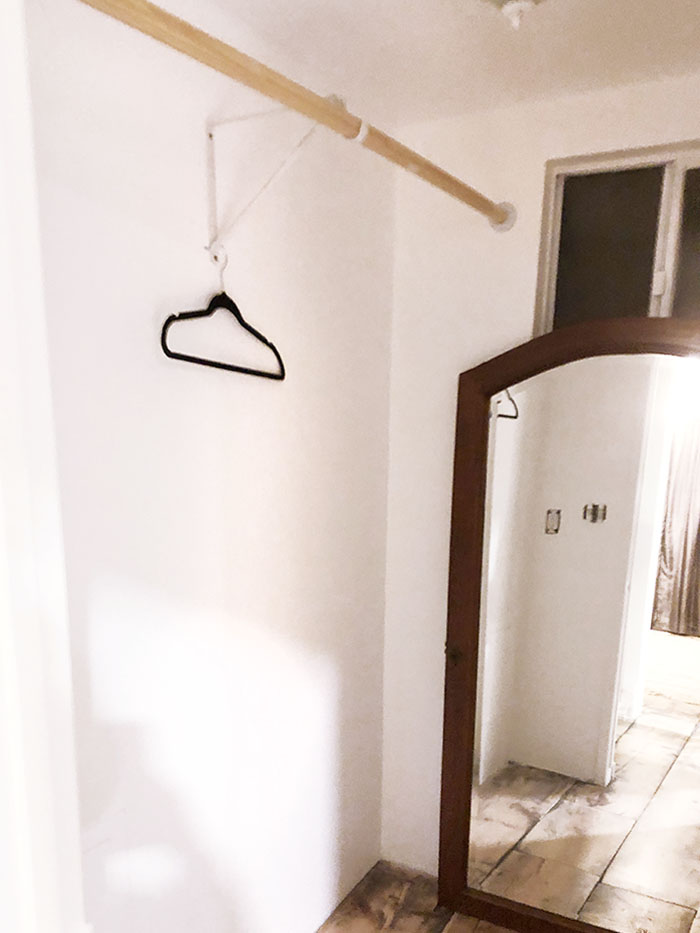
Closet…
Because this space was once used as a hair salon, there was a little room off of the hallway with a sink and counter and a few cupboards, which was just wasted space, in my opinion, so I turned it into a closet.
This was another project that came to mind during renovation and I’m happy we did it because now I have extra space for mostly all the stuff I want to sell and haven’t gotten around to it yet.
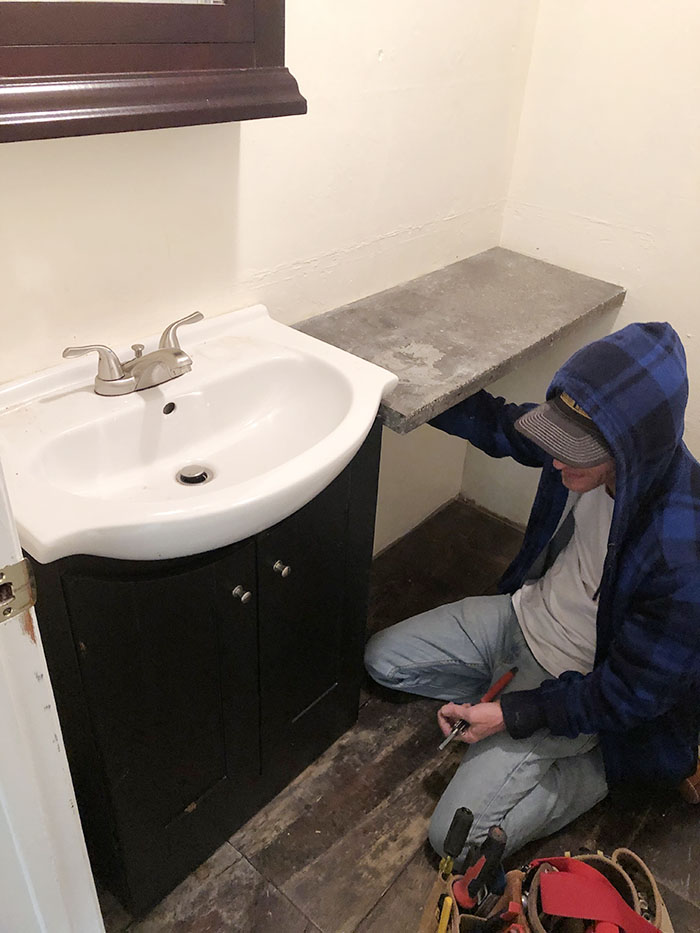
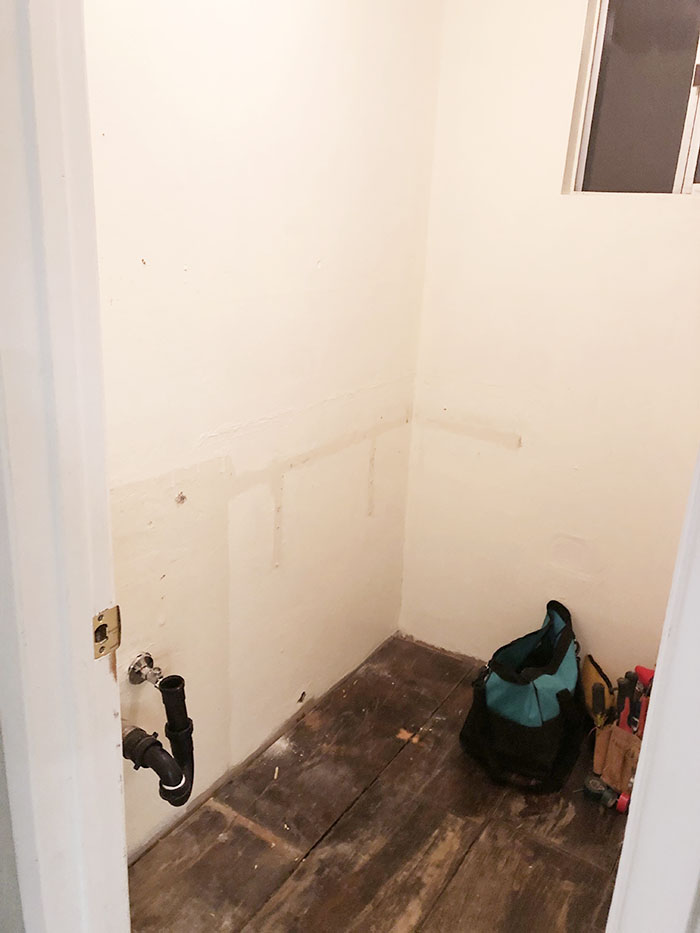
Chad removed the sink and counter and plumbing to create the space. I also had him remove the doors on the little cabinets to create open shelving, since the room is so tiny. He installed a closet rod and will probably add a shelf above it and one below, close to the floor for extra storage.
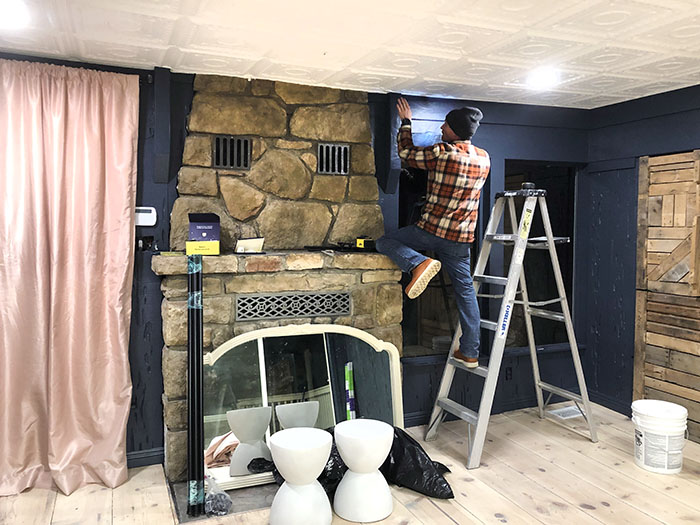
Let’s move on to lighting…
Lighting… and the ceiling
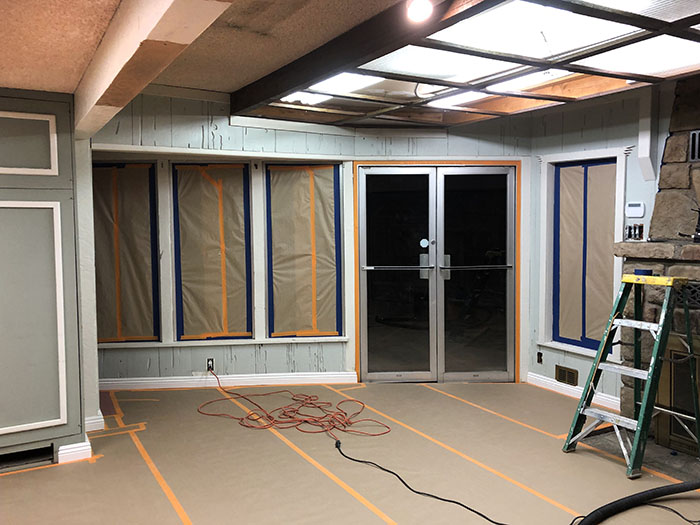
The lights in this space were my biggest issue and the first thing I asked to change. They were not only outdated and not up to code, they were just not good, lol.
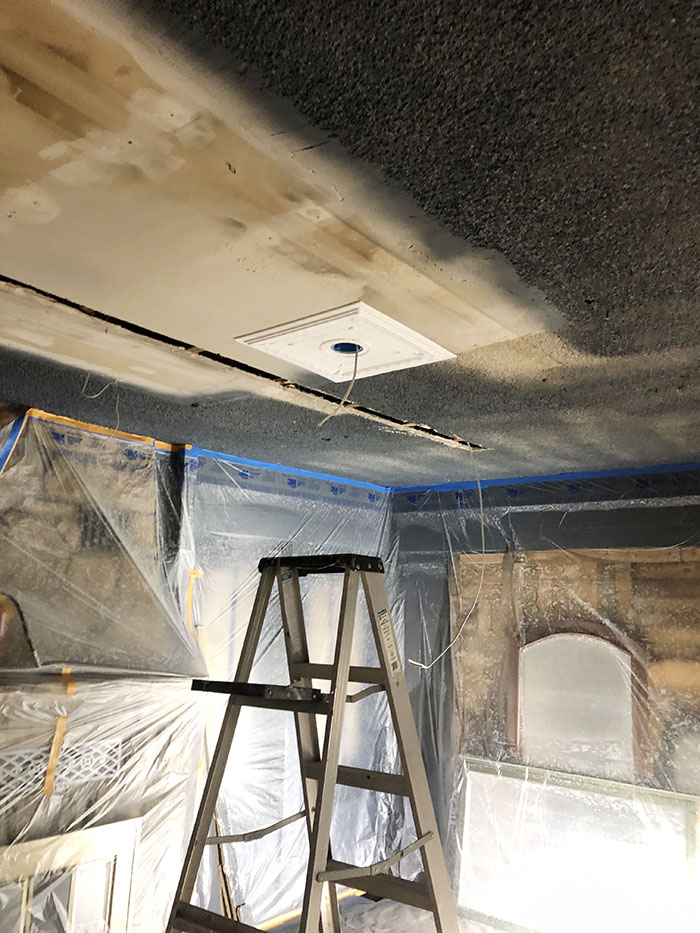
This is what it looked like right as you walked in… a combination of recessed fluorescent lighting on the right side, a drop down box containing more flourescent lighting on the left side and MORE and even uglier fluorescent lighting fixtures running down the center beam flanked by outdated track lights.
Above was the view from the opposite side and

And this is what it looked like when we removed the panels. Yuck.
So I asked Chad if we could remove it all. And so he did.

Removing the drop down box revealed the patchwork ceiling which was partially covered in popcorn texture and partially smooth. It was a mess. The electrical was also pretty janky. Because I didn’t want to get into full demolition and pull down the popcorn, I wanted a solution to cover it all up and make it feel taller. I found ceiling tiles and took the risk. I went with a pretty ornate design because I wanted to keep with the Old World Meets Contemporary vision I had in mind and I think it worked.
Chad removed the outdated electrical and installed 4 can lights and a center outlet for a pendant, which hasn’t arrived yet. He then installed the tiles, one by one (though I helped by applying the glue 😉 …
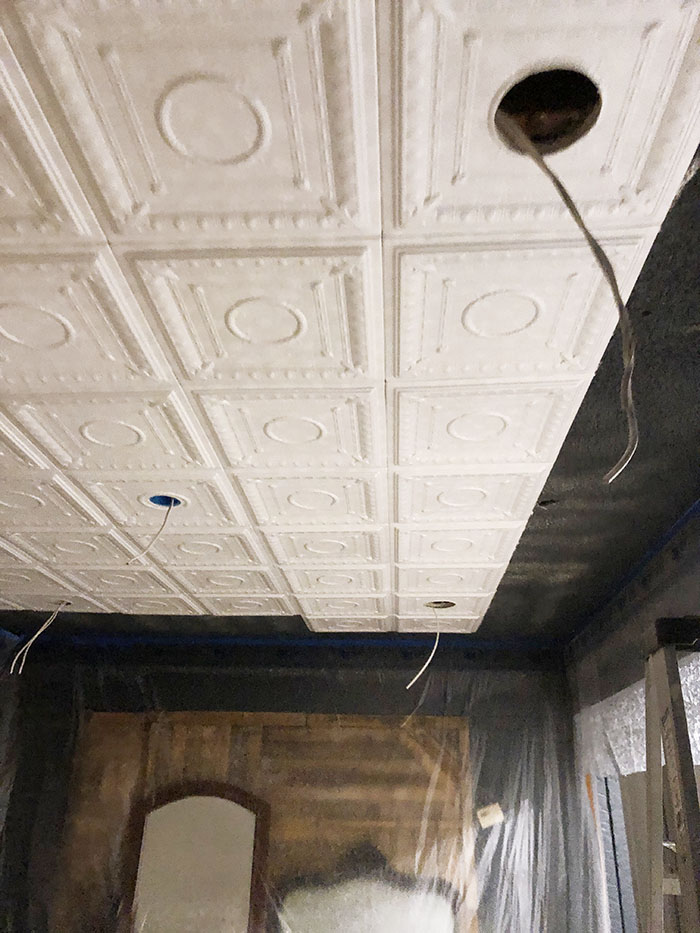
I’ll share an entire post on the installation with all the product info, etc., once I can decorate and get a great “after” shot of the area, but for now, here’s what it looks like.
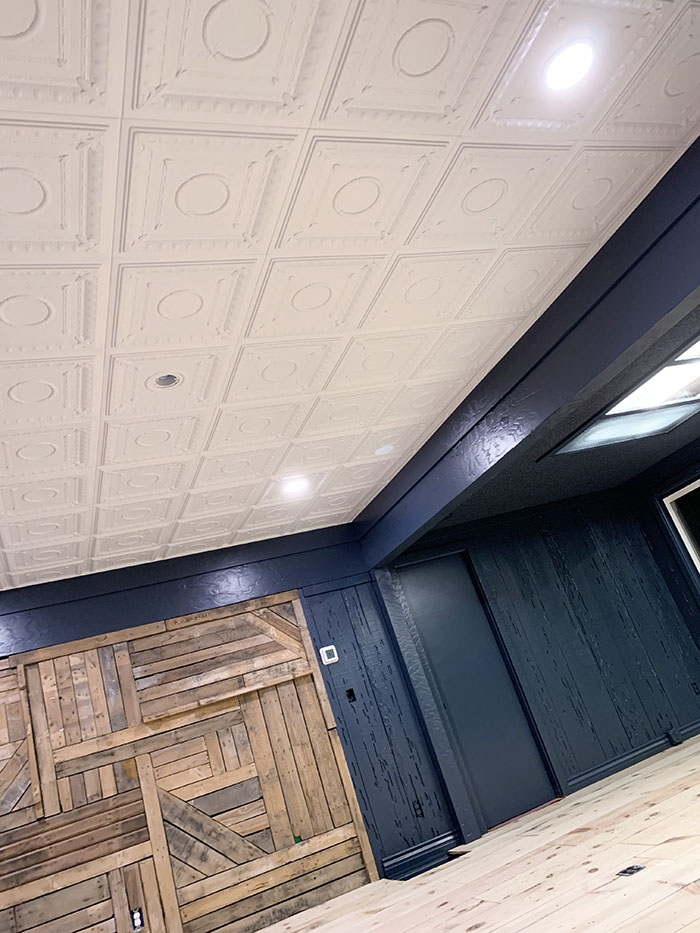
I’m super happy with the way the tiles turned out. They were not only a solution to the ugly ceiling problem, they added insulation, created a luxe feel and gave me that “old world” touch I wanted. They also made the ceiling look higher and are a great contrast to the dark walls.
The other side…
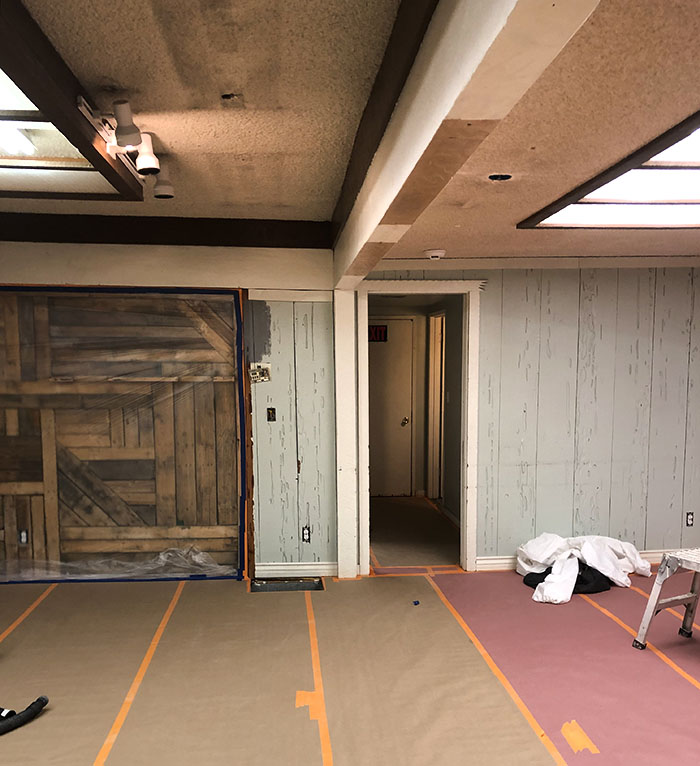
To the right, the ceiling is lower and the boxed fluorescent lights are recessed. I’m leaving them because I didn’t want to demo the entire ceiling.
I decided to paint this side of the ceiling the same as the walls for a few reasons but mostly, they were ugly and stained and I think this popcorn texture looks a lot cooler when it’s painted the same color as the walls and doesn’t seem to read DATED POPCORN CEILING as much as it does when it’s a dingy white. So there’s that.
We’re swapping the lights for LED and I’m planning on doing a fun DIY panel to cover the spaces in between.
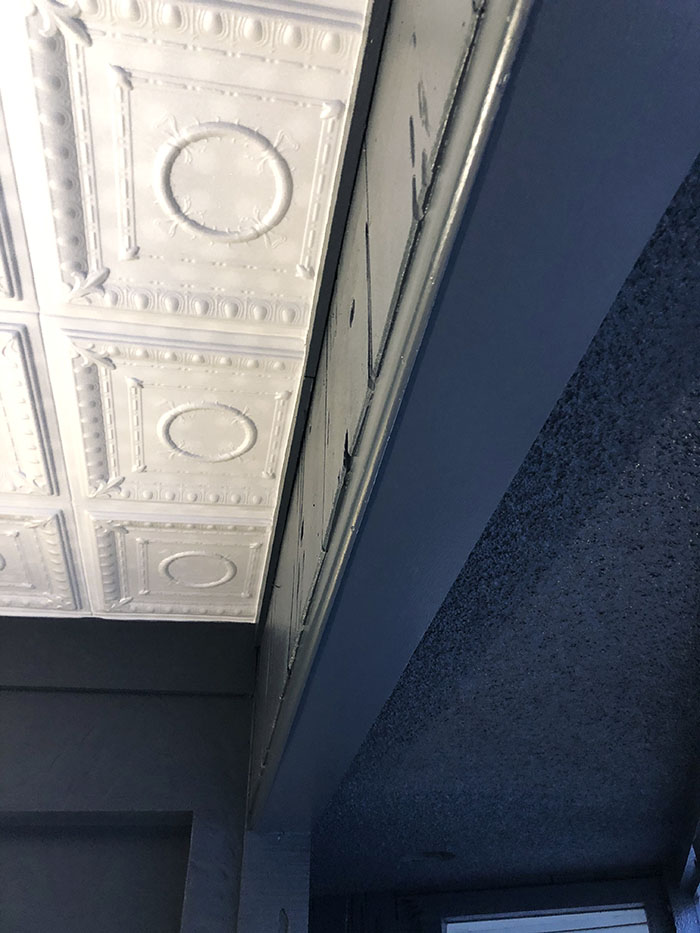
Here’s a closer look at the two ceilings and the color contrast. NOTE: This was also before we painted the ceiling tiles white so you can see the glue spots through.
Shelving and cabinet storage area…
Before…
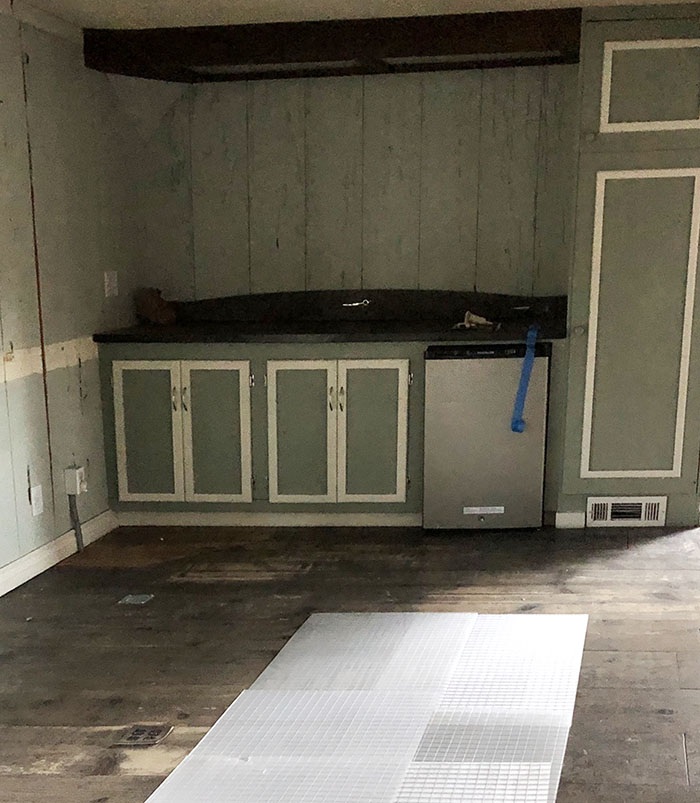
Since my desk will be nearby, this area will be used for general office storage.
During…
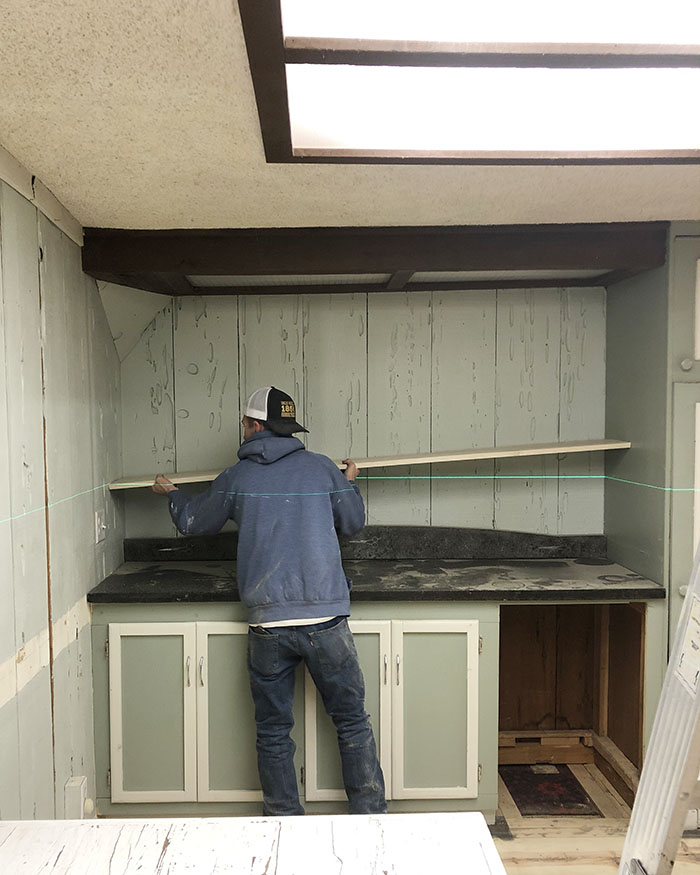
The cabinet and counter area needed a little help so I had Chad add a few shelves so I could arrange books and style some decor up there and continued the Midnight Blue paint over everything.
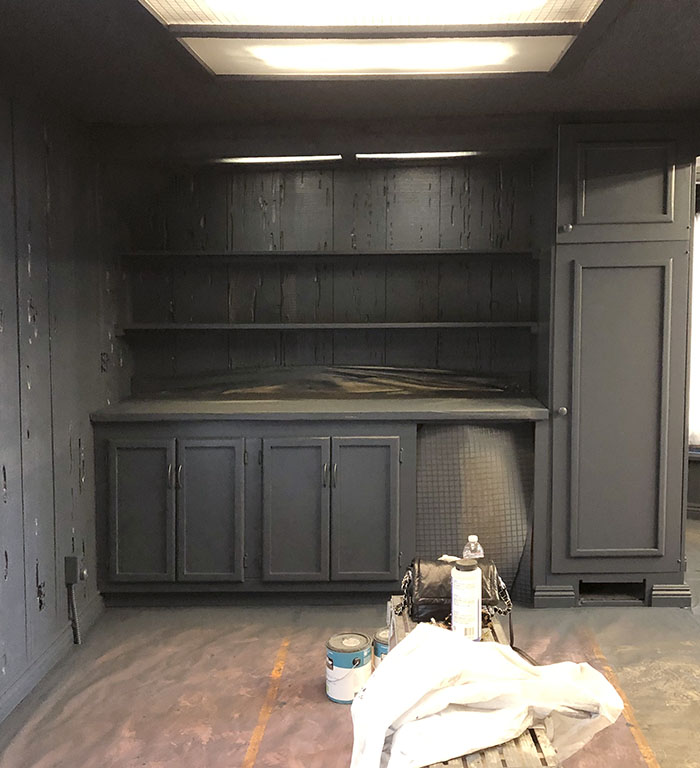
I found my old handles from an ikea dresser hack in my very VERY old home office (which I still love, even though it’s small) and added them to the doors.
You can see more on my Instagram Reels
Here’s what it looks like now…

And I’m in love!
Anyway, that’s it for now. We started refinishing my desk this weekend and moved some furniture in and now I can really pull it all together and GET TO WORK!
Happy Monday Lovecats!
* Find all my New A-Frame Office posts here
* Where I’ve been working as of late
* Find my Lake House Home Office posts here
* Find my Valley Home Office here
* Find my old old OLD home office here, the place where I first started blogging