

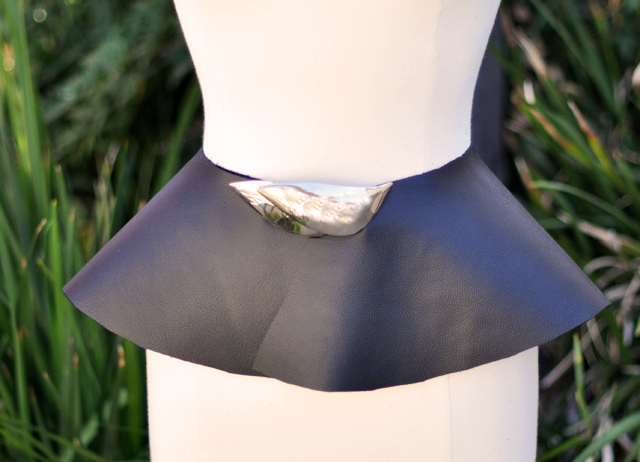
I can’t tell you how long I’ve been wanting to make myself a leather peplum belt. I think it’s been since the beginning of the year… and I finally have the time to get creative with some new DIYs, so I whipped one up the other day in about 30 minutes. I had plans for a different buckle entirely but when I spotting this removable abstract leaf clasp hanging in my closet, I thought it would add the perfect 80’s touch & paired it with an equally 80’s mini dress. Since this buckle is removable, I can alter the look by simply switching it out for something else, giving the peplum a more ornate or more minimal feel {or simply by wearing the buckle in the back}.
psst! Check out my Peplum T-shirt DIY, it’s easy too!
Here’s What You’ll Need…
* Leather {find it at Tandy Leather}
* Scissors or blade
* Measuring tape
* White crayon or pencil
* Belt Buckle or self-adhesive velcro

* Fold your leather in half with the back or suede side up & with your white crayon or pencil, begin drawing your peplum shape. I did it free-hand, but if you have a ruffled blouse, a large feather trim or belt you can use as a pattern, do so. Measure your waist and draw a half circle equalling half of the circumference. TIP: start with it larger so you can trim it down… If you’re using a belt buckle, measure it, and draw out an extra few inches on each end. If you have a large enough hide of leather {or fabric} you can cut this out in one piece.

* Hold your leather firmly in place and carefully cut along the lines. I work better with scissors than a blade & scissors will cut through a surprisingly thick textile.

* It should look something like this. If you’d rather have straight edges than angled, cut them straight. If you’d rather they not overlap, cut them back.

* I used an old looping belt buckle from an a vintage belt. **You can use a regular buckle if you have the findings and settings or simply use a thick strip of industrial strength velcro.

* With this buckle, I simply slid the leather through, looped it over and back through.

Voila!


Have Fun!
Find all my DIYs here!


