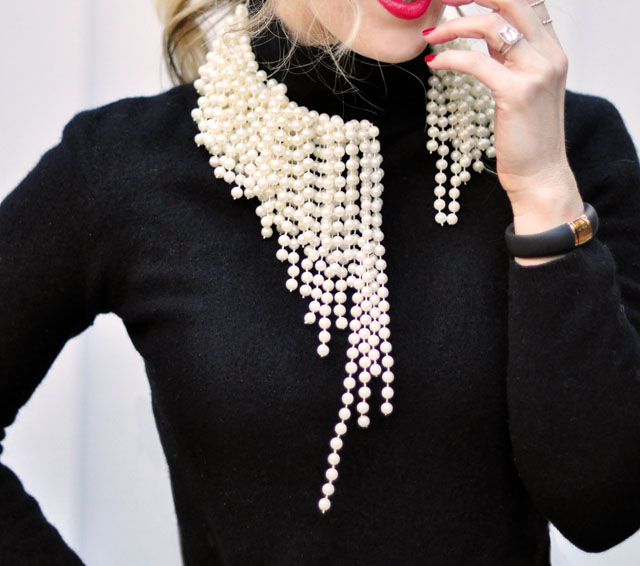
Flipping through this month’s Marie Claire magazine, I spotted this fabulously asymmetrical blue bulky beaded necklace {pg. 112} and was immediately inspired to make one of my own. These dripping beaded statement necklaces called Diorganic Leafy Waterfalls were shown on the Dior Spring/Summer 2014 Runway, but it wasn’t until I saw one lying flat in the magazine that I knew I could DIY one using a headband as a base!
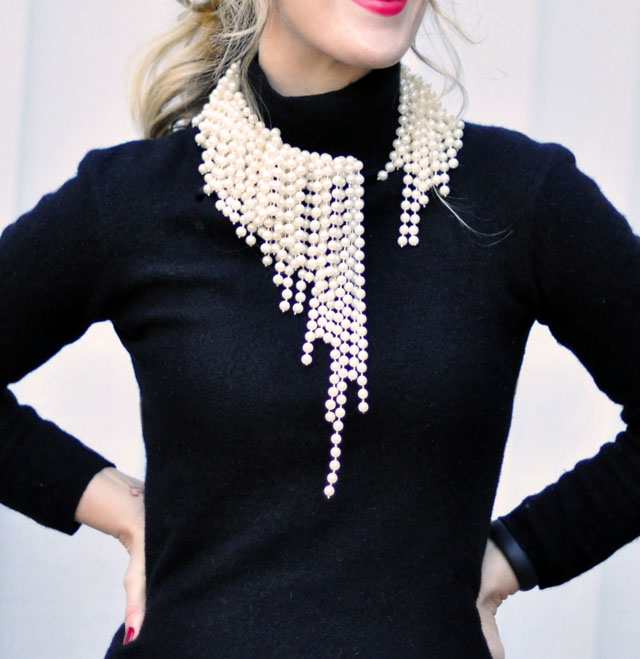
I used pearls because it’s what I had the most of lying around, {and pearls always remind me of Chanel and Madonna, so there’s always love there} but since they’re a bit larger than the beads in the inspiration pieces, it came out even bulkier… though I love it, I’d love to create a few of them in different colors and sizes because they’re just so fun. It’s not a particularly difficult DIY, but it is time consuming and requires a bit of patience. Alternately, you could use glue on a plastic headband, but I don’t think it will have the staying power that a stitch does. {and you know I despise glue ;}
NOTE: This could also be a fun use of all those shimmery Mardi Gras necklaces to create this year’s Mardi Gras costume!
My Inspiration…

* Top photo is from my Marie Claire mag {pg 112}, shot on my table, with snap photos from the Dior S/S 2014 Runway collection below, collage by me.
And my version…

Here’s What You’ll Need…
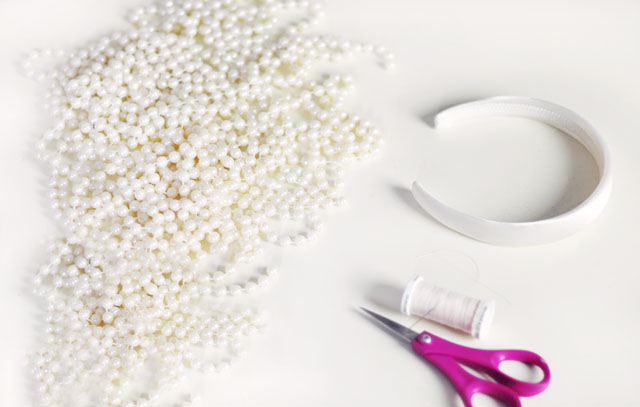
* Your choice of strung beads. {you’re going to need A LOT, so opt for plastic because they’re lighter in weight than glass}
* Fabric covered headband, preferably to match the color of your beads. I found mine in the wedding section of my local fabric/craft store
* Needle/Thread/Scissors
* Optional: satin, faux fur, or something to line the inside of your band to hide the stitches + glue {I did NOT do this step, but if I were to sell it or offer it as a gift, I would do that last finishing touch}
Steps…
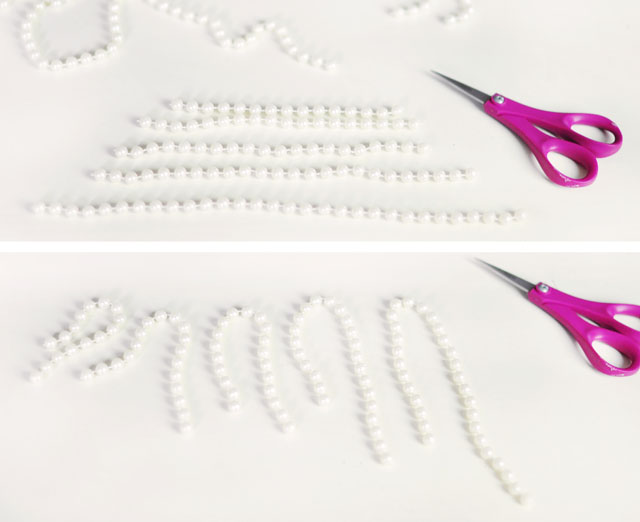
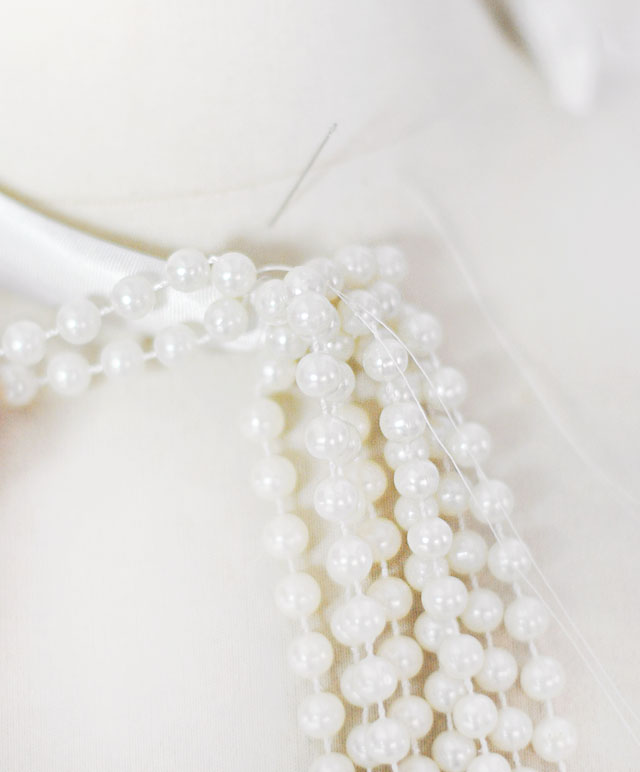
* Cut your pearl strands to have them ready… begin at the end, where your strands will be the longest, then gradually shorten them to achieve the easy gradated/layered effect.
* You will be essentially folding them in half, or with one side longer than the other, and hand-stitching each strand onto your headband. It’s better to start too long then cut away if you want to shorten them, just make sure you have enough bead strands to cover the entire band.
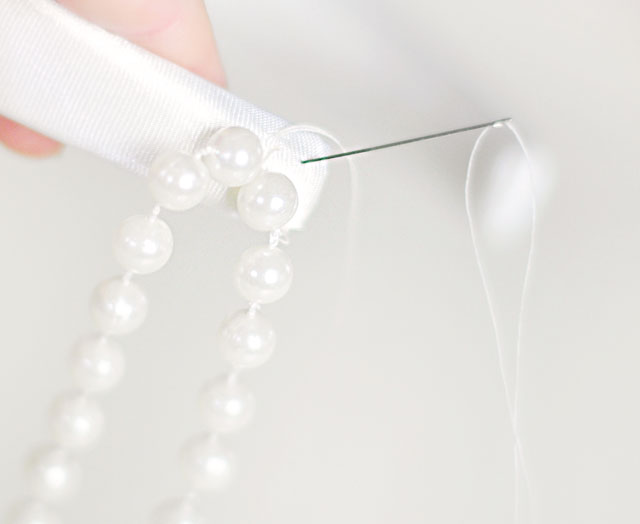
* Begin by threading your needle through the back of the headband to hide the knot, then come up through the top and stitch your pearl strand onto the headband. Stitch it down twice to keep it secure.
* Continue adding strands in varying lengths {on the top and bottom of the band} to create the bulk of the piece at the end.
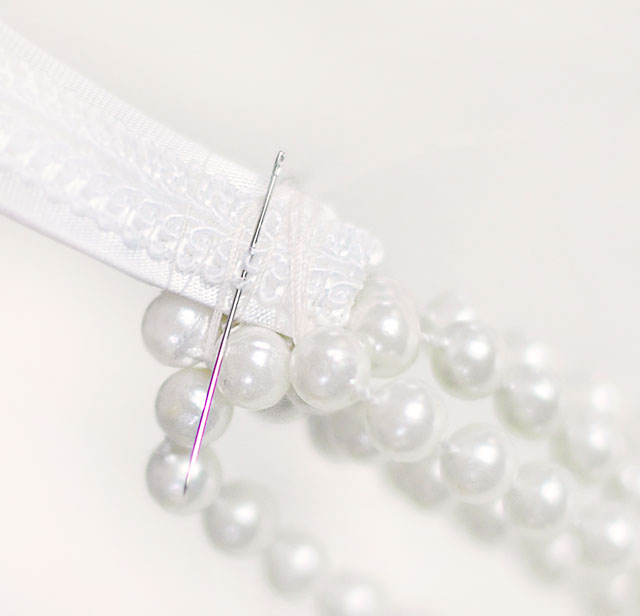
* To really secure them, in addition to sewing THROUGH the fabric on the front of your headband, wrap your thread around the band and secure it through the ribbon detail in the back.
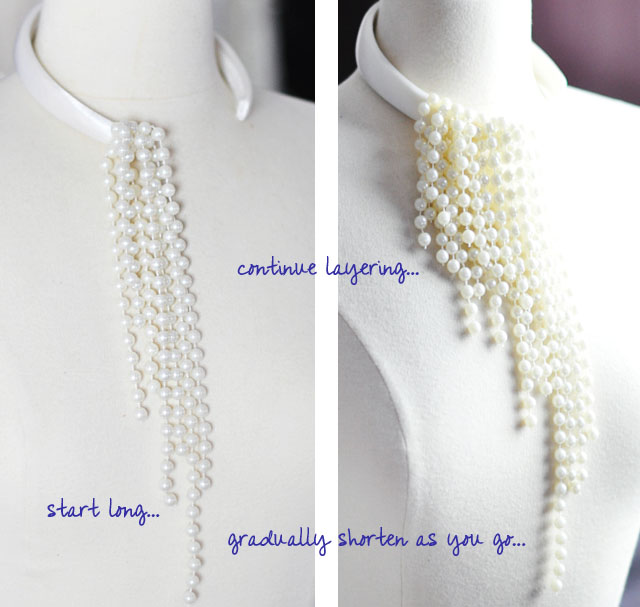
* And continue around the entire headband. I made the front edges longer than the rest, and one longer than the other, as in the inspiration piece, and consistently shorter in the back.

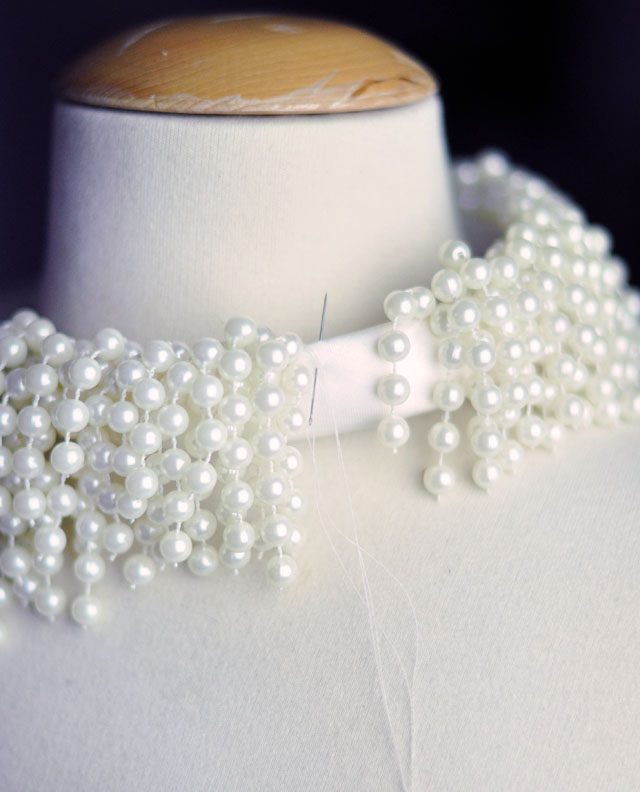

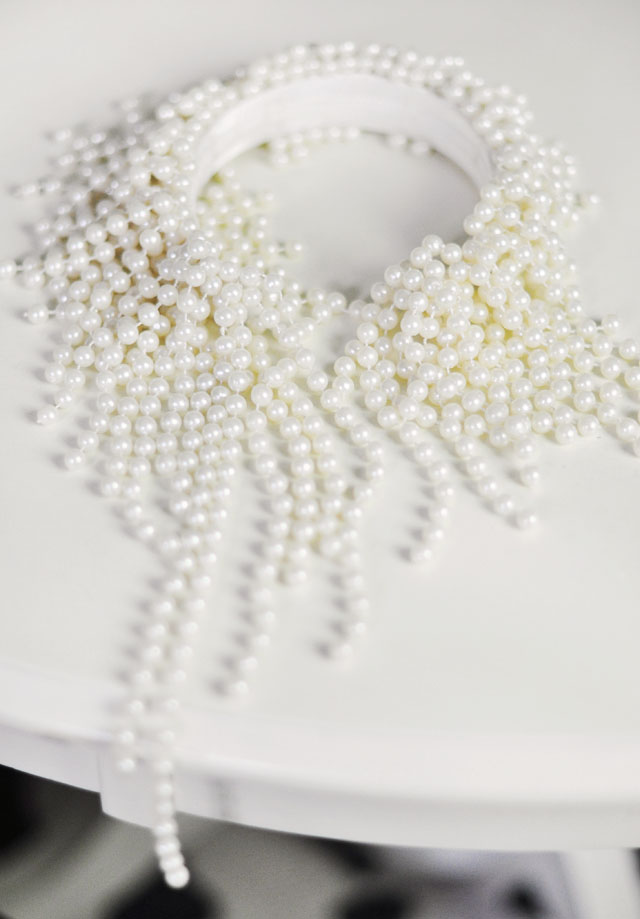
* The under side will look something like this…. again, you can easily finish {cover} this with a little glue and faux fur or any soft fabric… though you can’t see it at all when it’s around your neck.
And… Voila!


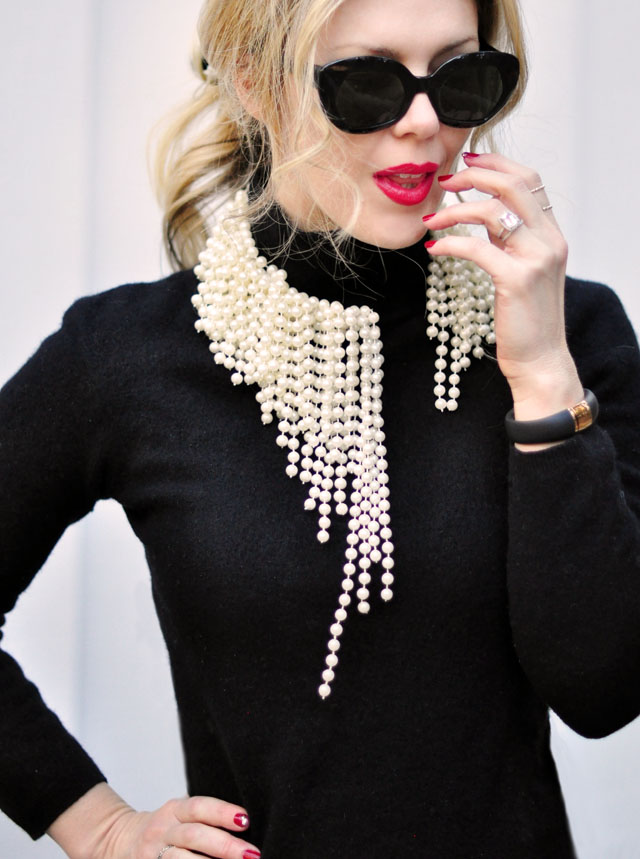
Have Fun!
*Find all my DIYs here