Okay, remember last week or so when I posted about this cute chunky knotted headband trend by Lele Sadoughi I was dying to try? Well, I was also DYING to figure out how to DIY one as well. I just could not figure out how they were able to create a seamless knot on top that also surrounded the headband. I showed a friend and he nailed the knot for me! Once I had the knot, the rest was simple!
I used my faux fur (yes, the same faux fur I’ve been using since I started DIYing on my blog back in 2009) because A. I love the color and texture and B. hand-stitching faux fur is really forgiving, so if you make a mistake, it’s usually totally hidden and C. I wanted it a bit thick and knew that if I used a thinner material, I’d have to also sew it first into a tube and stuff it a little and then use glue to adhere it to the headband. All of which you can choose to do… but you know I really don’t like using glue if I don’t have to, so the fur was the perfect solution.
YES, the fur made my knot in the center a little bit larger, but I LOVE how it turned out. I was told by two beautiful little girls that it looked like I was wearing a fur crown, so mission accomplished… Let’s get to it!
Here’s What You Need…
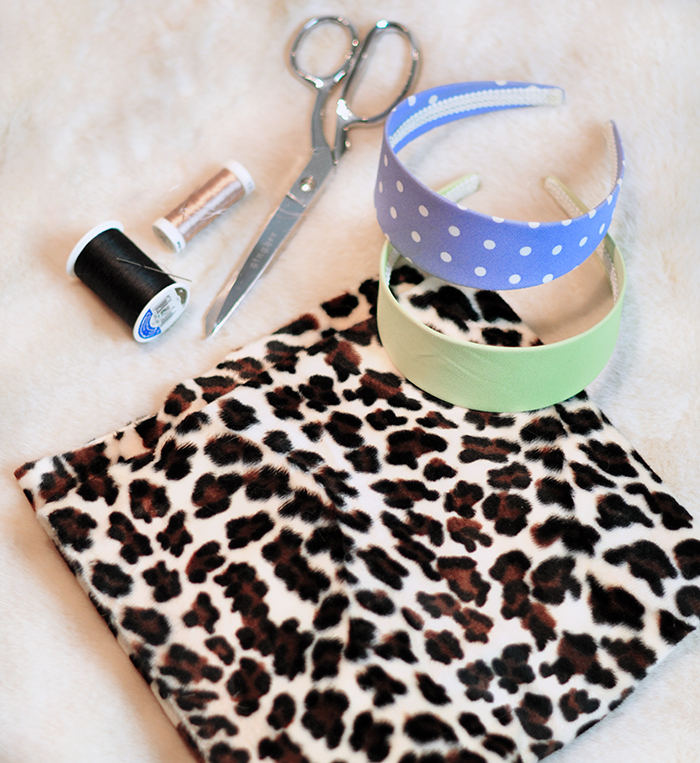
* Wide headband (covered in thin fabric like mine is helpful)
* Faux fur (medium pile/thickness – the leopard print shown is a little thin, but I think it would work almost as well. Maybe I’ll make a second one out of it just to see?)
* Scissors
* Matching Thread and Needle
I had all of my supplies so it was just a matter of D-I-Ying it.
Steps…
My headband is 2″ at the widest (top) and 1″ down near the ends. These measurements are based on my sized headband. If you’re using a different sized headband, lay it on your fabric and cut enough so that it can wrap around the top and under each sides easily.
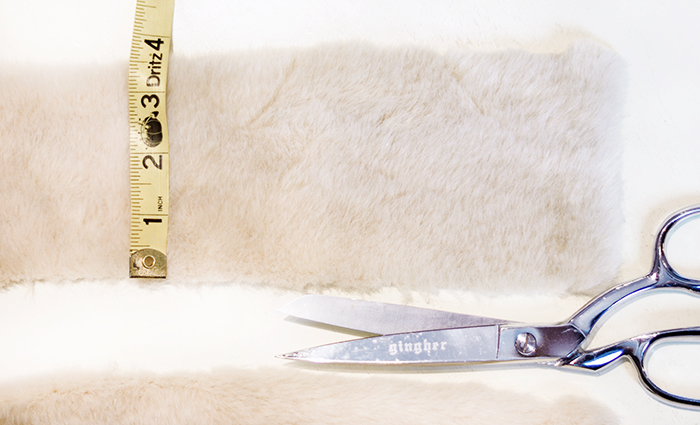
Cut your faux fur at 3-4″ wide and…
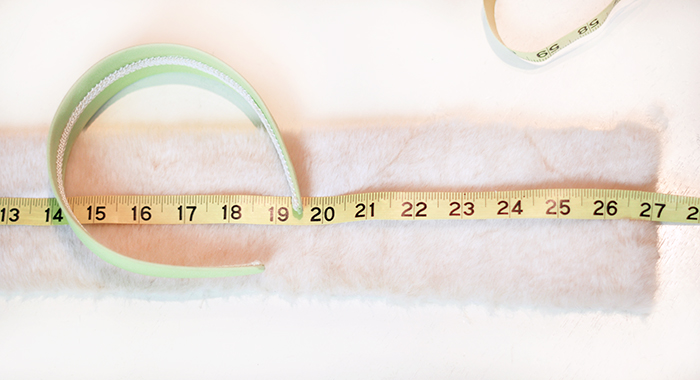
…about 26-27″ long.
(It’s more than you need, but I always start with more and cut away than risk not having enough. Since I’making it as I go and don’t have a pattern, it’s the only way to prevent having to start over again if you don’t have enough)
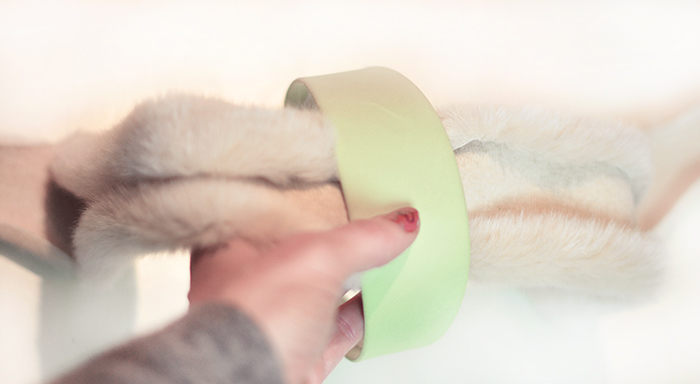
Grab your headband and center your fur beneath it…
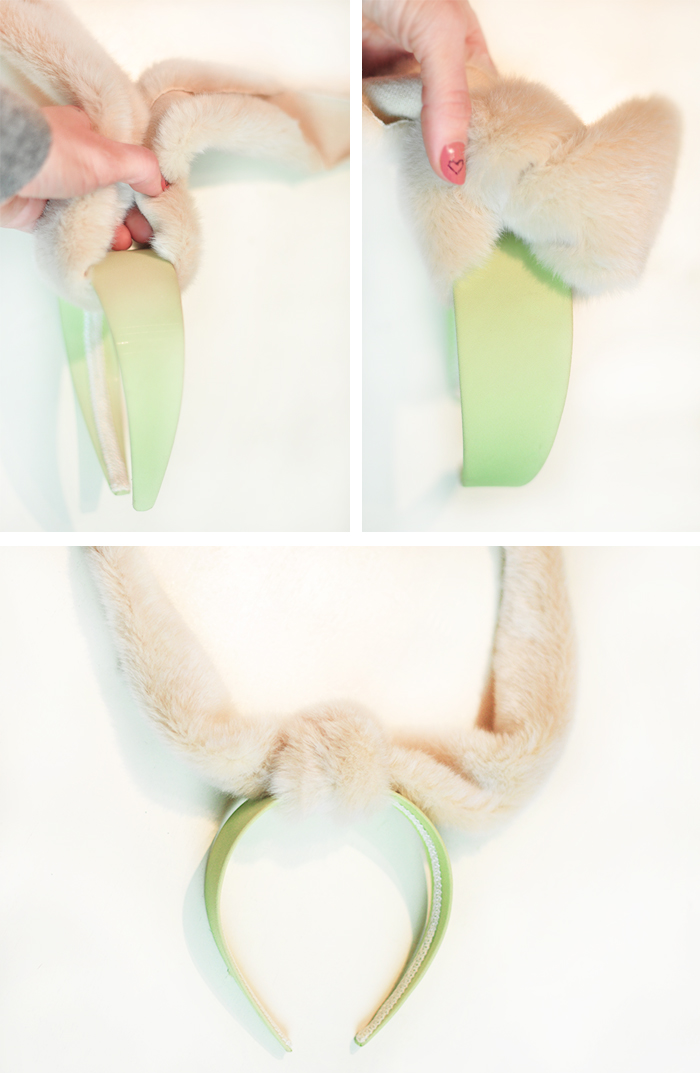
Bring it up around the edges and tie a knot on the top/center.
Yes, it’s that simple!
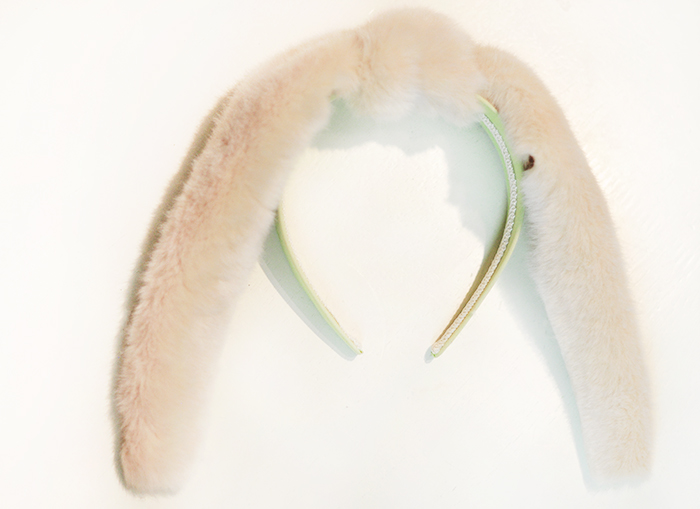
It will look like bunny ears 🙂
Here’s where it gets a little tricky…
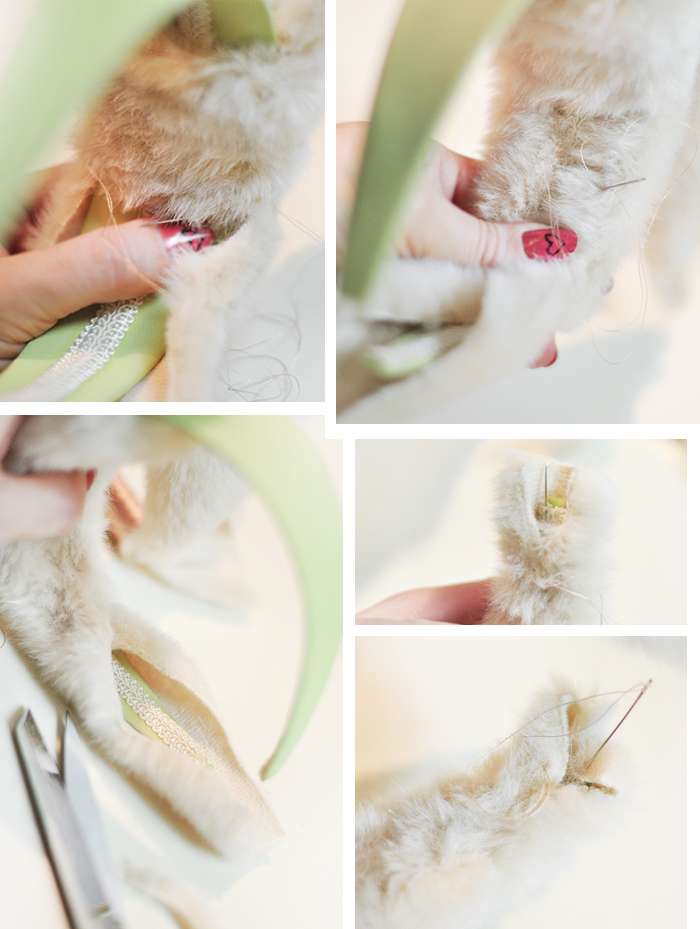
- Make sure your knot is secured in the top/center of your headband.
- Starting one side at a time, wrap the edges of your fur around the sides of your headband…
- And stitch them together!
NOTE: IF YOUR FUR IS OVERLAPPING ITSELF IN THE CENTER WHERE YOU’RE STITCHING, CUT SOME AWAY. You don’t want it TOO thick underneath or else it won’t fit on your head right.
- This is where the pre-fabricated headband helps a little – I was able to secure the fur not only to itself, but to the base of the headband for extra support.
- Continue stitching down… again, if you have overlapping fur, cut some away.
- Continue to the bottom. Cut away the excess, fold the end and side/ends of the fur over and stitch it down, concealing the thread and stitches beneath.
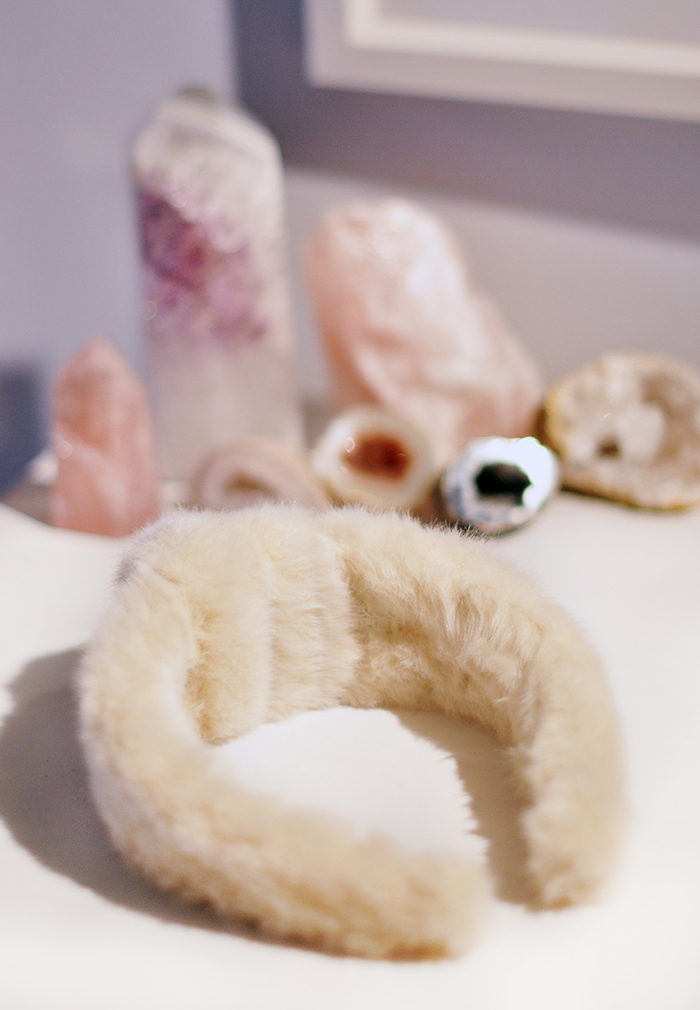
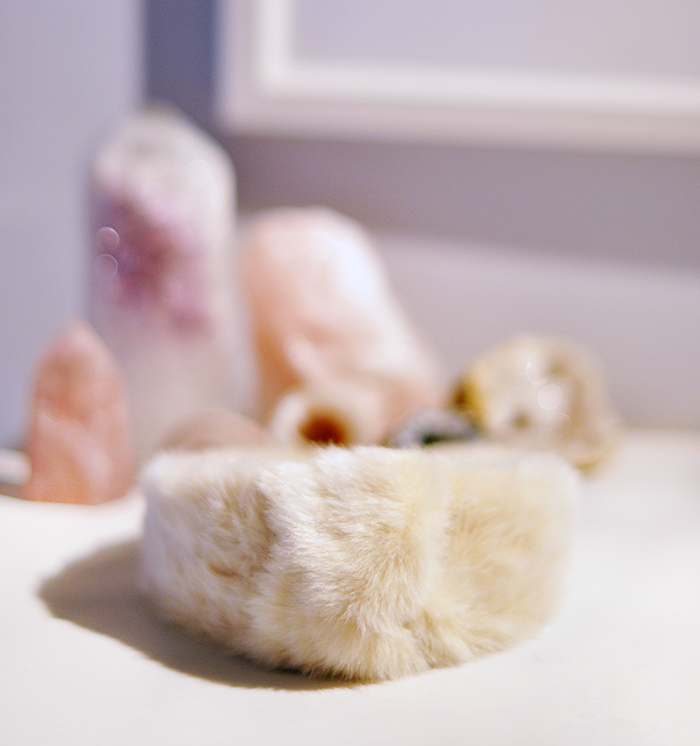
And… Voila!

Also Seen: My DIY Faux Fur Cuffs! Pull them on any coat or sweater or top and BOOM, a whole new look.

The fur is slightly hard to photograph against the snow, but in person you can see the knot a little better.


I honestly was a little on the fence with this chunky knotted headband trend, but I wanted to try it and I wanted to make one of my own and honestly, the faux fur is so fun and also actually keeps my head warm in the snow! I have to admit that I have worn it almost every day since I made it 🙂 I love it!
Have Fun!
* Find all my DIYs here
* Find all my Faux Fur DIYs here