When I was desperately searching every thrift shop in my area for an Elsa-esque dress and coming up empty handed, I finally drove down to Crestline {just 15 mins away} because I remembered a little dress shop I had passed a few times while antiquing there but had never stopped to check it out. It’s one of those cheapy shops {you randomly find GEMS in} with dresses on mannequins propped up outside the entrance and I thought they MUST to have something I could use.
And I was right! WOO!
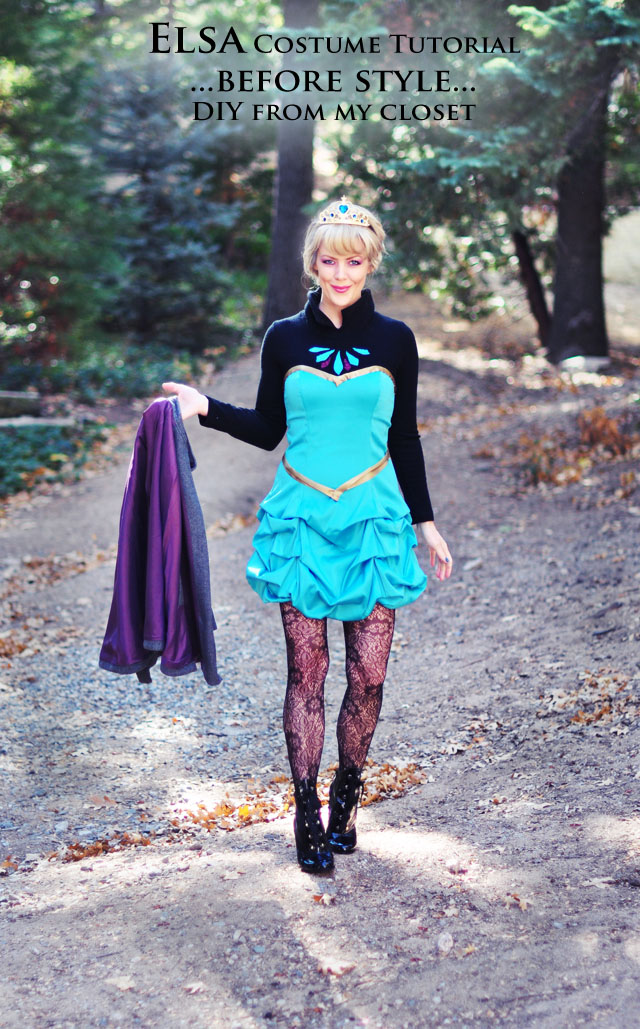
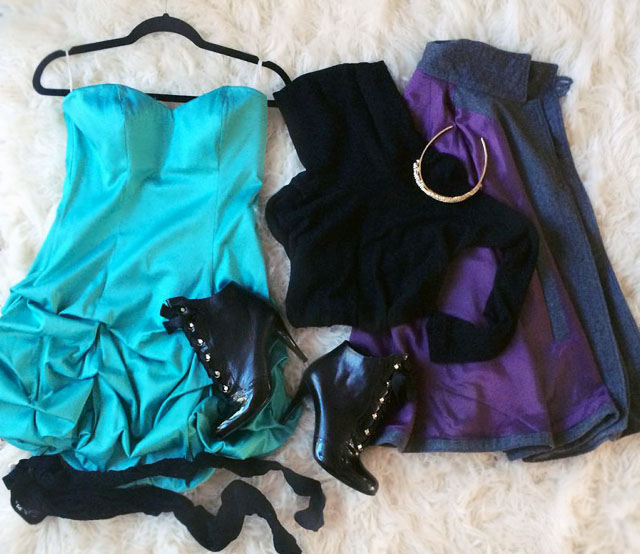
I first found this deep teal sweetheart bustled bubble dress {seen here} and thought I’d DIY it into a corset top and also purchased a cotton/poly maxi dress in the same color to go with it for my “after Letting It Go” Elsa costume. But while I was there I also found a two piece corset/bustier zip up top with a matching fitted skirt in a shimmer light blue that could work as well and since both were about $25 each, I bought all the options available.
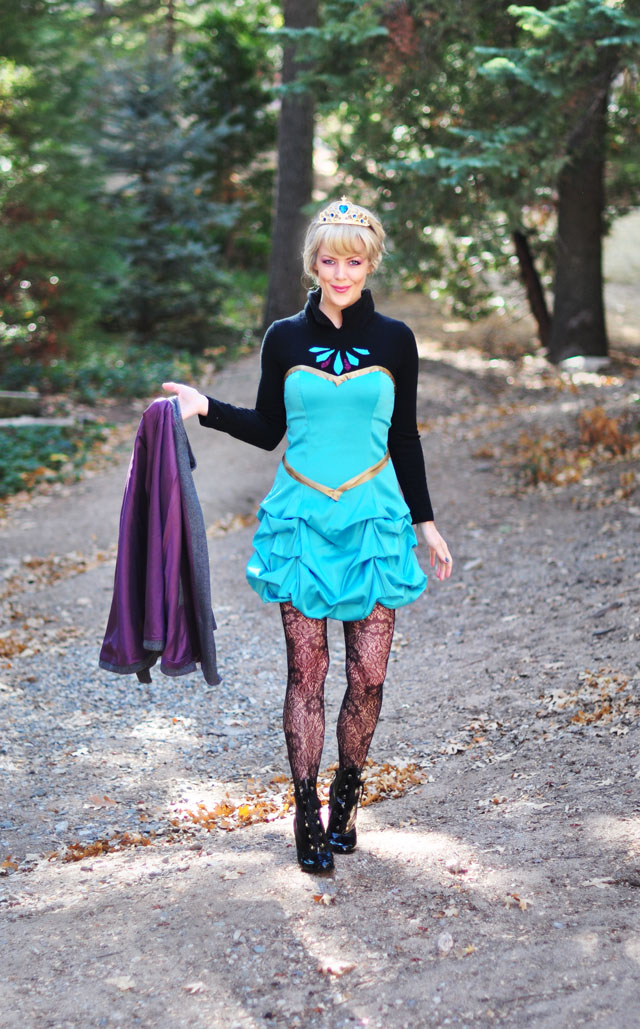
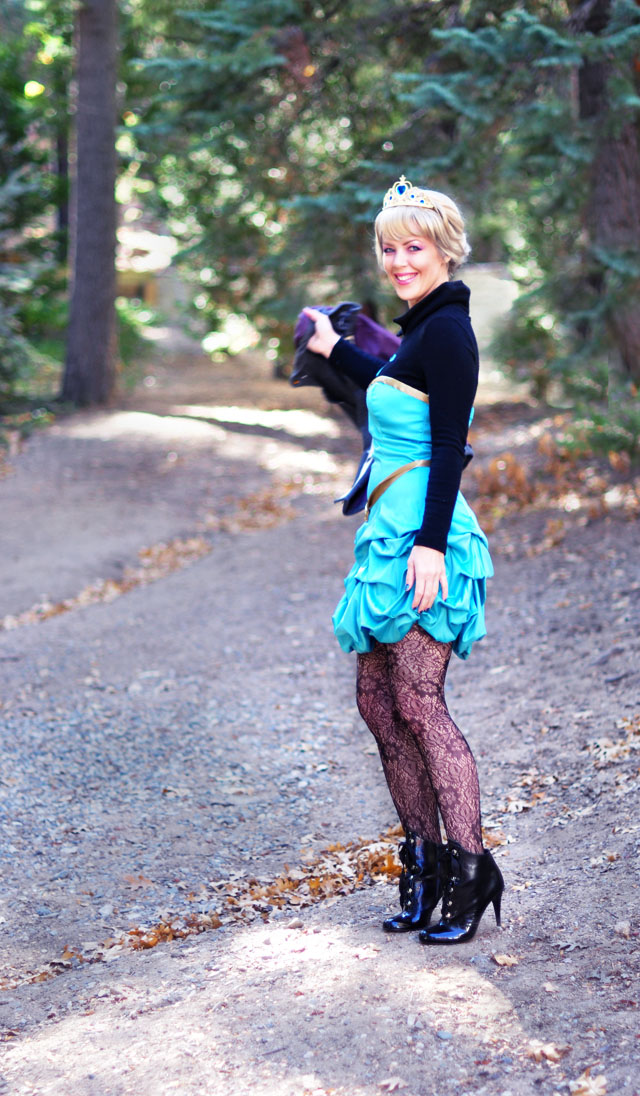
Once home, when I was showing the husband what I had found {because by this point, I had been searching for over a week for the right dress} he said that the color of this one {which is much darker and greener than I can even show in these photos} was better for her other/before look. Once I chose the other two-piece number for my alternate Elsa costume, I had this as a spare and thought I could easily throw together a less-than-authentic-but-still-super-cute-and-workable Elsa “before Letting It Go” costume DIY and started rummaging through my drawers for an old black turtleneck to use as well.
So this “before” Elsa look was an afterthought, but it really turned out so much cuter than I even imagined. For this costume, I paid $10 total {for the dress}. Everything else was already in my closet.
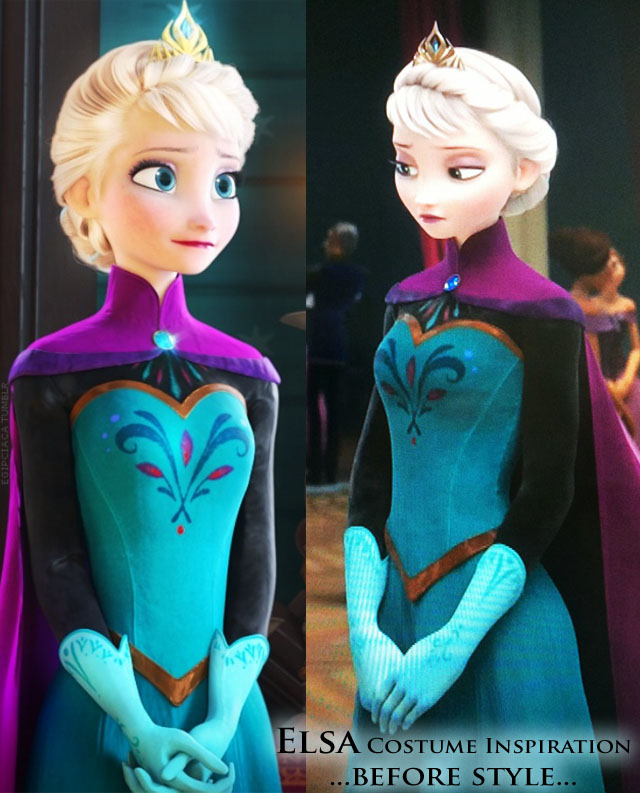
Elsa Costume Inspiration…
Follow these links if you’re looking for…
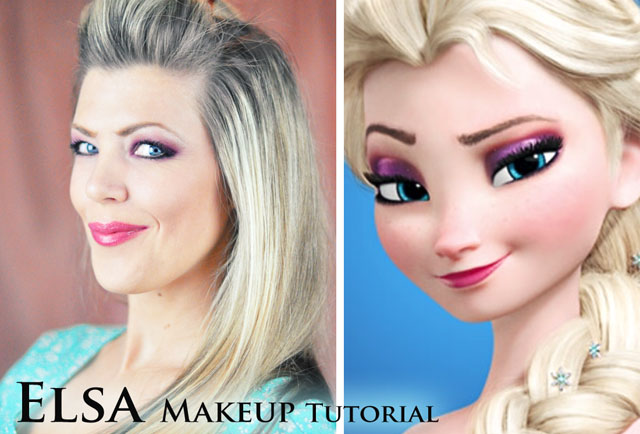
* Elsa Makeup Tutorial
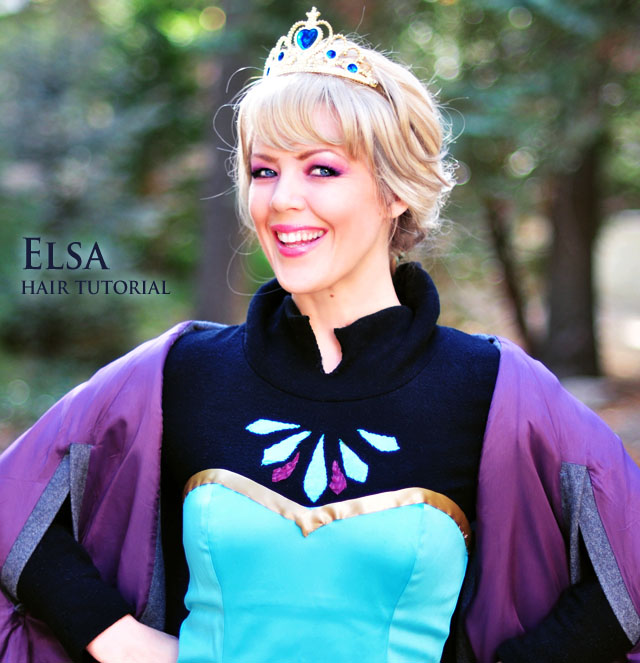
* Elsa Hair Tutorial ~ Twisted Bun & Bangs from this look
Here’s What I Used…
* Aqua/Green sweetheart bustle bubble dress $10
NOTE: You can opt to make Elsa’s dress from scratch if you know how to sew and like to sew. I hate sewing from scratch mostly because I don’t have patience for patterns, but I also like to create my DIYs for anyone who may not be able to sew, so everyone can have options to DIY themselves.
There are plenty of aqua/teal sweetheart dresses on Amazon {like this one, this one, and this one}, between $60-$160. I really wanted a challenge, but if you’re willing to spend $100+ on a pre-made Elsa costume, then $100 for her dress is nothing really for a unique DIY costume all your own {my preference, of course}.
* Old black turtleneck ~ THE only one I had available to use had a larger, almost cowl neck, but if you have a regular fitted jersey turtleneck, it will work a bit better than my thicker knitted version.
* Lace tights {seen here in outfit post with oxfords}
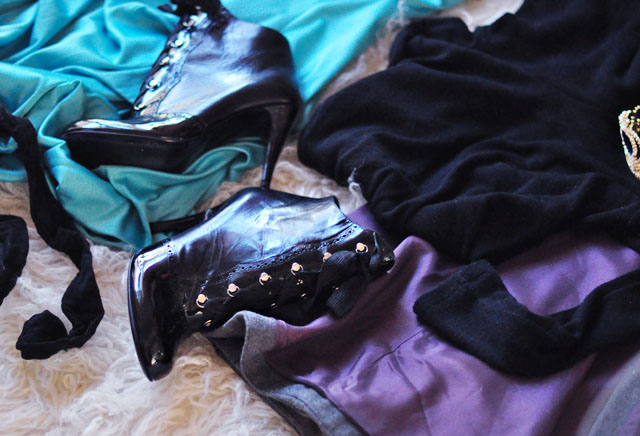
* Patent lace up boots by Jill Stuart – seen in a lookbook from 2008
* Random fabric and ribbons in Elsa colors {aqua, magenta, dark gold} or gems
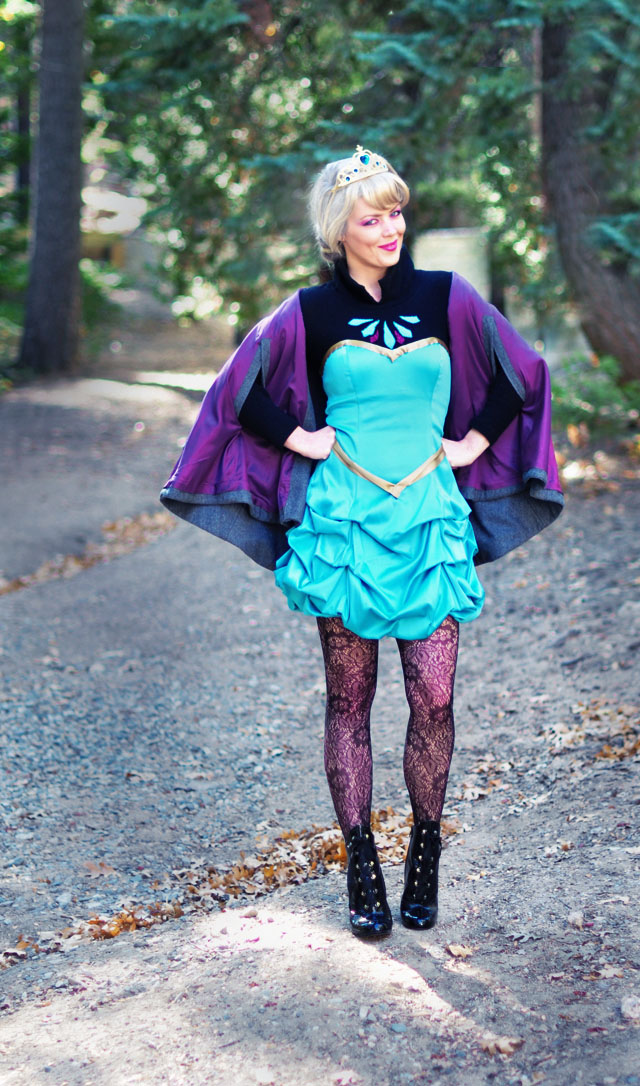
* Cape… My cape is actually gray wool {you can see it in this halloween outfit post and here in an outfit post} but the lining is the perfect Elsa magenta/purple. So I just flipped it over and removed the tag and it worked swimmingly.
* Gold tiara with gem {mine is not authentic – but the linked version is!}
NOTE: I did not create Elsa’s gloves because I ran out of time, but if you have white costume gloves, you can simply dye them aqua/teal to match and draw on the designs or not. I had the gloves but not the dye.
Also NOTE: The green on this dress somehow cannot be photographed correctly. It is mostly too blue and too bright in these photos. It is almost identical to the color of Elsa’s dress in the movie… but when in different lights, like in real life, it looks different colors as well. The two photos above are the best representation of the color.
Here’s How I did It…
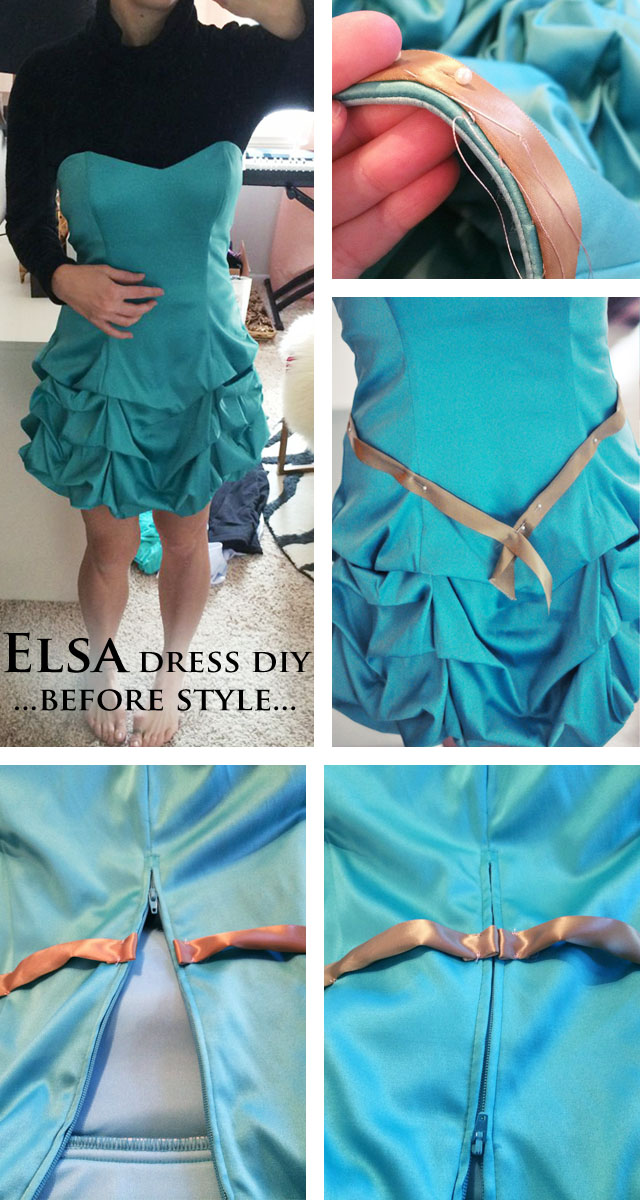
Steps… Dress
1. Try on your dress and your turtleneck.
2. Grab your gold ribbon {mine is from Burberry gift packaging… because I’m a ribbon hoarder like that, but look how handy it is ;)} and fold it in half
3. Find your waist and pin your folded ribbons to your side seams best you can.
4. NOW… You CAN GLUE your ribbon on, but it will make your dress pucker, which is why I opted to hand-stitch it.. also, I hate glue and waiting for it to dry, but it’s an option and felt would work for this as well.
5. Make small stitches on either side of your ribbon to key places like right along the zipper seam, & the side seam, and create a V point in the center by folding each ribbon end over the other to hide the ends, and stitching in place.
6. MOST IMPORTANTLY when you’re stitching or glueing your ribbons on, MAKE SURE to separate your ribbon at your zipper and stitch it onto either side so you can get into your dress in the end! FOLD your ribbon ends UNDER to keep from fraying and finish the look, then stitch in place.
7. Follow the same instructions to create your top V, but for this, I stopped at the side seam {you can choose to go all the way around if you like} but this area will need more stitches to keep it in place. As hard as I tried to make tiny visible stitches and hide most of the thread beneath the ribbon, it still showed… but it’s a costume, so it’s good enough, right?
NOTE: If you notice, I did not create the designs on the front of my dress… mostly because I ran out of time and thought that it was close enough. But the best way to achieve this is to hand-draw the design on paper and cut it out to use as a stencil and simply find matching markers and trace the design on. You may be able to find a printable stencil online… Test your colors on the under side of your fabric somewhere near the bottom of your dress first.
Turtleneck…
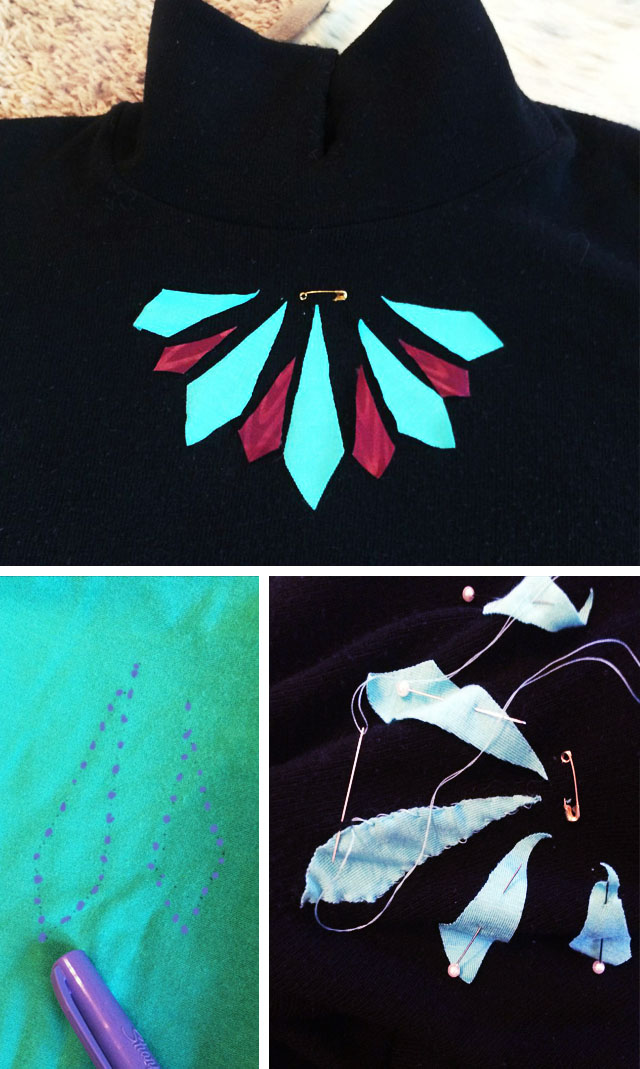
1. With your turtleneck ON, find the center of the neck and make a snip with your scissors.
2. Determine where you want your design to begin and mark it with a small safety pin.
2. Remove your turtleneck, and with it laying flat, carefully finish cutting the slit down about an inch and a half.
NOTE: If you have a stretch jersey turtleneck that is short and straight, this is really the only step you will need. It shouldn’t fray and it should stand up on its own. Because mine is a cowl neck AND knitted, I stitched the front edges together so they wouldn’t unravel.
3. To create Elsa’s gem neckline, I drew and cut out similar shapes from fabric and ribbons in matching colors and hand-stitched them onto my turtleneck around the edges. Up close -it’s not great, but from far away, it works fine. Again, I wouldn’t suggest glue because your turtleneck will stretch around it once it’s on and pucker quite funnily. If you have REAL GEMS, that would be best.
If you have a floor-length dress, your tights and shoes/boots won’t really matter. Since mine were showing, I opted for a fun lace tight {though I think she wears green in the movie} and lace up boots that felt the era.
And… Voila!


Click through for my Elsa Hair Tutorial – Twisted Bun & Bangs
Have Fun!
Looking for… Elsa Makeup Tutorial or Elsa Hair Tutorial ~ Twisted Bun & Bangs from this look or Elsa’s Snow Queen BIG BRAID hair tutorial
And though I created a special Frozen manicure {found in my makeup tutorial}, I think these Purple & Green Faux Jeweled Nails would suit the look better!