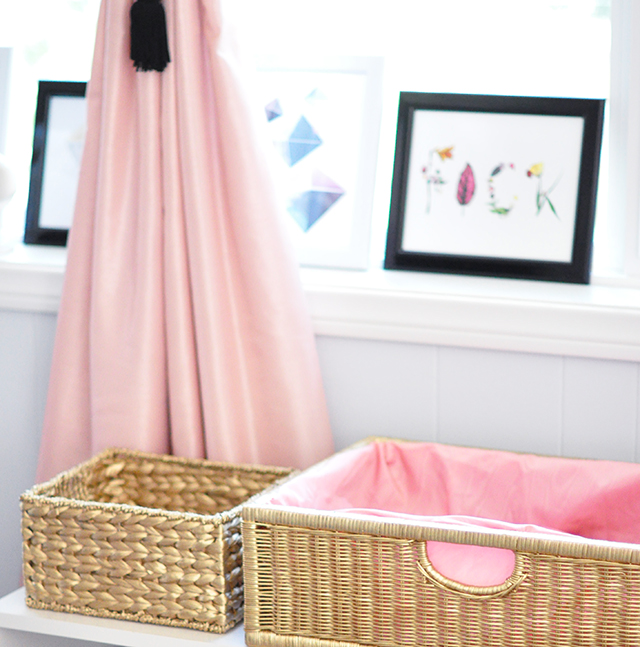
I mentioned the other day that this week I’ve been cleaning out my office and giving it a little refresher and though I thought I’d be done by now, I’m still just not. But in the mean time, I’ve done a few little DIYs to bring the space together and this is one of them.
I needed a place to house my monthly giveaway stuff and prior to now, this shelf-bench sort of became the place where everything random just landed. As I decluttered my space, I also realized a needed to create new places for different areas of my life. Three years later, I still love my office, but I use it a bit differently than I did in the beginning and so I needed to reorganize for that.
It’s still basically the same use of space, with a few upgrades, which you’ll see soon. I have another cute DIY coming … {which is actually on Snapchat right now} then I need to hang some art, finish decorating, and then declutter the two Ikea expedit shelving units that surround my desk, and THEN I will finally be done… for now anyway. I’d still love to install new light fixtures, new flooring, get a new desk {because the laminate on mines is starting to peal along the edges} renovate my closet and my bathroom in this space. But until then, it’s good enough.
BUT now… DIY Fabric Lined Baskets
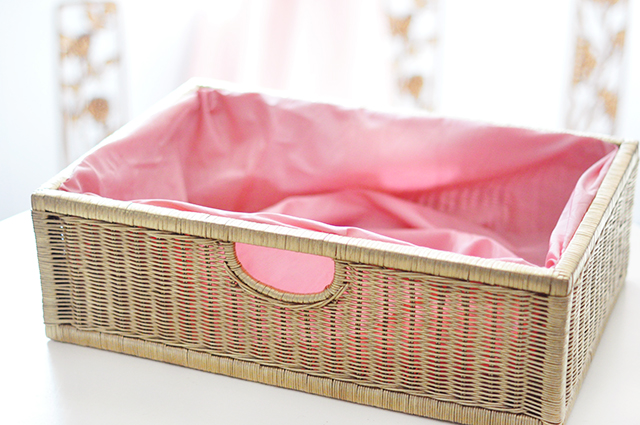
These baskets were your regular run-of-the-mill reddish brown in color, so I gave them a quick refresh with gold spray paint… but that wasn’t enough. It’s just that I wanted something a little softer along the edges for the large one, so I found this blush pink fabric {which is actually from a vintage tablecloth because if you find the right shade of pink, you buy it, no matter what it was in a previous life -though this may have been a random find/hand-me-down from my mom} grabbed my office stapler and got to work.
Here’s What You’ll Need…
- Basket of choice
- Fabric of choice
- Office stapler {if your fabric is thin} Staple gun {if your fabric and basket are heavier}
- Scissors
Steps…

- I first spray painted my basket gold, if you want to change the color of your basket, begin there and let it dry, of course.
- To line the basket…
- Measure and cut a your fabric at least 3-4 inches larger than your basket. Remember that the fabric is going to sit inside the basket, and allow space for it to do so.
- Beginning at the center of the longest side, staple your fabric to the top/inner rim of your basket, on the inner side of your fabric so that it flips over and hides the staples.
- Continue along all the sides until you get to the end/corner.
- Overlap your edges and staple them down, leaving an opening in your fabric.
- This opening will remain unless you wish to staple it down to the bottom, which I did not. I simply tucked it over the other and into the corner and hid the entire opening. This is why you cut your fabric larger than your basket.
- That’s it!
- I love that it doesn’t have to be perfect to get the look!
And… Voila!
