This was a sort of last minute DIY because this quarantine finally gave us the time we needed to wallpaper the guest bathroom and give it a little makeover ANNNND I needed something on the wall that was textured and circular and a little funky with a pop of color… and then I thought that a Juju hat might be the perfect solution.
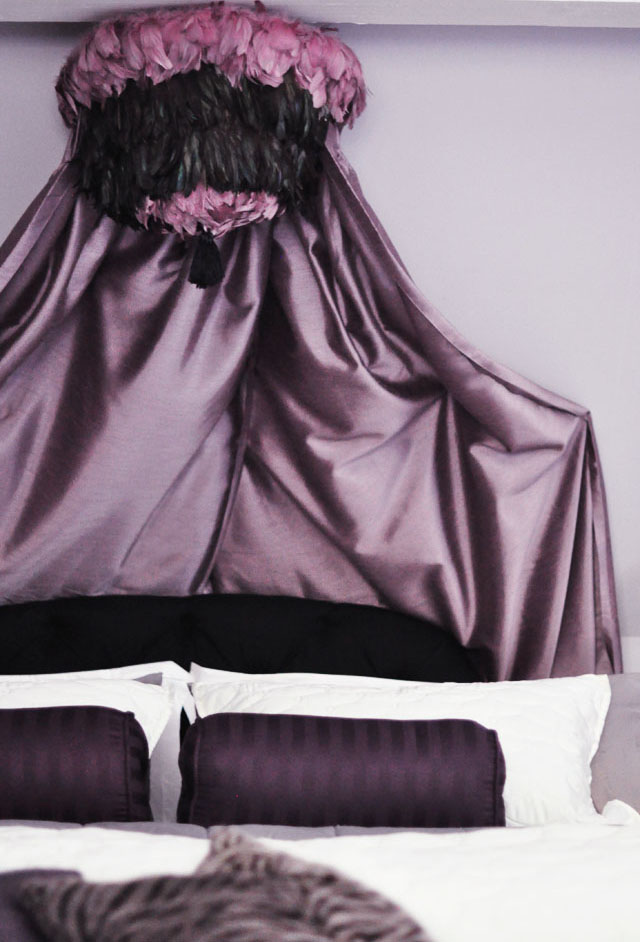
Yes, I already have a DIY Juju Hat hanging in my living room that I made a few years ago and of course, I still love it. So I grabbed it to see if I liked the idea in the bathroom, and aside from the color, I thought it was perfect. (NOTE: Since this is a guest bathroom without a shower or tub that doesn’t get used that often, it’s kind of perfect for objects that don’t typically go in a bathroom, PLUS I have a an affinity for kooky guest bathrooms – note the little mirror!). Then I remembered that I had my old DIY Feather canopy (seen below) laying in the garage collecting dust (among other things, unbeknownst to me) because I’m no longer using it. And so I ran downstairs and trimmed all the feathers off, made a huge mess and tossed the rest of the old canopy in the trash and grabbed my supplies… I love when I already have all the supplies I need to make a project work, but especially now when we can’t leave the house and I didn’t want to order something to have to wait for it to arrive to get started! I shook the dust off my feathers and brought them in along with all my other supplies back upstairs with me and got to work.
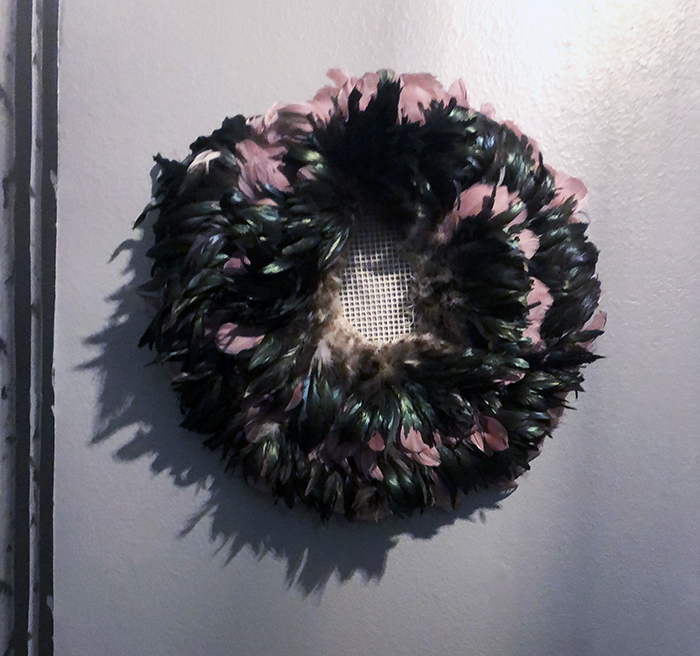
But first, here’s what it was before…
I set up shop at the kitchen table since I don’t really have a workspace now and got started right away. As I was stitching, I also had my vacuum sucker handy because the feathers were making quite a mess! It was quite a big mess actually, more than the usual, to which I shrugged and attributed it to their age. After getting a few strands sewn down onto my netting, I grabbed my vacuum as I had a hundred times prior, but this time I got a little too close and almost pulled the feathers right off! When the feathers finally released from the tube, I noticed a tiny little moving critter on the table and had to take a second look. At first I thought it was a feather but then I realized it was a tiny moth baby alive and moving (and I say moth baby because calling it what it really is, moth larvae, is not as cute and also makes my skin crawl) YUCK!
I stopped dead in my DIY tracks and began inspecting my feathers deeper only to find two more little creatures. At this point I was utterly grossed out, you know the feeling, and I was probably squealing a little bit too. Okay, A LOT. Actually, it’s all on my Instagram story highlights, if you’re interested in seeing the process, because it’s intense… kind of, but not really.
Based on my 3 little findings, I assumed the feathers were FULL and immediately put them all in a trash bag, along with the netting and partial Juju hat I had stitched down and promptly took the bag outside. I was going to through it away… but I was also really sad about it because I had become totally attached to the idea that it was the ONLY thing that was going to work in the bathroom as decor and make it look the way I wanted it to. Leaving the bag outside in the freezing snow, I checked my DMs on Instagram and had handfuls of suggestions and advice on how to get rid of my new moth baby friends. I’d go on except, it’s boring, so if you want to watch the progression, check out my “bathroom redux” highlight on Insta.
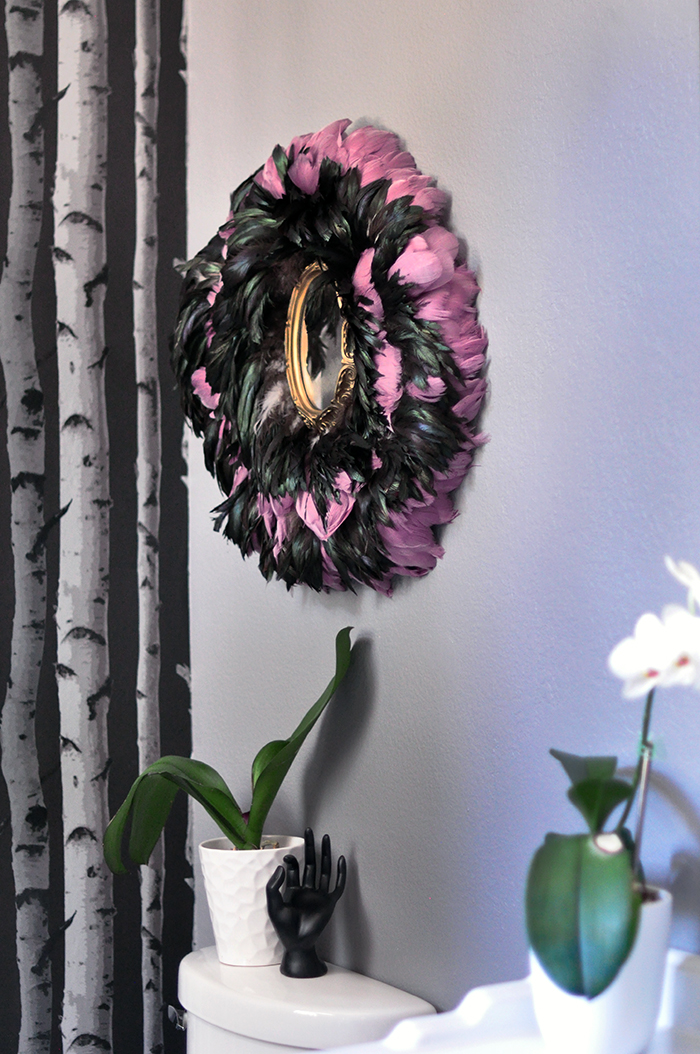
For the record, the feathers are critter-free and I was clearly able to finish the Juju hat about 4 days later… HOWEVER, I RAN OUT OF FEATHERS. I spaced them right when I laid them out but when I actually stitched them down, I did them a little too close to each other and so I had an empty center. Thanks to a crafter Insta-follower who recommended a mirror, I quickly grabbed a vintage option I had already planned on hanging in the bathroom and it worked out perfectly.
The netting is a perfect backing because all you have to do it pop a nail in the wall and decide which angle you like best and hang it on it. You can see it in the photo at the end… and then I popped a second nail in the wall to hang the little mirror on top so that it’s not stuck there forever… and I love the way it turned out. Hope you do too!
Here’s What I Used…

* Strung feathers in whichever colors and textures and lengths you like… I re-used the feathers from the DIY canopy I made a few years ago as seen in the photo above. You can buy feathers here, which is where I got all of mine. And actually, the Feather Place sent me these feathers to use for my last project. I believe the short feathers are goose and the long ones are rooster. Amazon has a ton of options now too… look for tightly woven and “thick” feather strands for these projects… (Please note, I now understand that there is probably some animal cruelty in the gathering of feathers from birds and using real feathers for projects and/or fashion may not be totally humane, which admittedly I have used for years without realizing. I’m not sure why I never associated feathers with cruelty, but I understand now and probably won’t buy real feathers in the future. I re-used these feathers from an old project and was determined not to buy new)
* Rug canvas netting (think latch & hook not rug liner/pad) Mine is 24 x 30, I used about half of it.
* Large needle and thick thread
* Scissors
Please see my other DIY Juju Hat Tutorial if you prefer using hot glue and adding an extra backing.
I prefer stitching to glue because it allows the feathers to hang a little more loosely and stick out from the wall a little more. In the end, it has a much fuller look.
Steps…
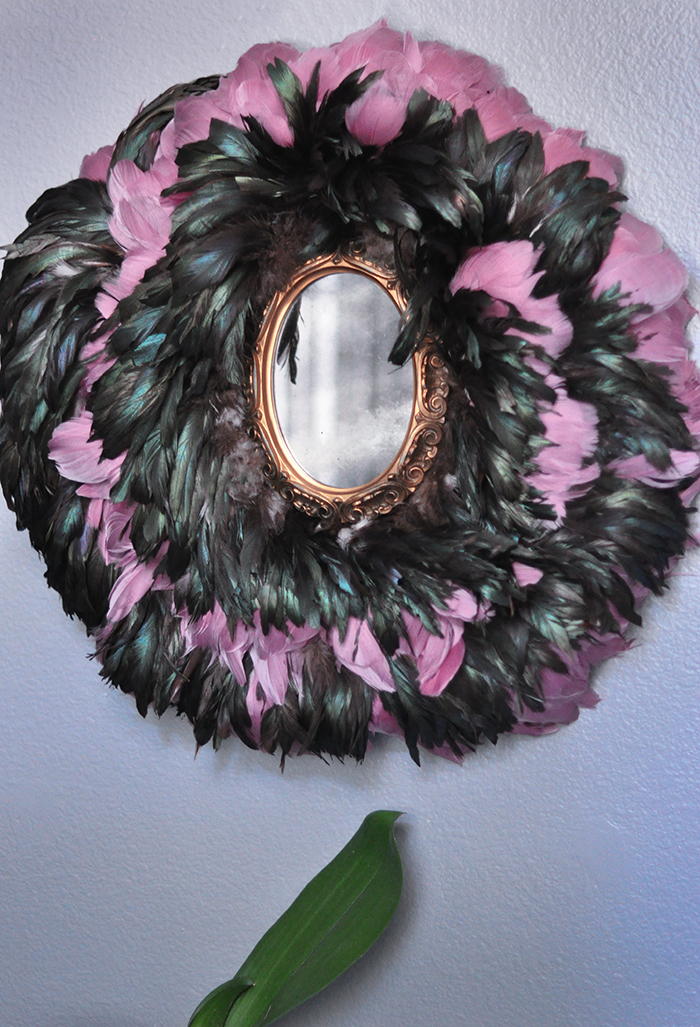
I had more of the purple-toned feathers so I began with those… even though they’re shorter and less visible, they add texture and fluff and width to the final look. Because I was working with a limited amount of feathers, I tried to layout my feathers in a way that would allow for the best use of the feathers I had left.
Cut your netting in half on the long side. You can cut a circle if you wish like in my last DIY tutorial, but it’s not necessary. If it helps you to stitch in a perfect circle, then do it. In my last DIY juju hat tutorial I traced around a large bowl to get my circle. But definitely reference that tutorial as it may be easier to follow than this one!
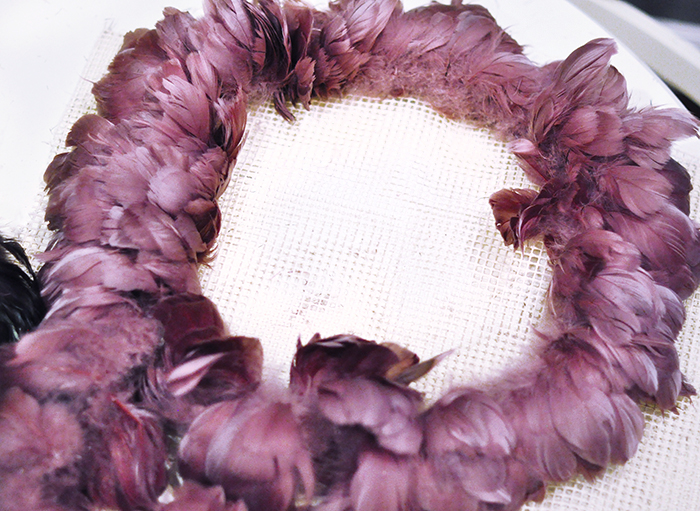
Before beginning, lay out your feathers in a circular fashion to get a feel for how your juju hat will turn out. I knew I’d have to use both feathers so I created a swirl affect, layering the black rooster feathers within the purple feathers.

Above is not a finished product, it’s just my initial concept with my feathers just set atop the netting.

Thread your large needle and double the thread and tie a knot at the end.
Because your feathers are strung tightly, you can stitch them to the netting really easily.
Begin by stitching through the end of one strand of feathers and then begin stitching down to your netting. They stay pretty well without needing a ton of stitches, so you can spread them out as you go and it doesn’t have to look pretty or be perfect at all since no one is going to see it but you!

I finished stitching my outer circle and allowed the rest of the purple feathers to hang loose for a while.
Then I grabbed my longest row of darker rooster feathers and nestled them in between, stitching them down about two inches away from my original outer circle. NOTE: Because these dark rooster feathers are much longer than the purple feathers, I should have stitched them even further away so you could see them a little better, which would also have probably left me with enough feathers to finish the entire thing. But I messed up a little… even though I don’t mind the mistake because it led to the mirror, which I love.

Once I finished with my rooster strand, I continued in the spiral pattern, stitching down the purple that was hanging loose about 2 more inches away from the last section… stitch until you finish the strand, obviously.
I had one more tiny small section of purple and rooster left that I finished the spiral circle with and then I ran out.
If you’re interested in seeing the other feather options I almost went with, check out my Insta-stories highlights.

Once you finish stitching, cut off the remaining edges of your netting. Again, you can begin with a circle if you want this to look better than mine does.
Please refer to my other DIY Juju Hat tutorial, it’s better than this one 🙂
Twist it around a few times to find your favorite “top” section or the way you like the feathers to fall best. I simply hammered a nail in the wall and slipped my netting right through it…
I used this funky vintage framed mirror to finish the look!
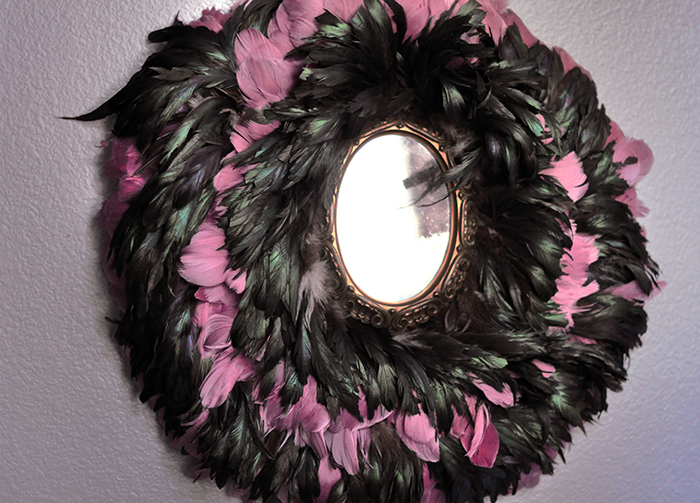
It’s simply hanging on a second nail I hammered in the wall in between the netting, so it’s not permanent! I can remove it if I want to.
Do note that it’s fluffier before the mirror goes up and flattens it a bit. If I had enough feathers, it would have been a really nice and full juju hat. Still, I’m happy with the way it turned out. It works perfectly for the space.
And…Voila!
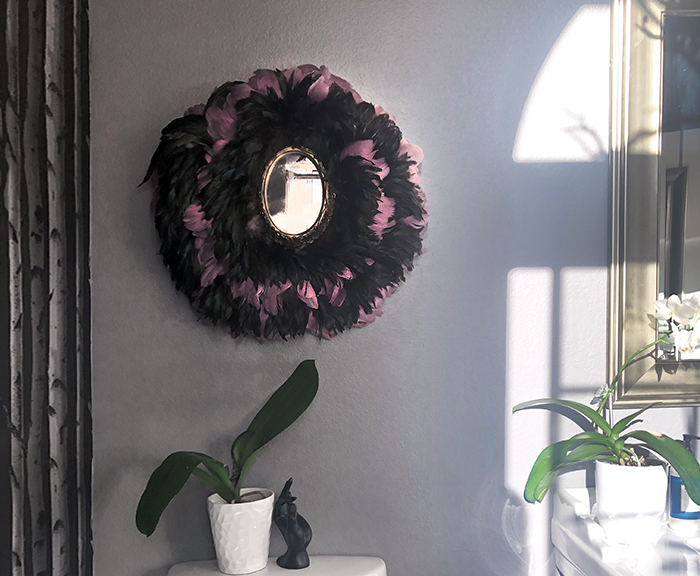
Shot with different cameras at different times of the day so the lighting and colors are different as the sun changes. The wall it hangs on is a dark charcoal grey.
I’m not sure why but it gives me Disneyland “Haunted Mansion” vibes and/or New Orleans vibes, what’s that section called or inspired by at Disneyland? I’m spacing… something court… who can tell me? Either way, I just love it.

Stay tuned for my full guest bathroom reveal!
Have Fun!
* Find all my DIYs here
* Find all my Feather DIYs here
* Find my other DIY Juju Hat Tutorial in neutral colors here